Building a Hot Water Tank
(Written and photographed by Hamish, SolarisKit Engineer)
In January 2023 I was doing testing for SolarisKit on my family farm in Zambia. It was great to get good data on the systems in an African country where there is plenty of sunshine. Especially during this period when the sun does not shine much back at the office in Scotland.
I wanted to test a domestic hot water system with the solar thermal collectors. First task was to obtain a tank, but finding the correct tank that allows for solar thermal input can be tricky, especially in Zambia. So I decided my best and hopefully most cost effective option was to make my own. Luckily for me I have a farm workshop with all the tools I would potentially need, nothing fancy, just a good old Zambian farm workshop.
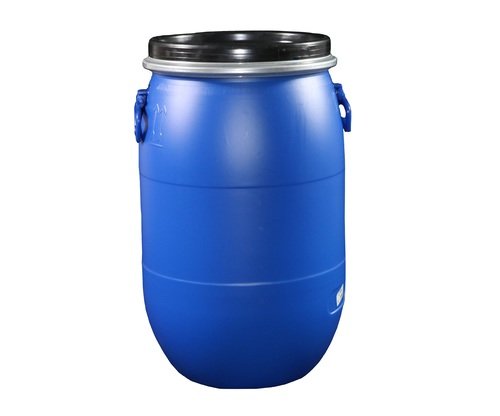
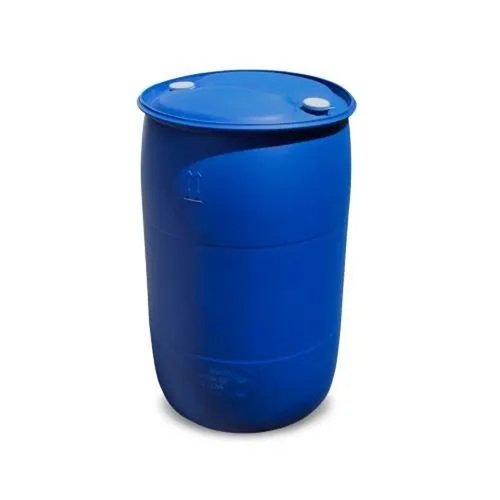
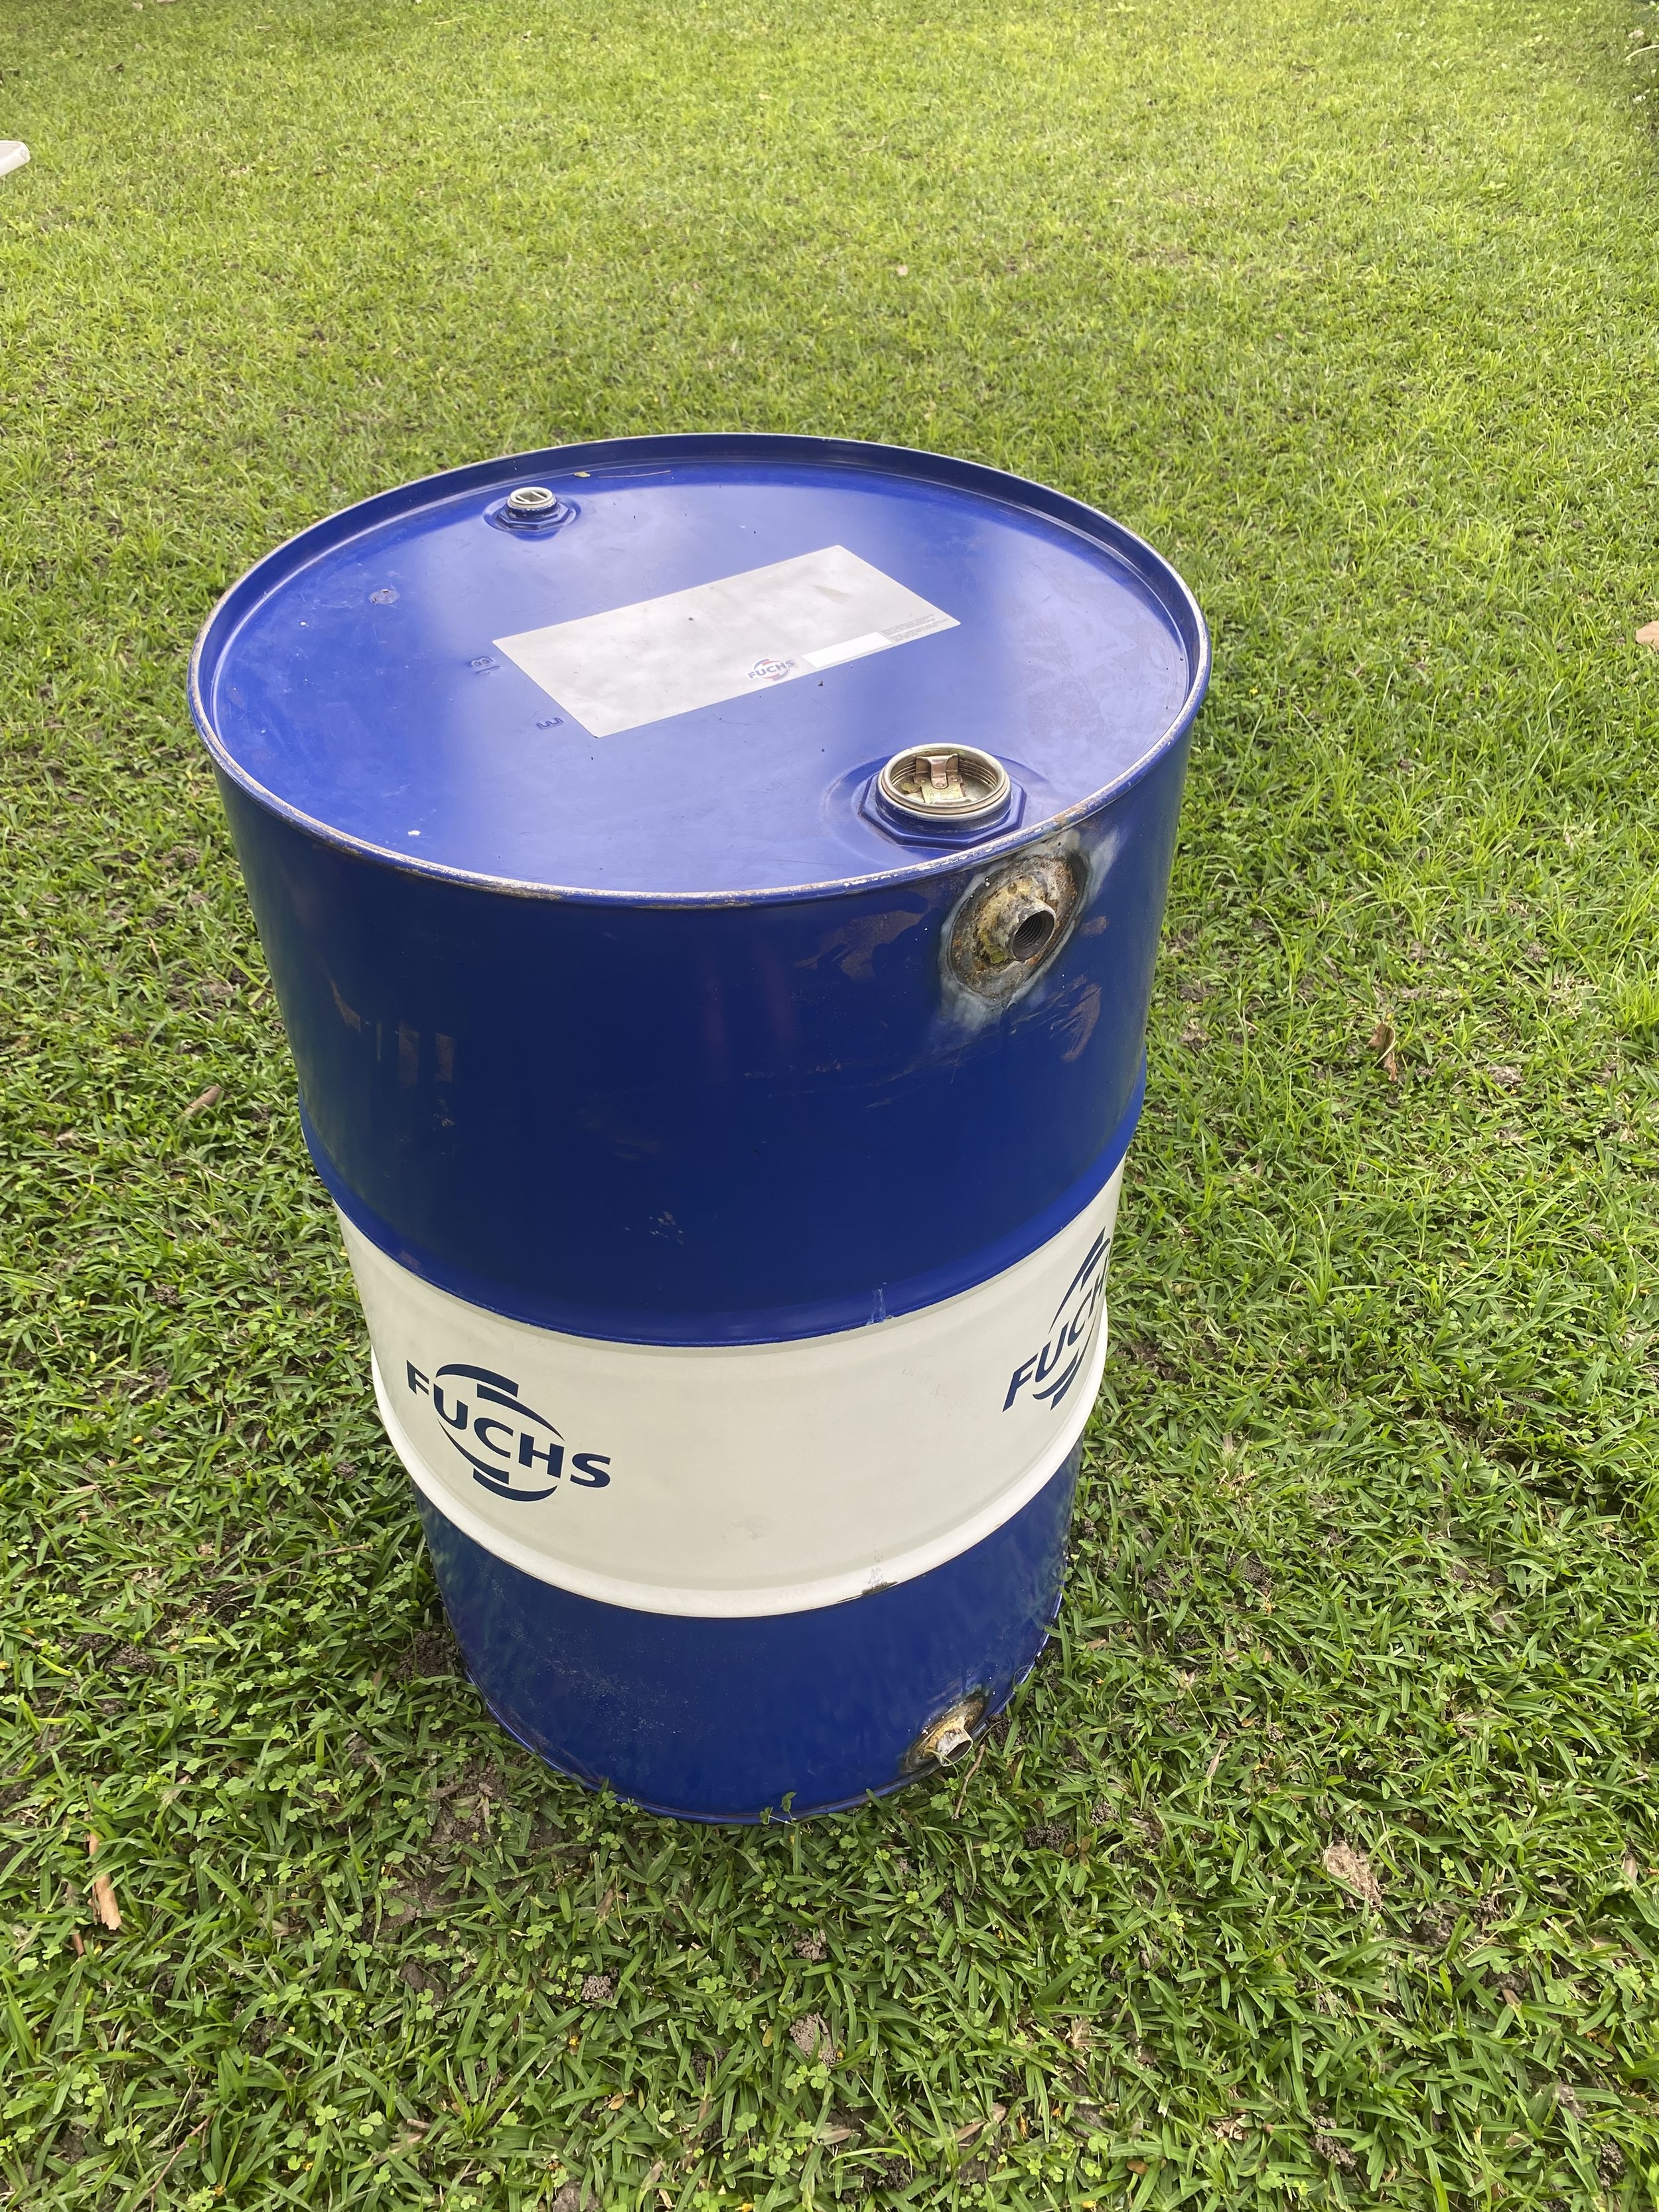
Sourcing the tank: I initially wanted to buy a second-hand 200L blue plastic drum. The reasoning behind this was it would be easier to cut holes into, and fix the tank fittings onto it, without needing to many tools. With the tank fittings I wanted to use I would also need to be able to get into the tank to fasten the fittings. Luckily these plastic drums usually have a removable lid, so fastening the fittings and cleaning the tank would be simple. I found a vendor in the local market who was selling the second hand plastic drums, however the price was not right so I decided to re-think my plan.
When returning back to the farm I noticed we had a few spare steel drums lying around, this was perfect. So I sketched down a plan of action and noted down some components I would need for the tank assembly:
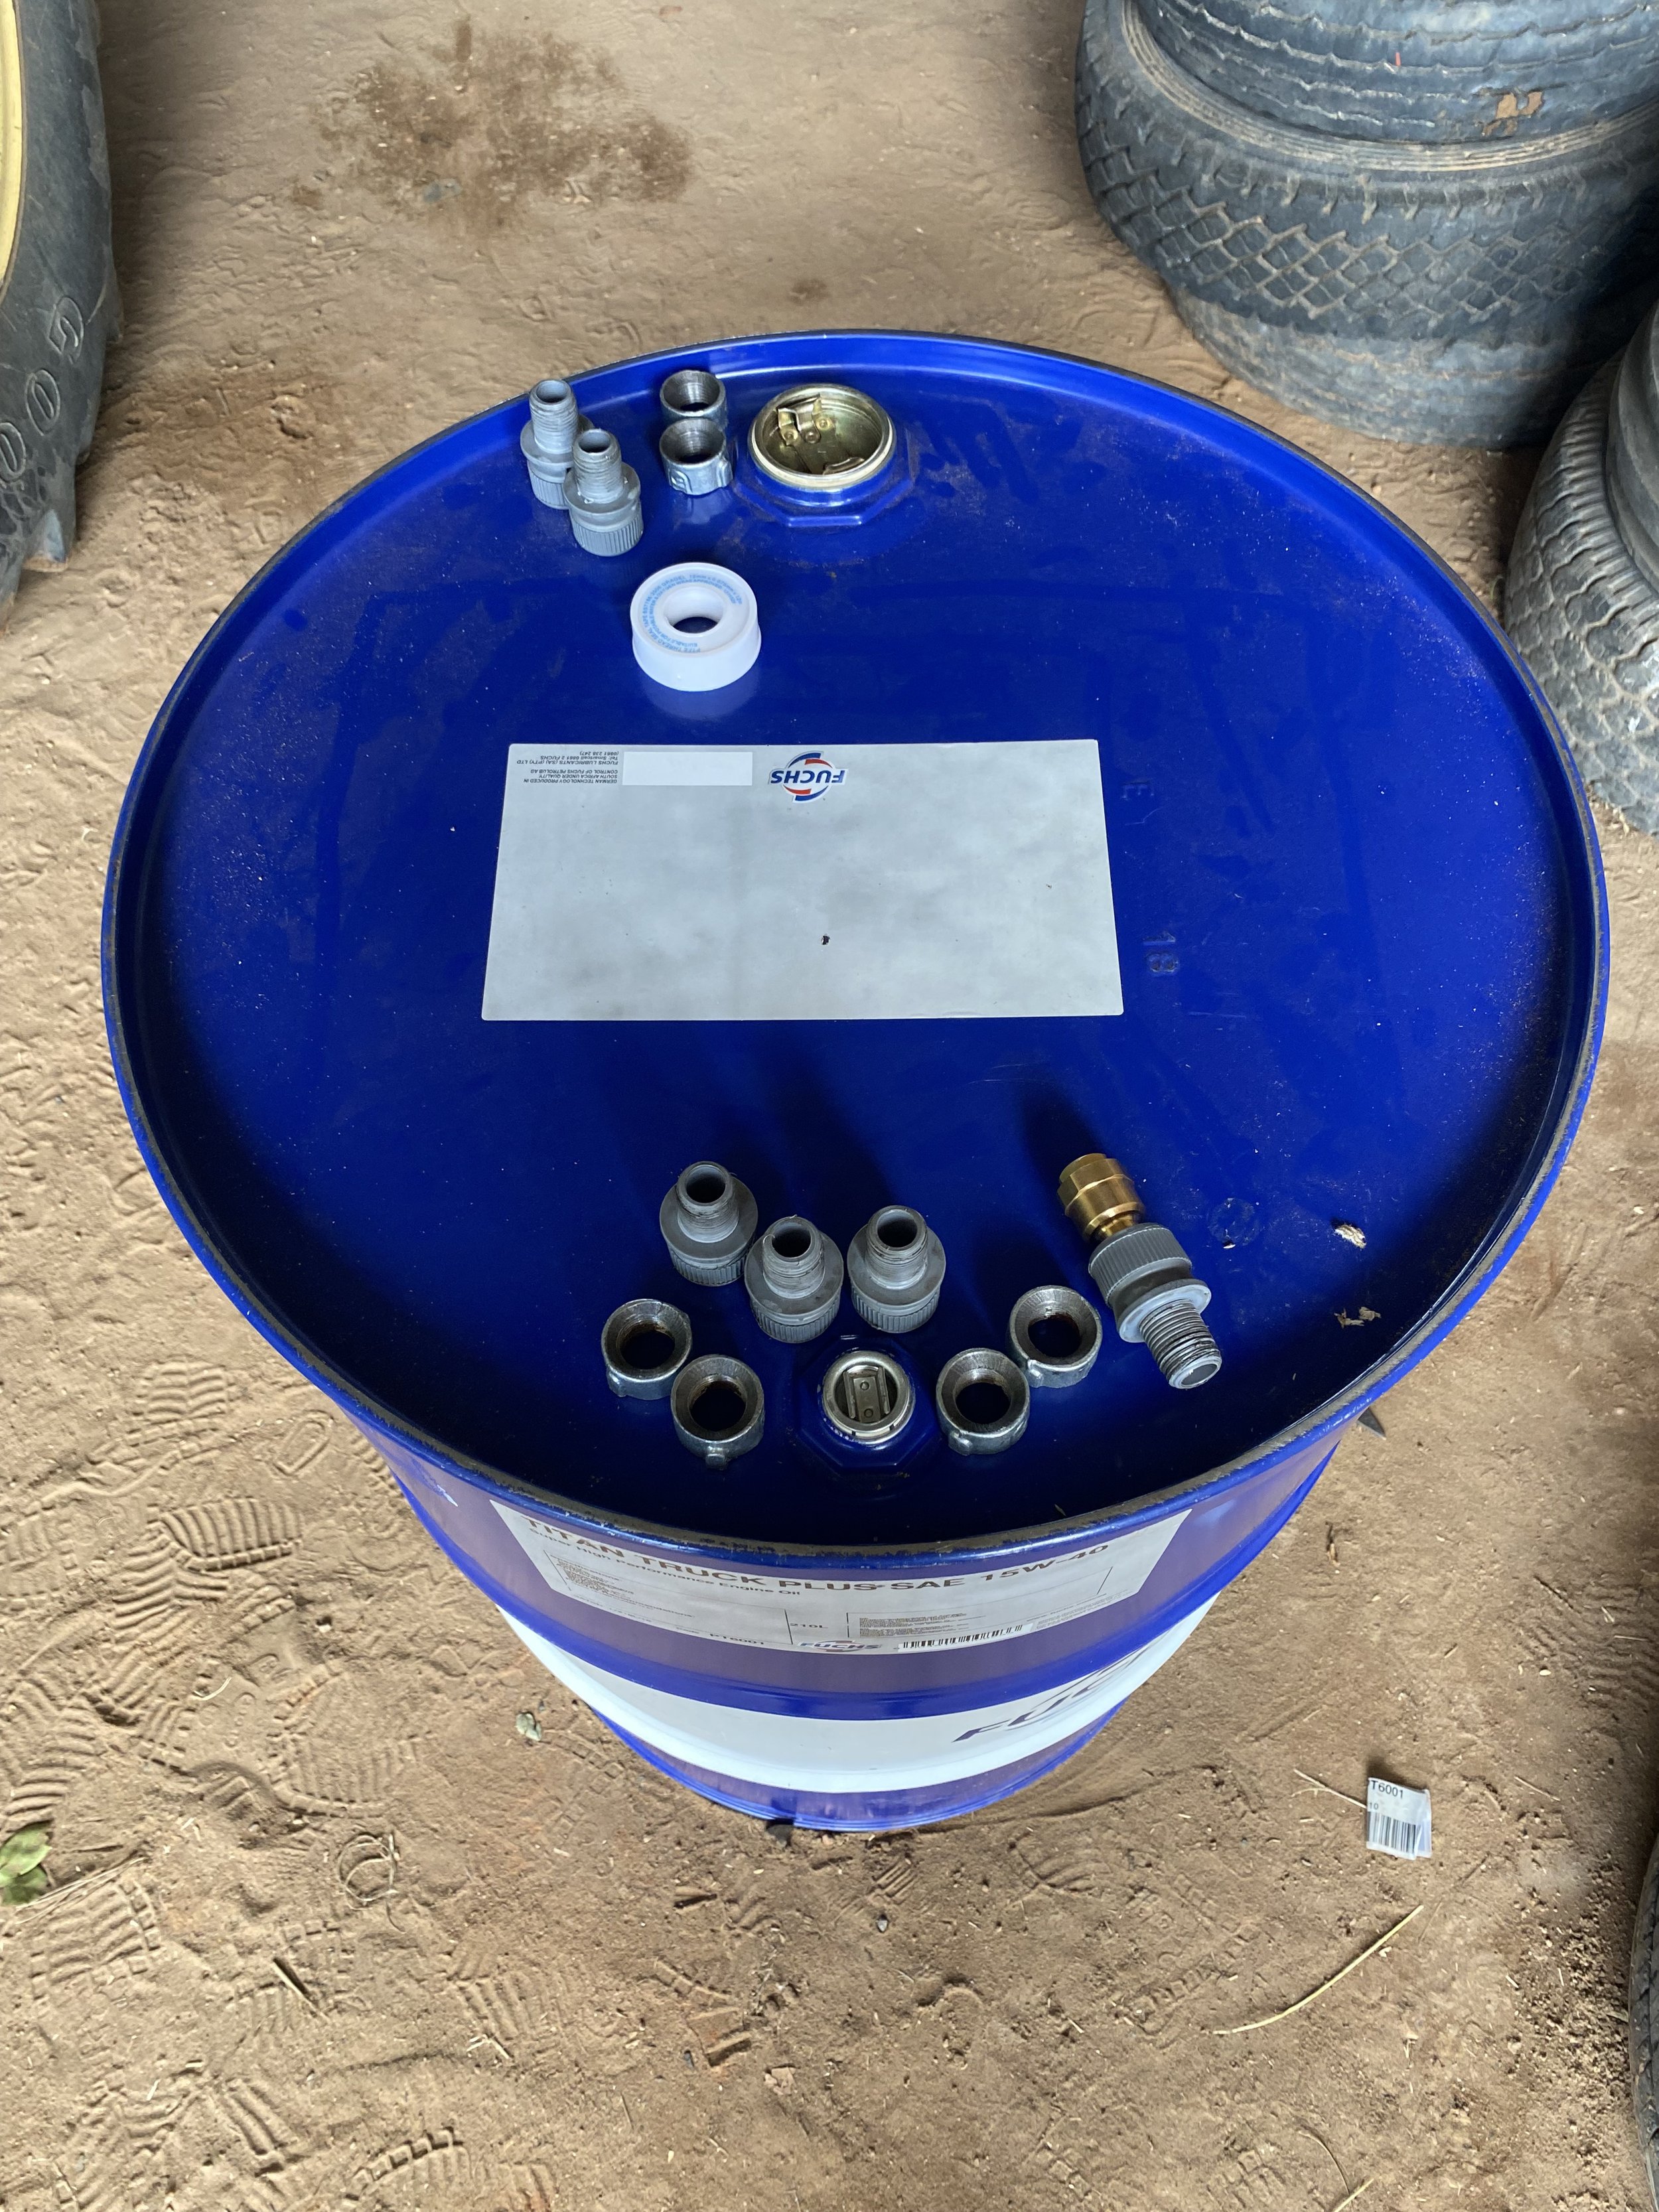
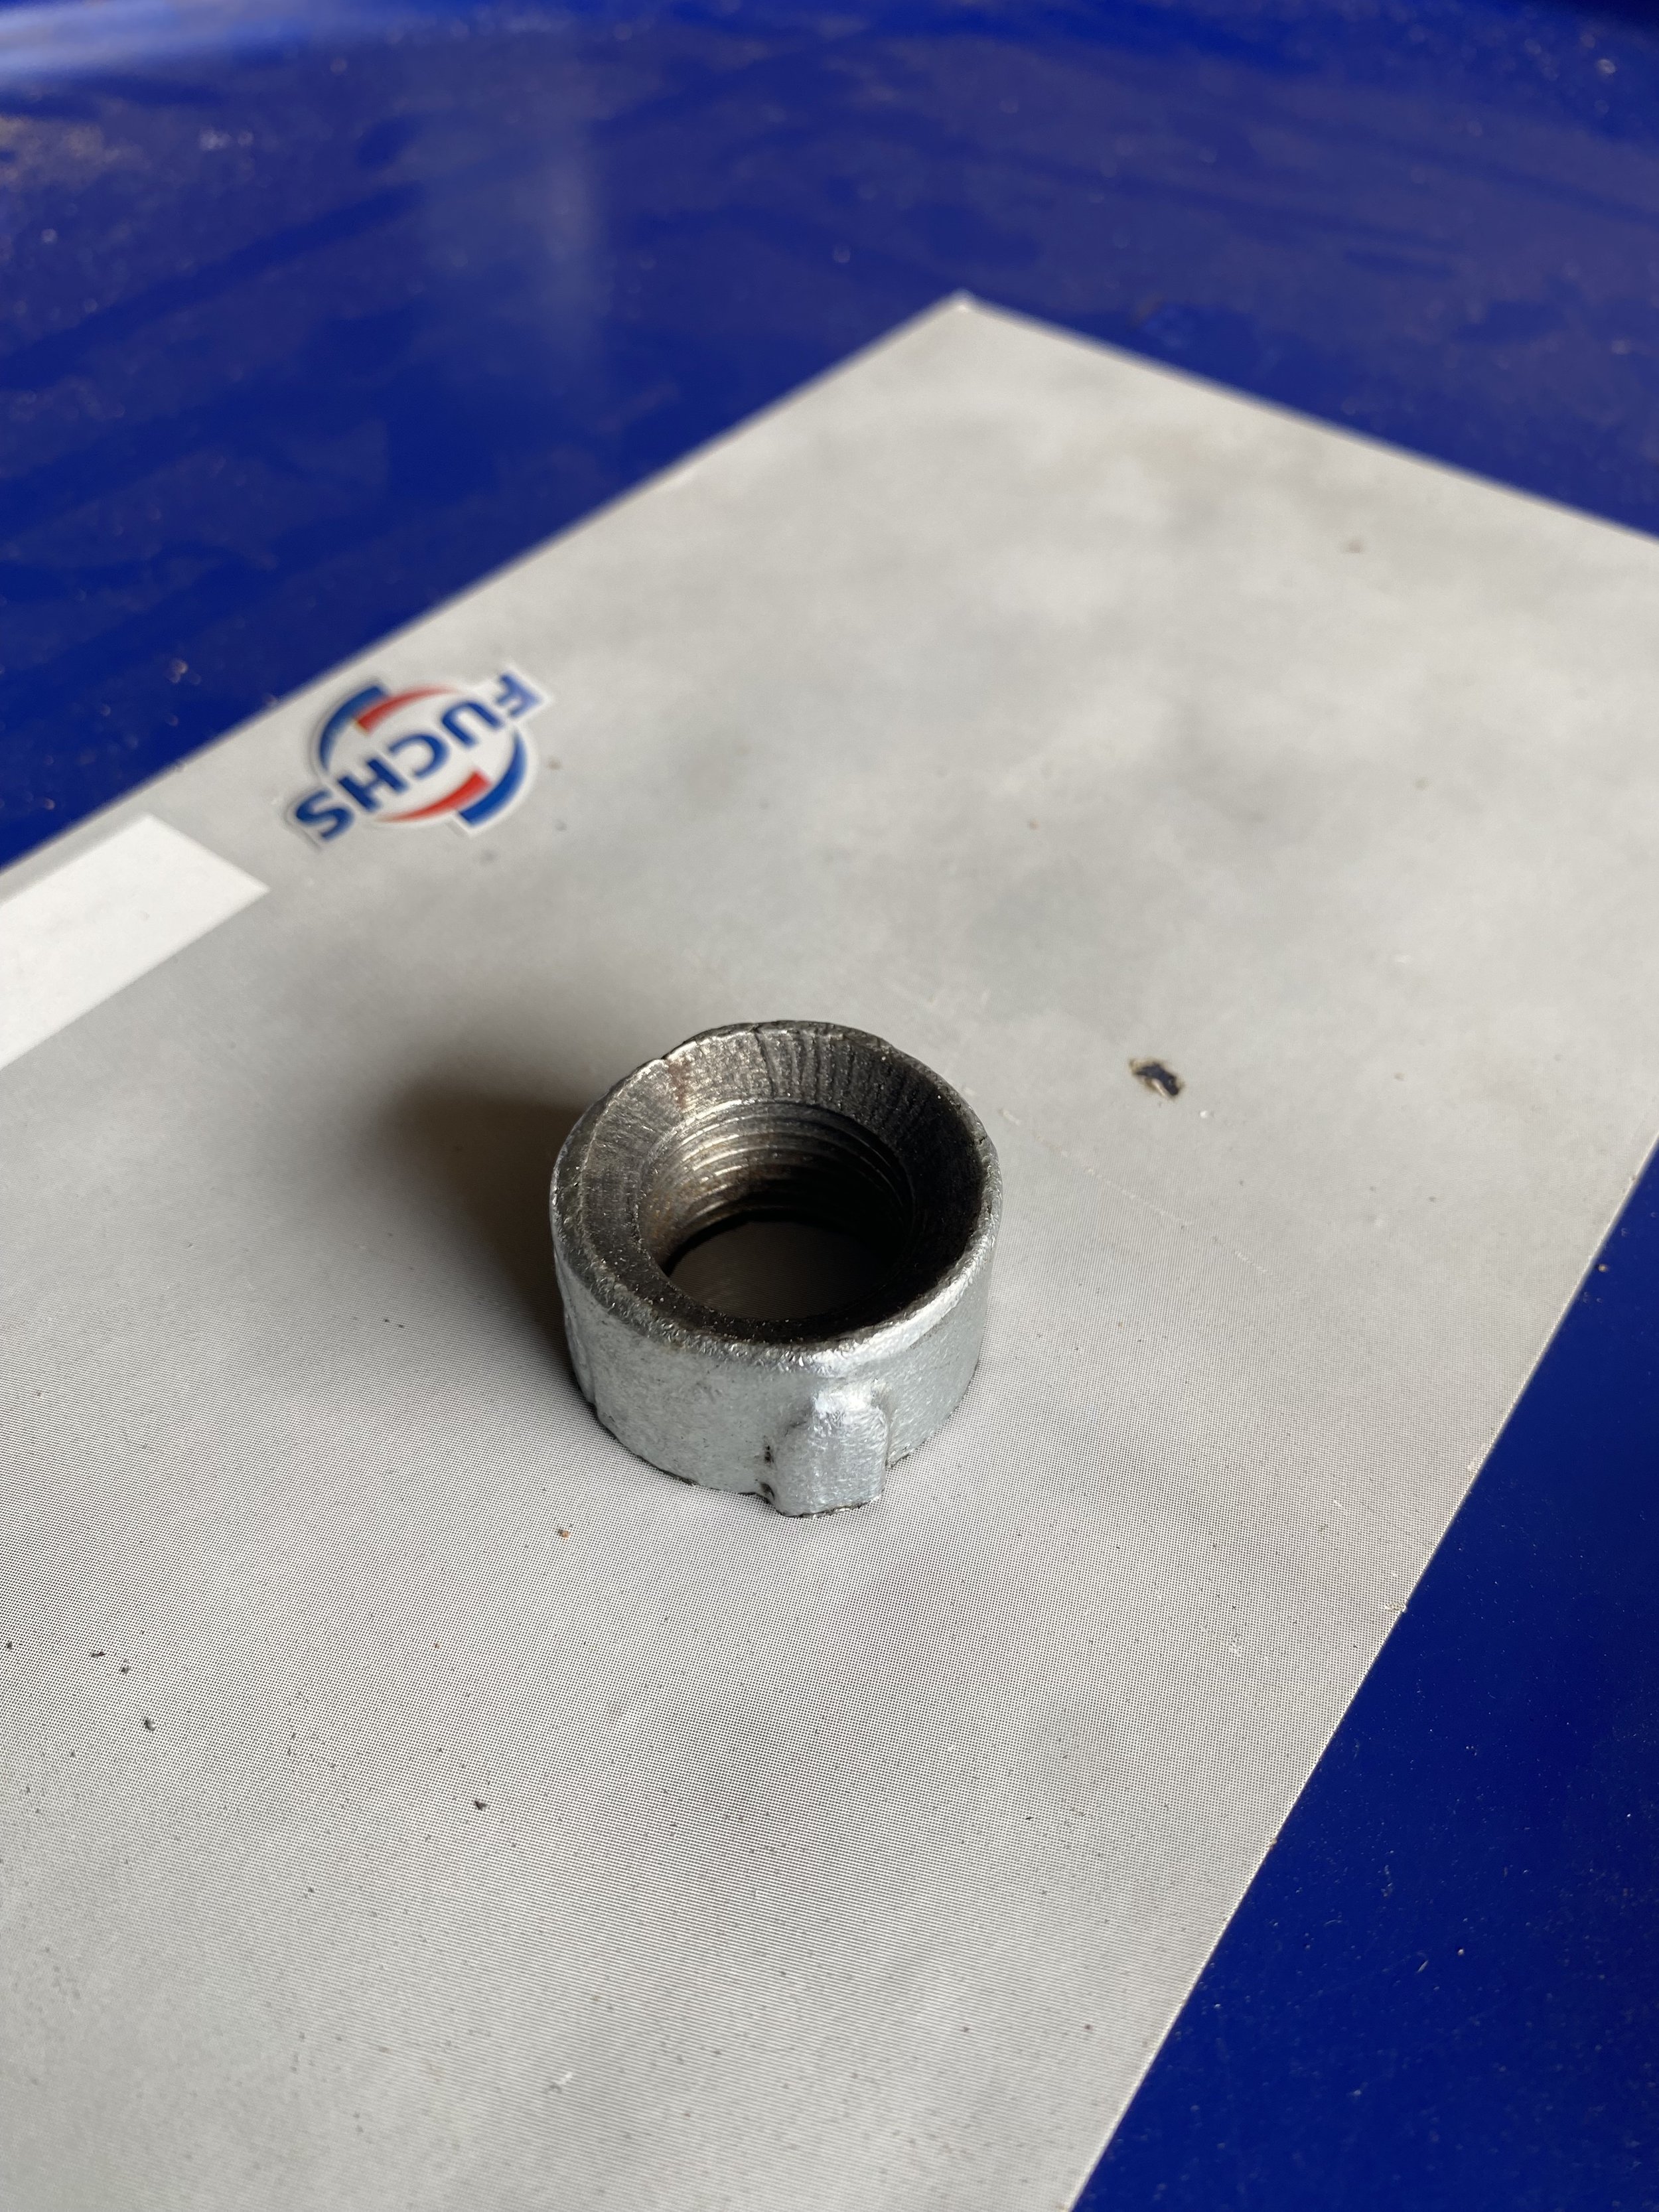
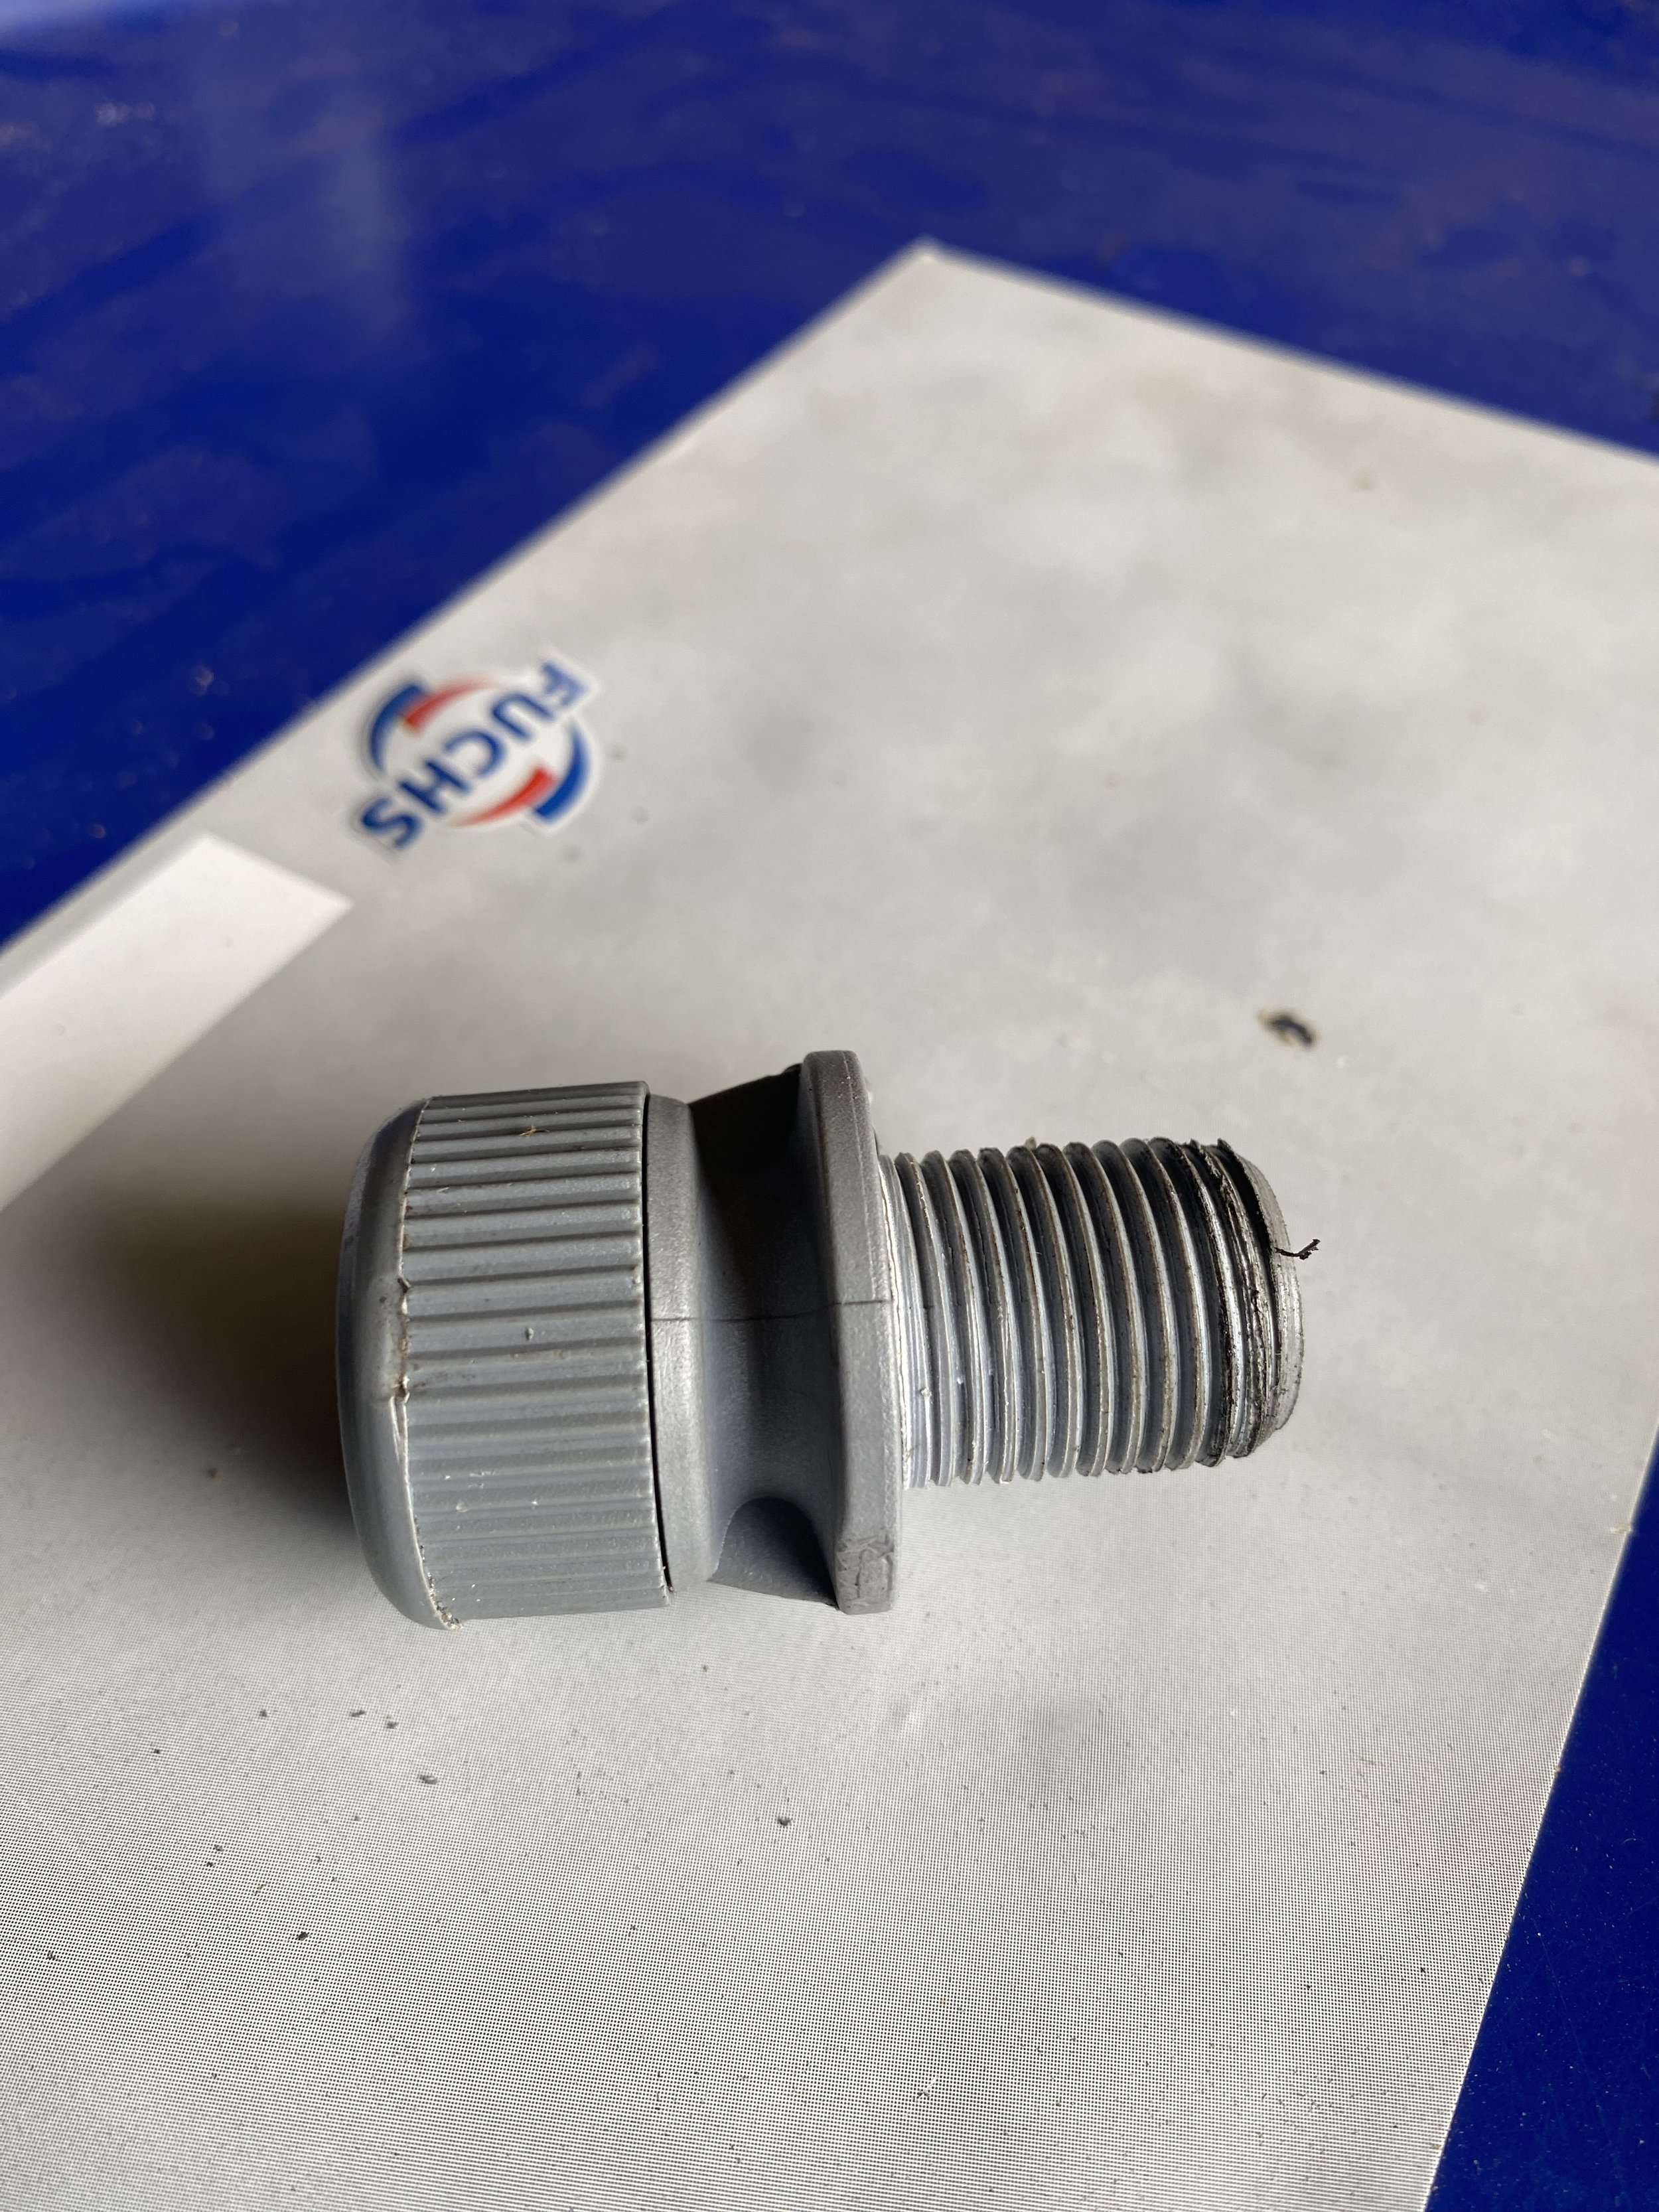
x6 Tank fittings
x12 rubber O-rings
x3 - ½ inch sockets
½ inch piping
x2 - ½ inch elbows
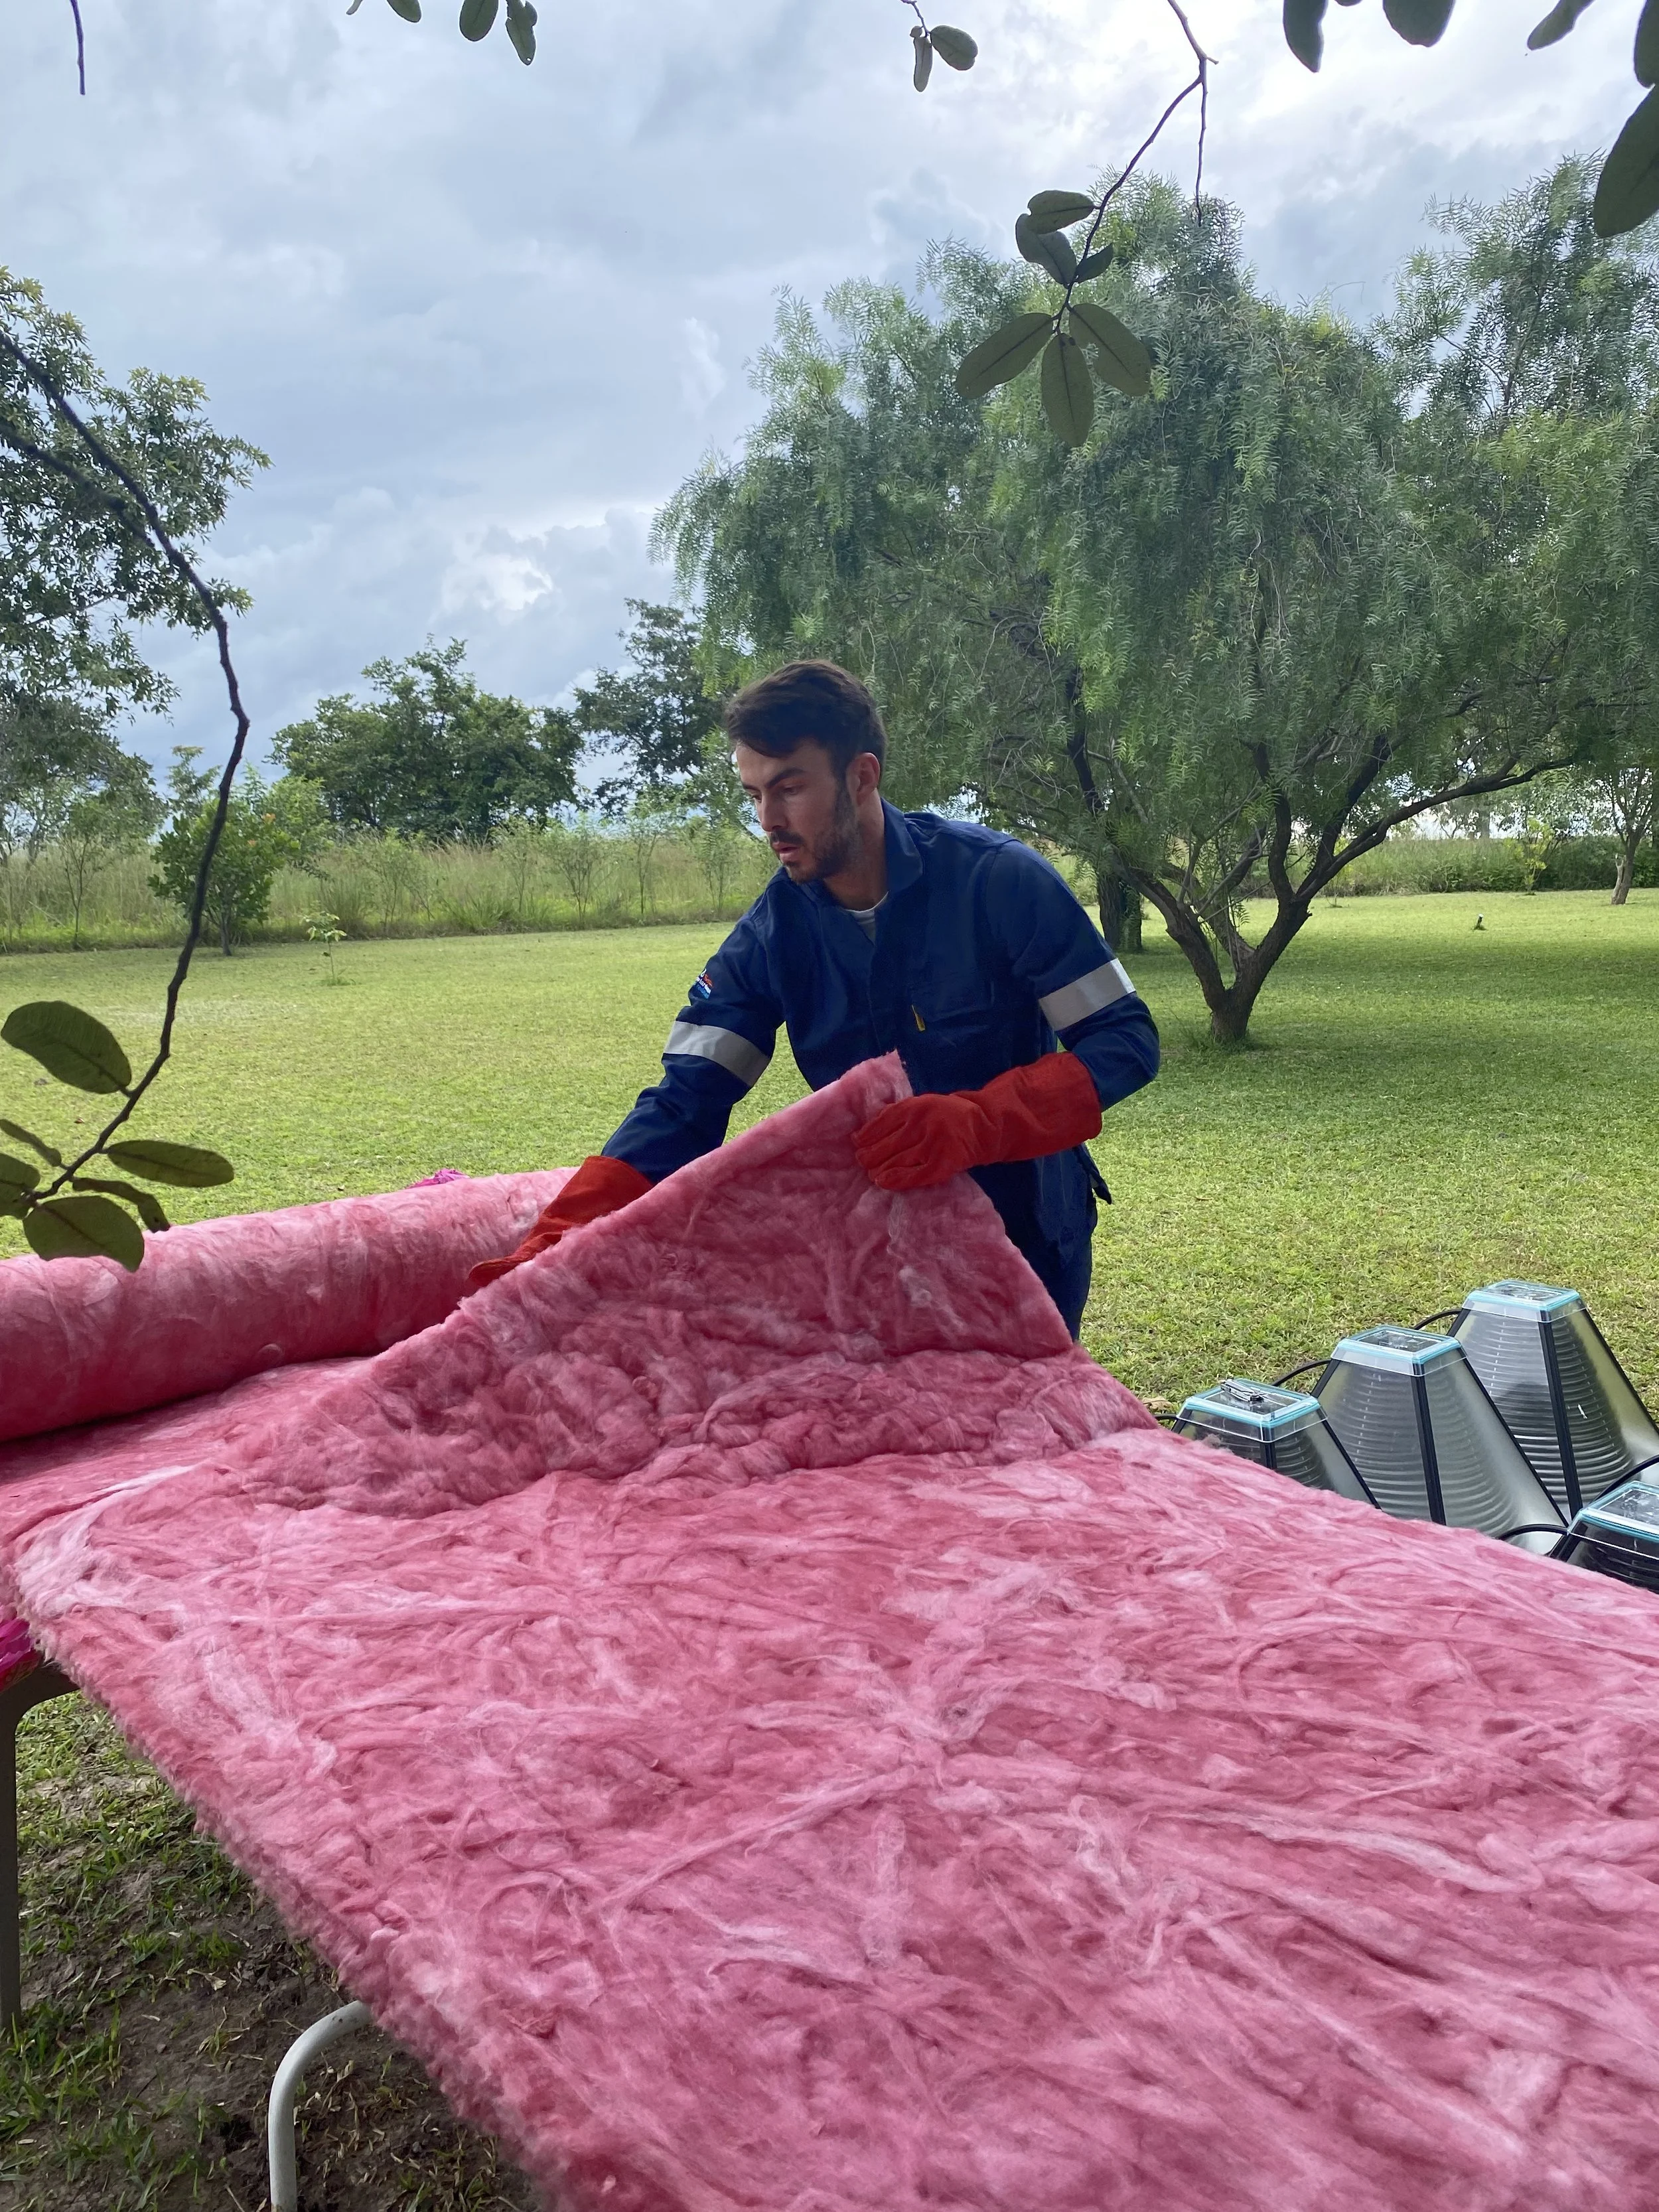
Insulation - Glass Wool 10x2m
Wooden Planks
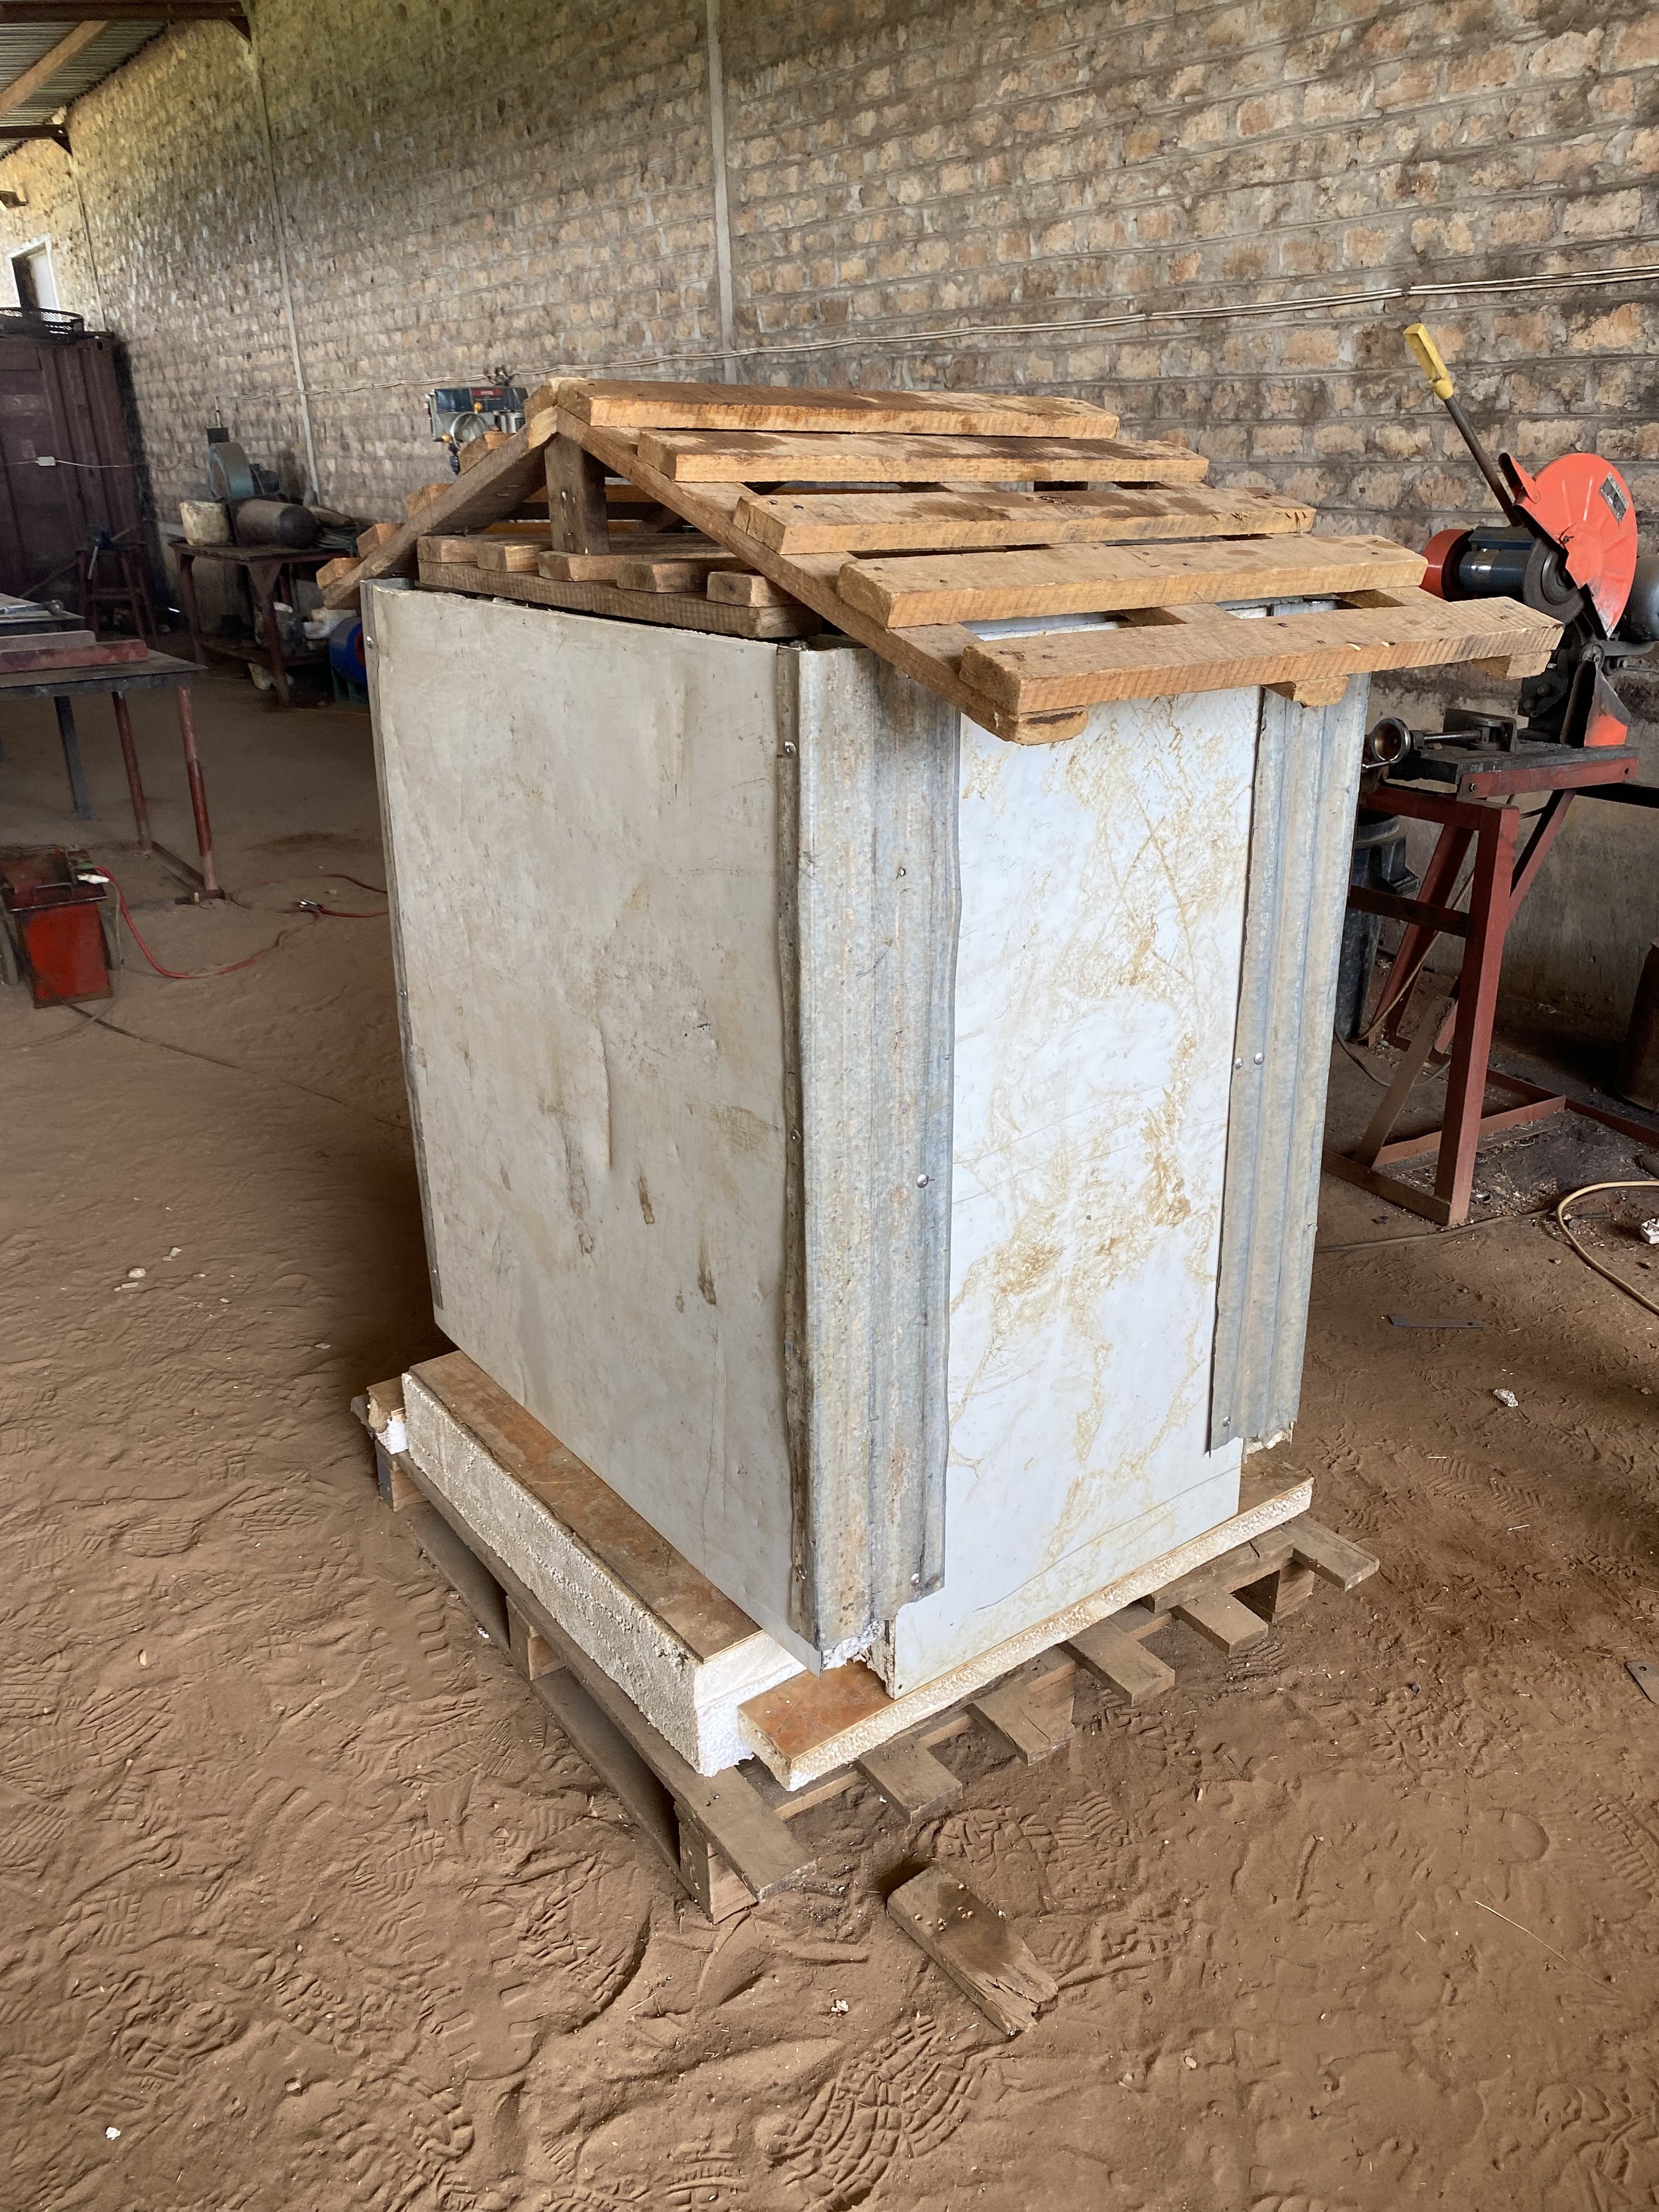
Outer Structure
Roof

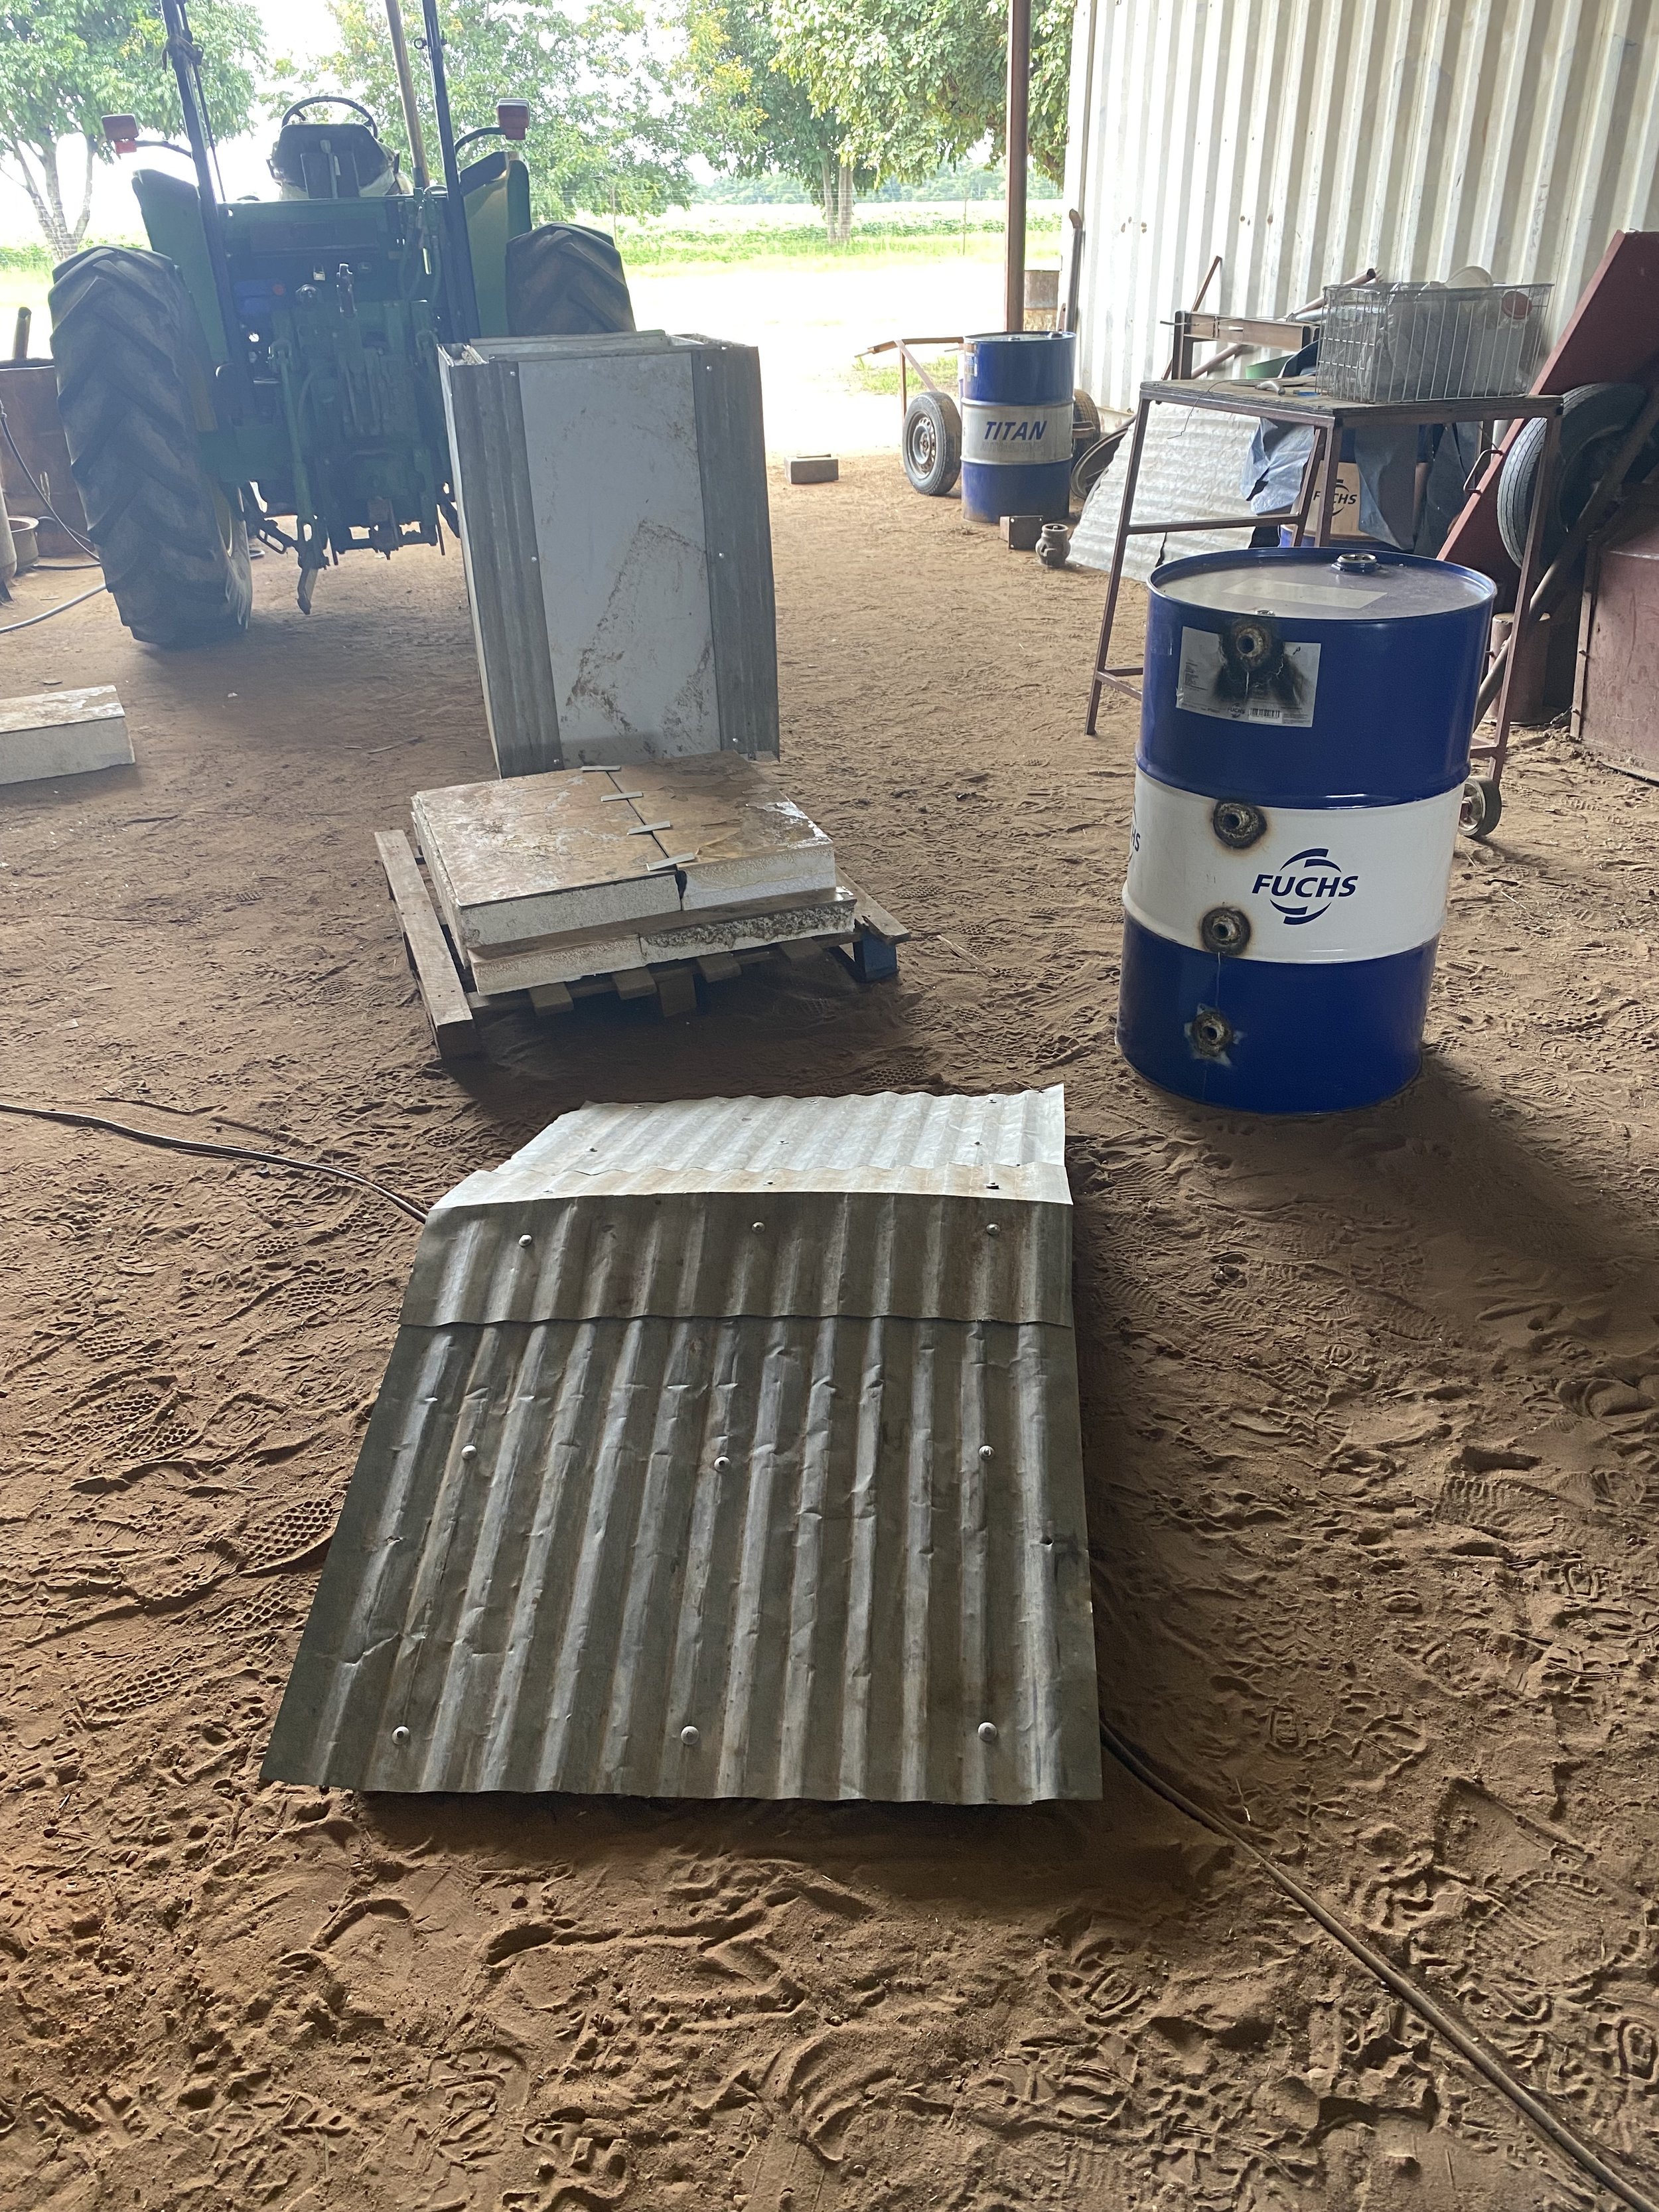
My plan was to try and reuse what was around me which would also keep my costs low. I had the steel drum, some wooden pallets and old roofing on the farm already. I knew a farmer nearby that had just had huge cold rooms installed on his farm for his potatoes, so i contacted him to see if he had any offcuts of insulation from the install. He replied to say he had a few odd pieces that I could come pick up. So I did, they were oddly shaped but I had a plan. As this insulation was Styrofoam incased in sheet metal I would not be able o shape in round the circular tank. Therefore there would be open cavities around the tank, however this was perfect as this would form the outer structure of the housing. I wanted to avoid any heat losses I could, so I decided I needed some glass wool insulation too. I bought the insulation, 1/2inch sockets and piping from my local hardware store. The tank fittings and O-rings I had brought back with me from the office in Scotland.
Building the tank:
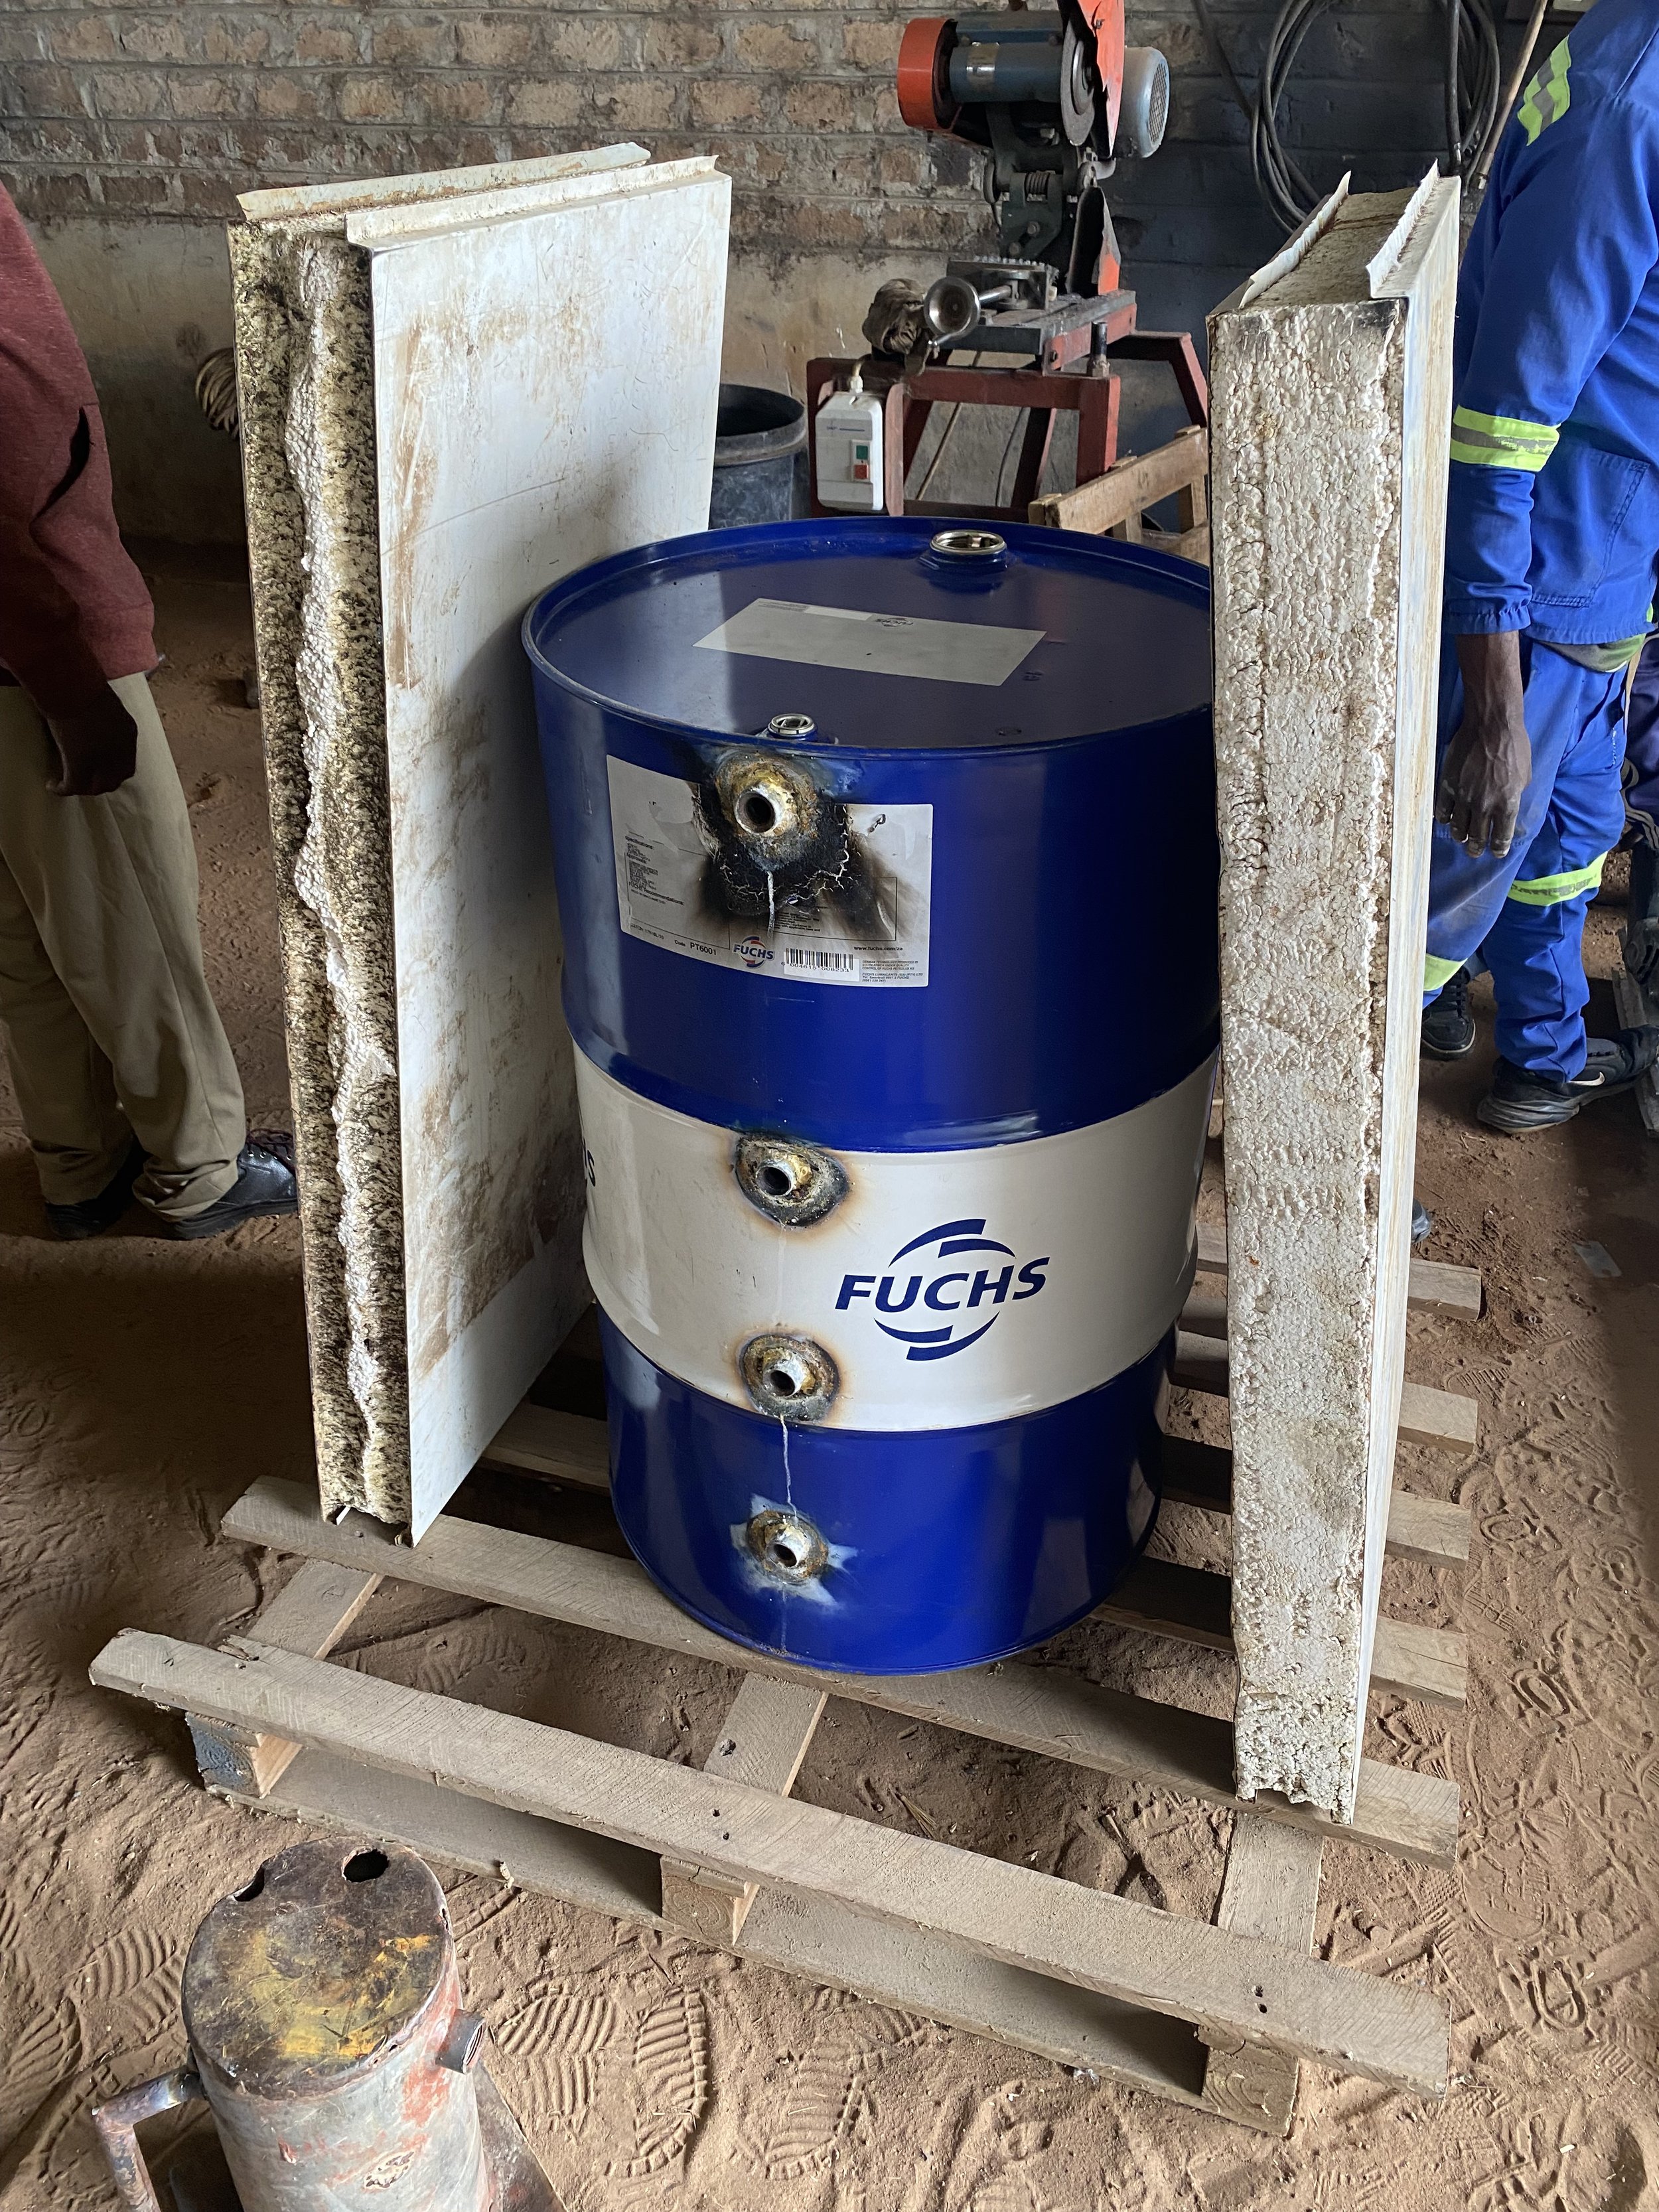
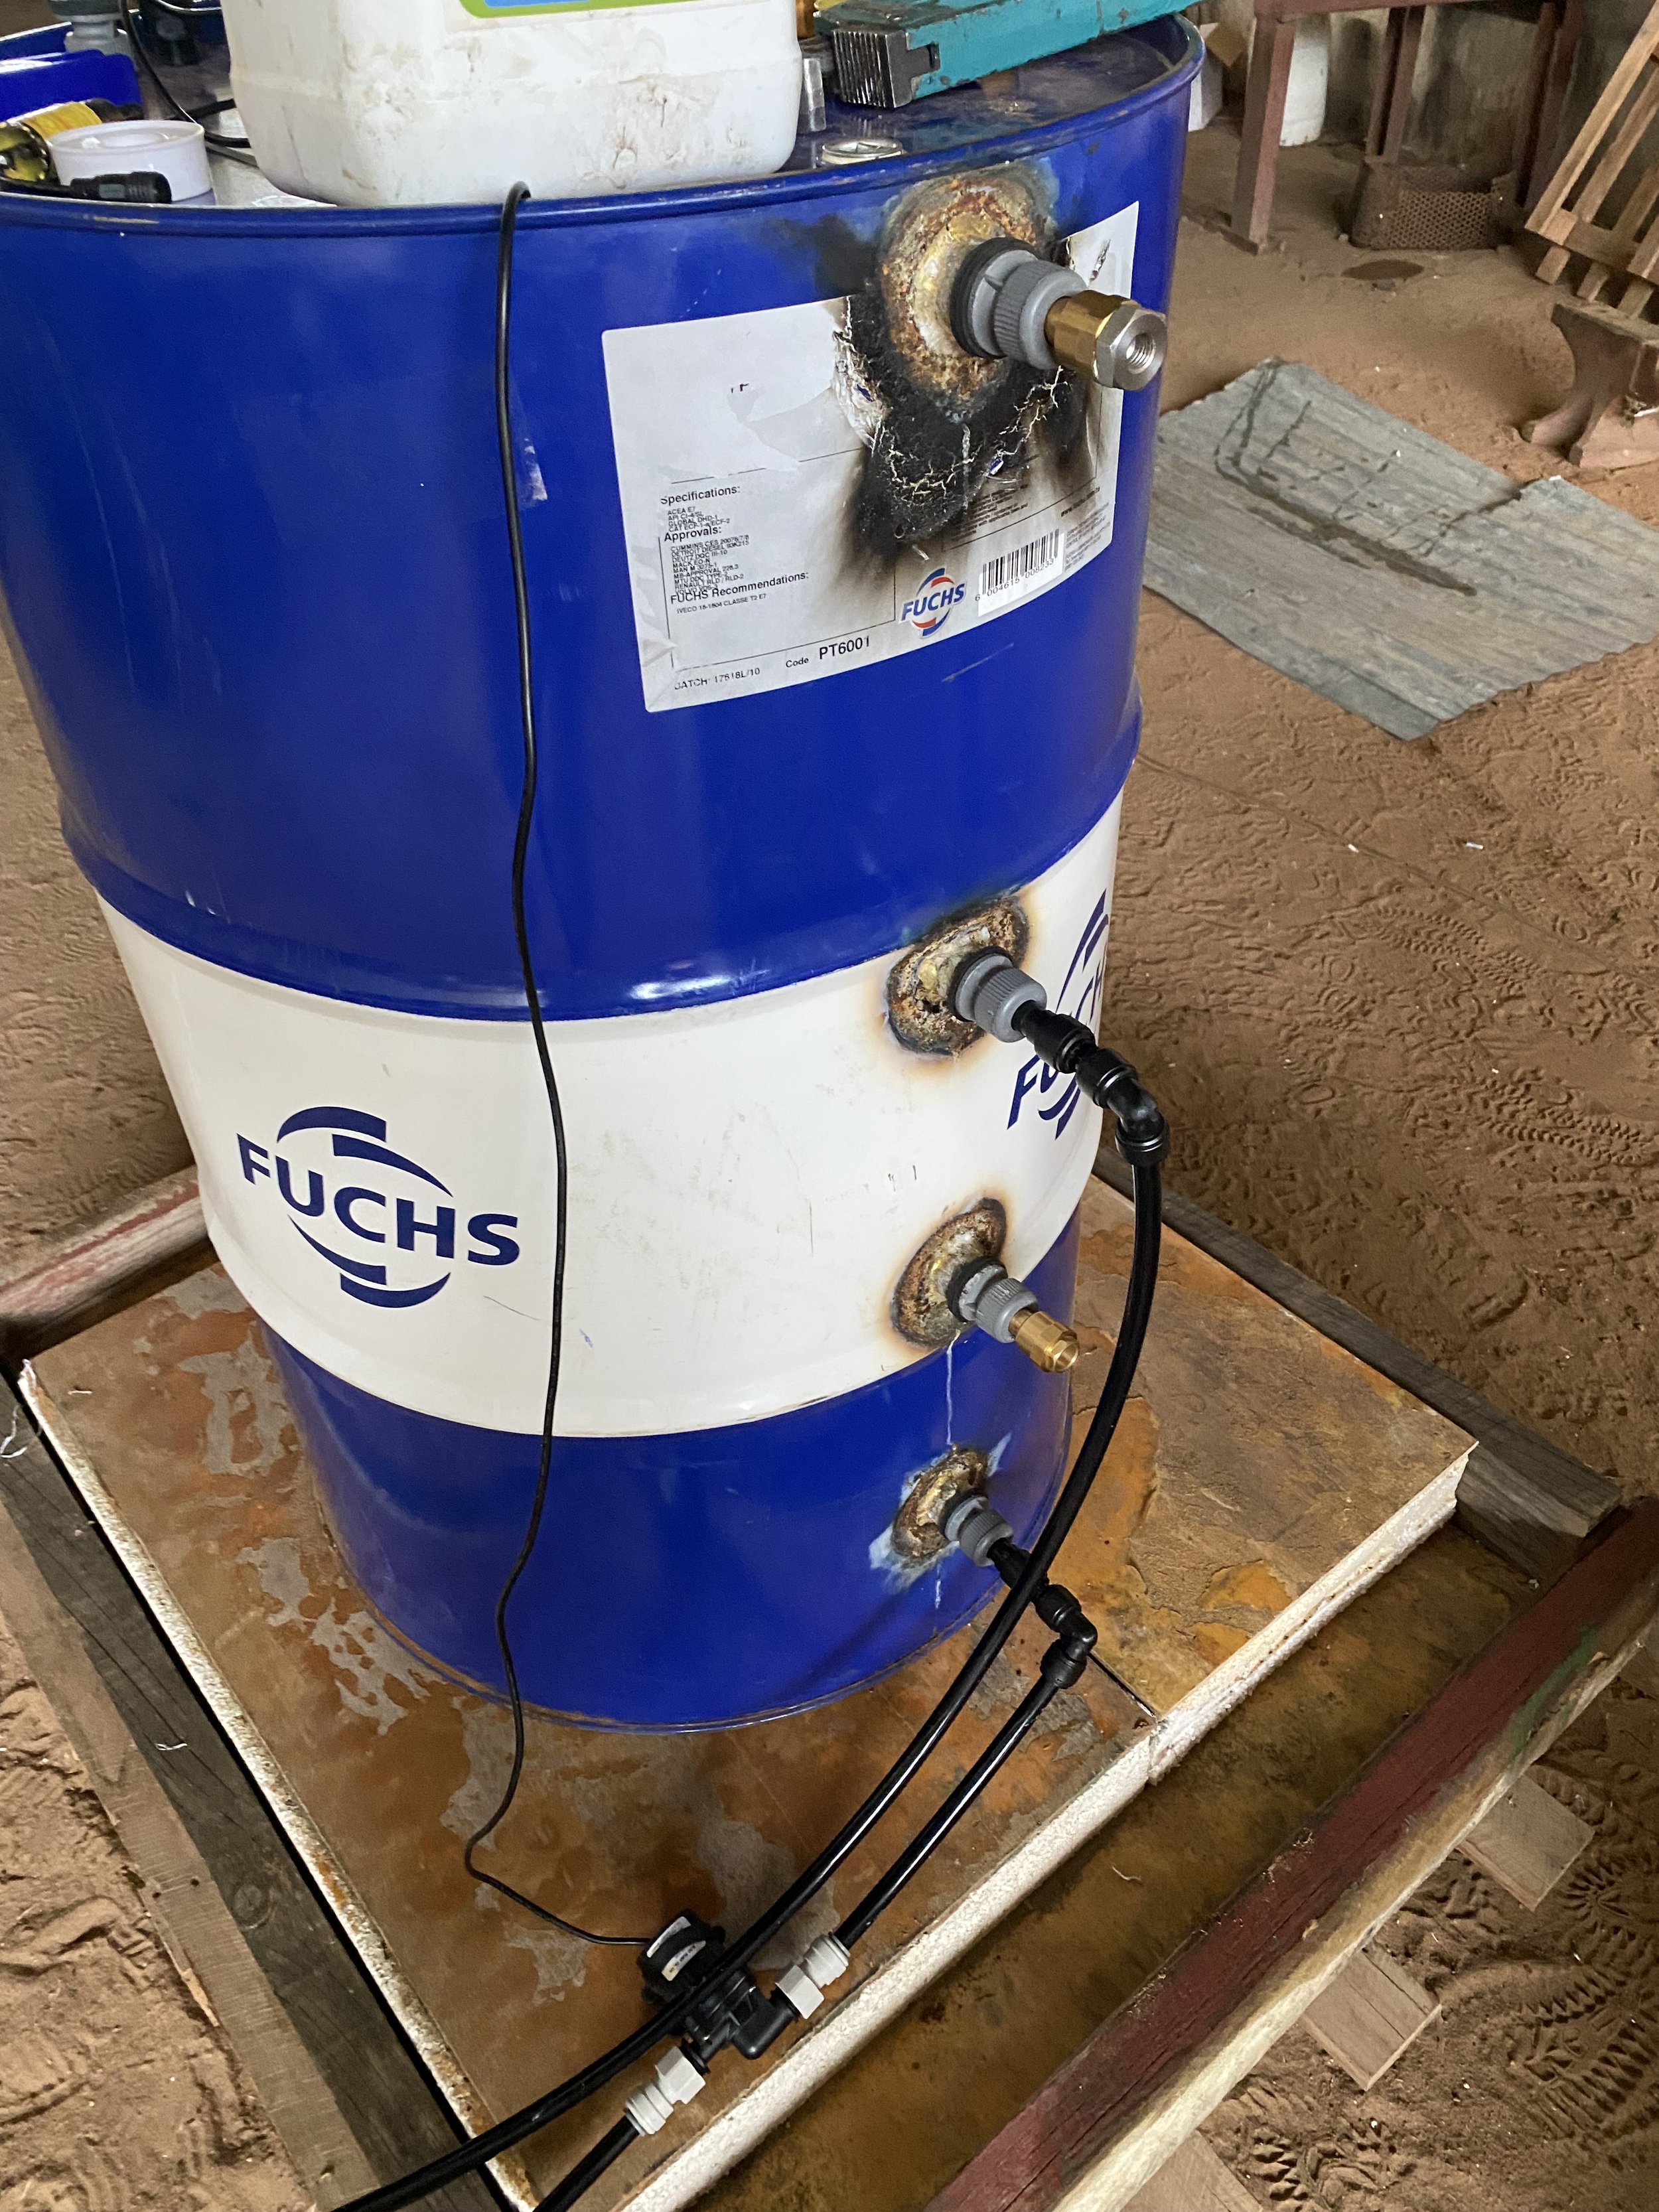
1. Cleaning the tank: As this is a second-hand tank, I wanted to make sure that it was as clean as possible. I used some dish washing liquid and bleach, then rinsed the tank out thoroughly.
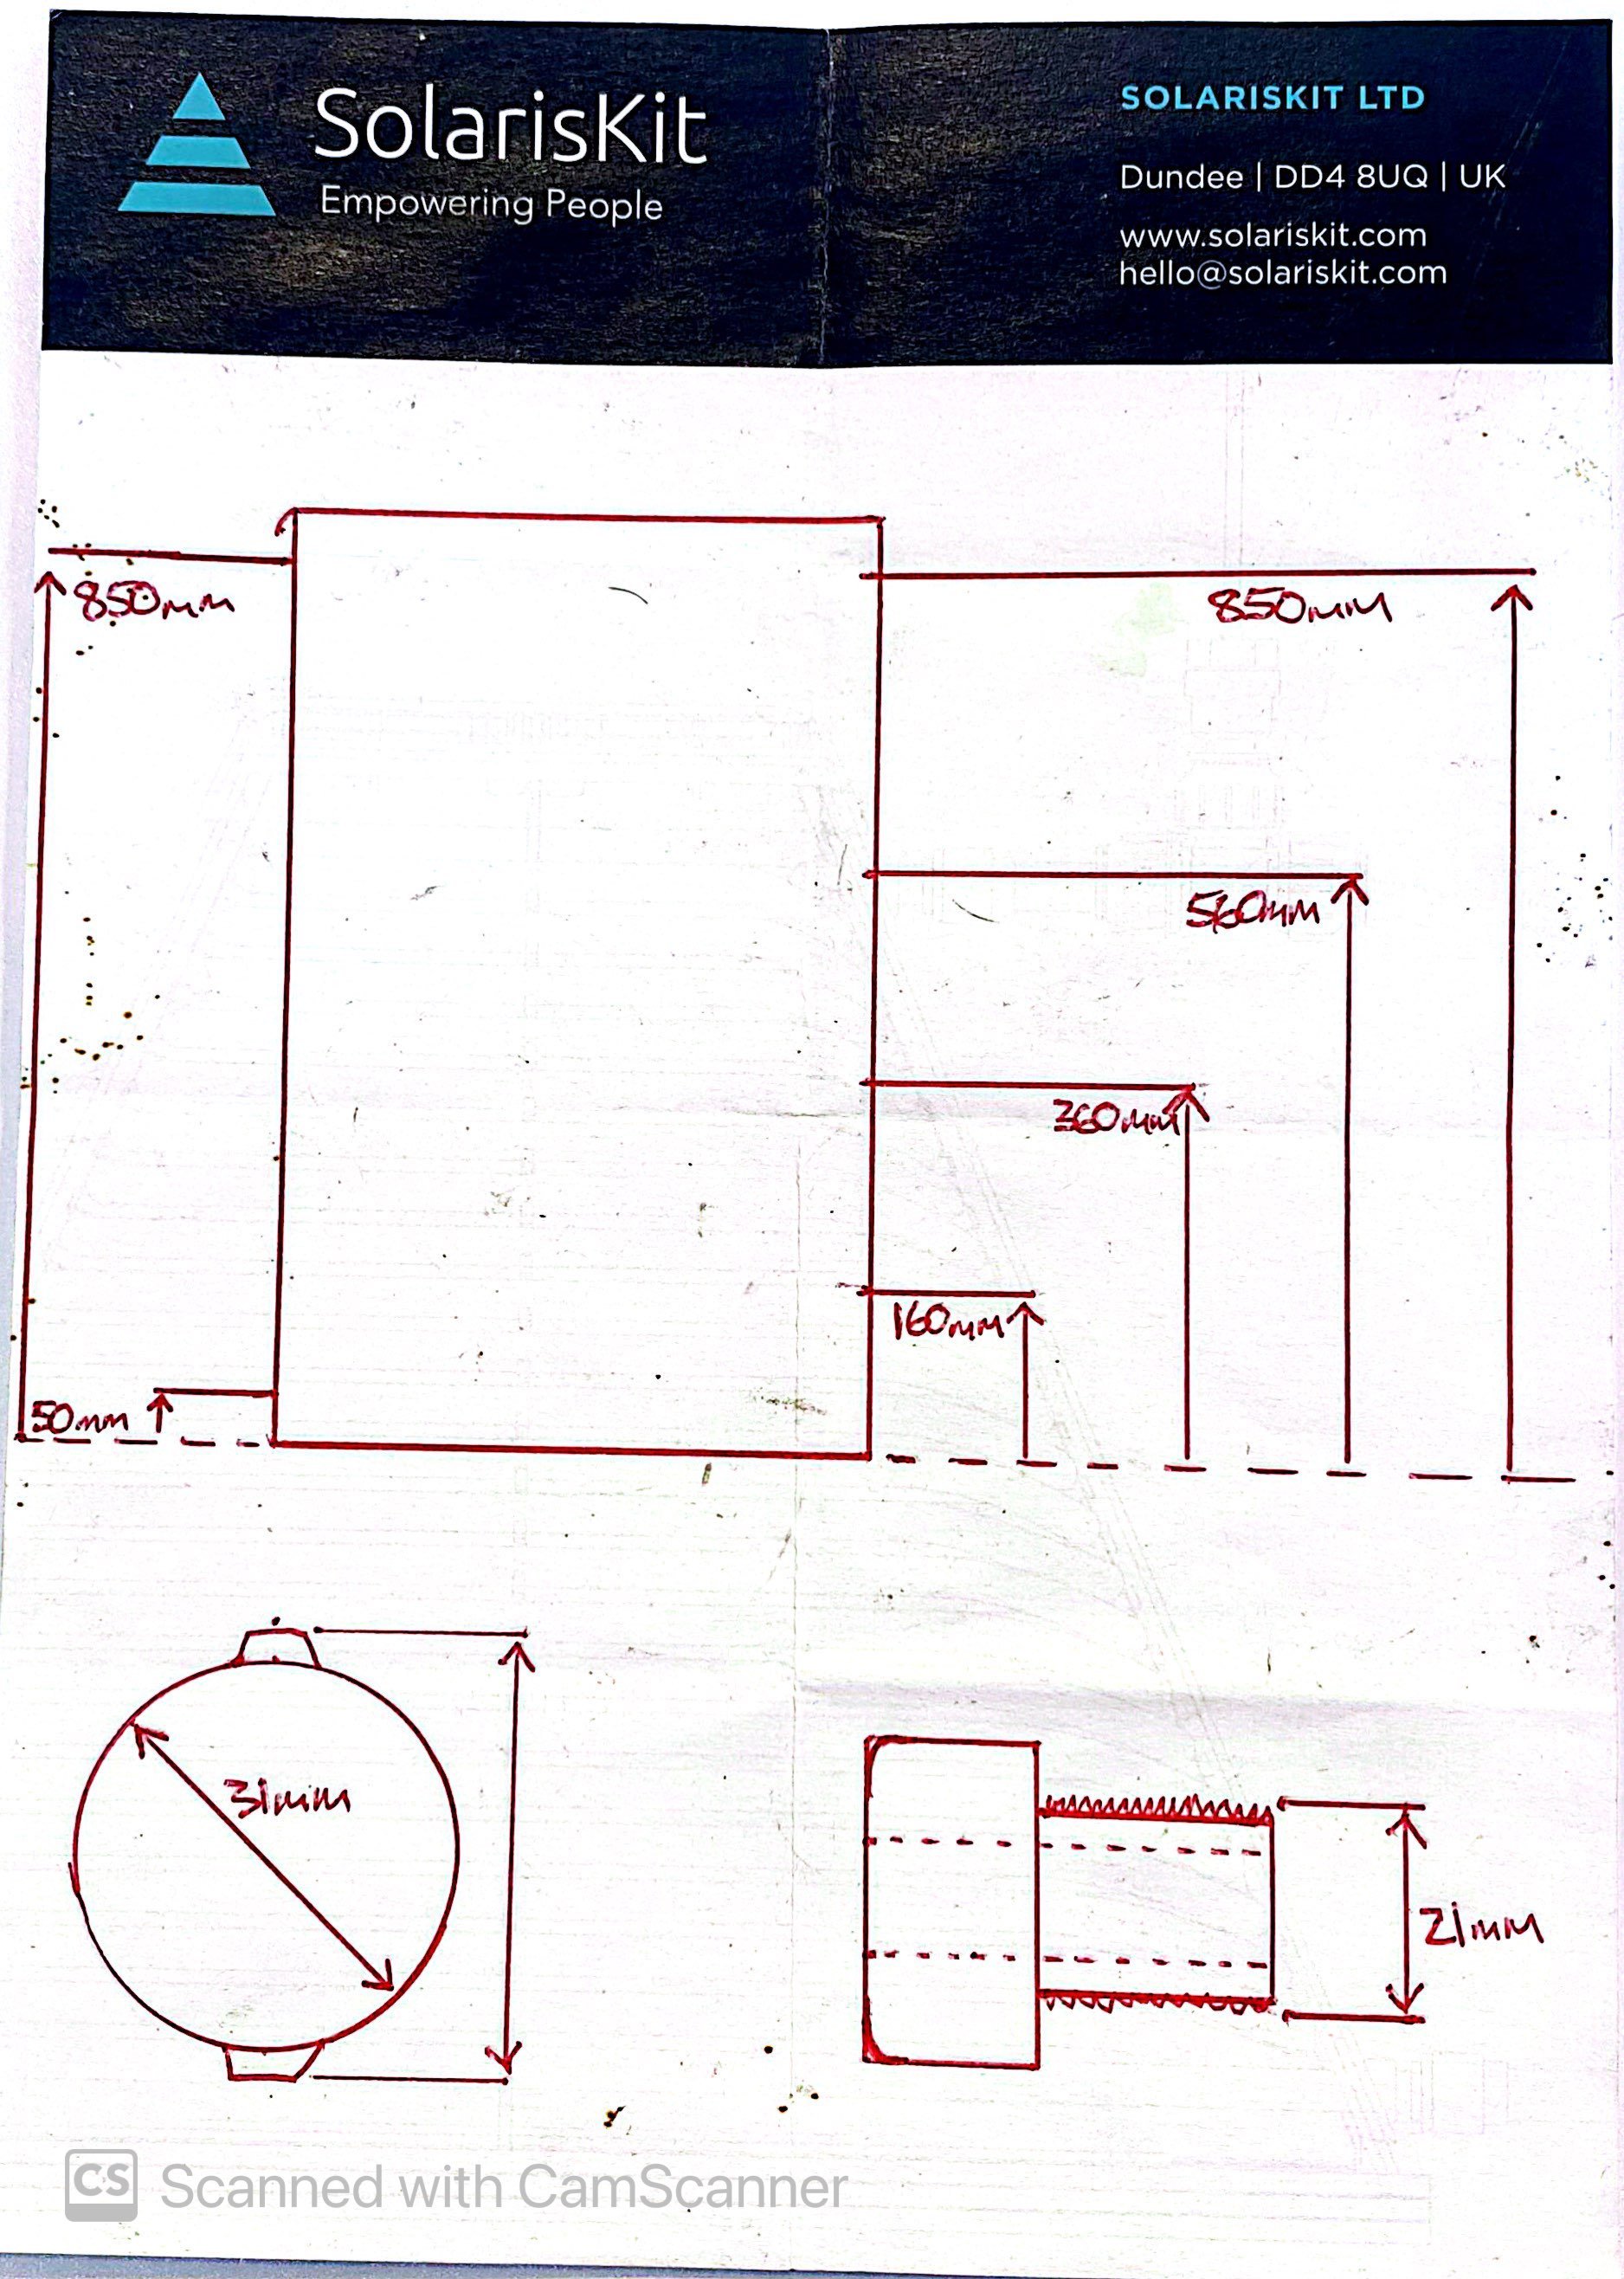
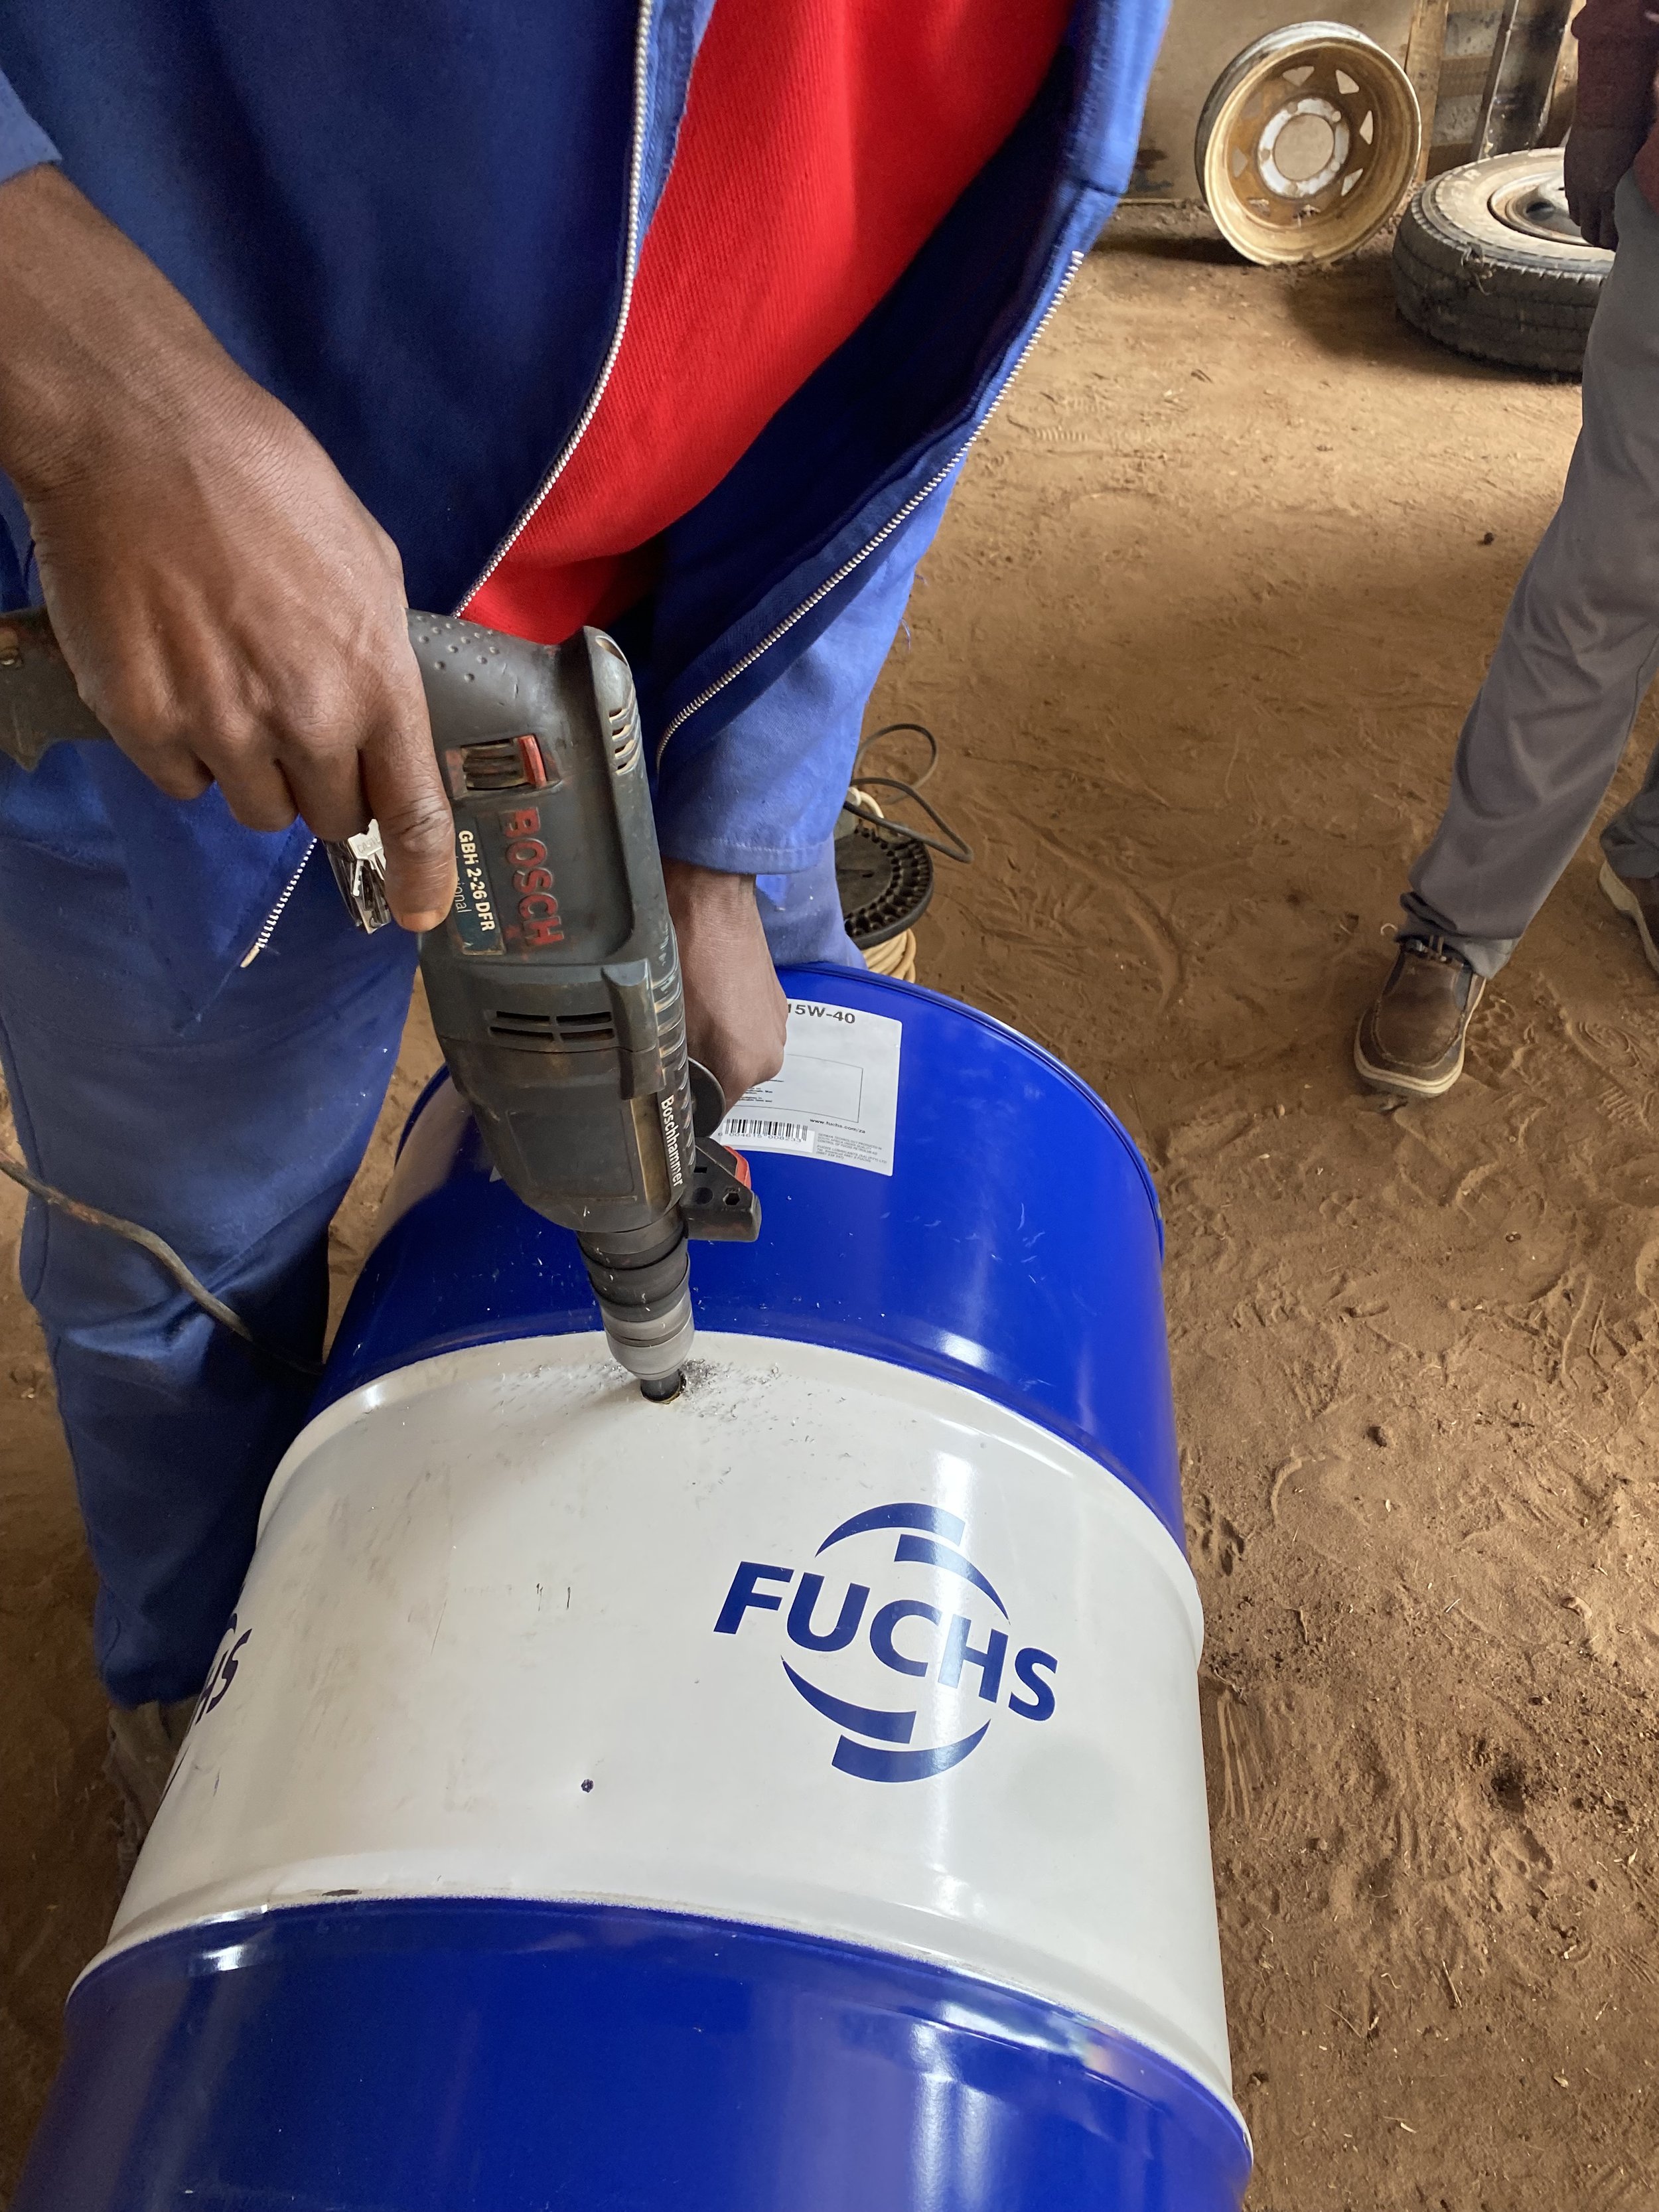
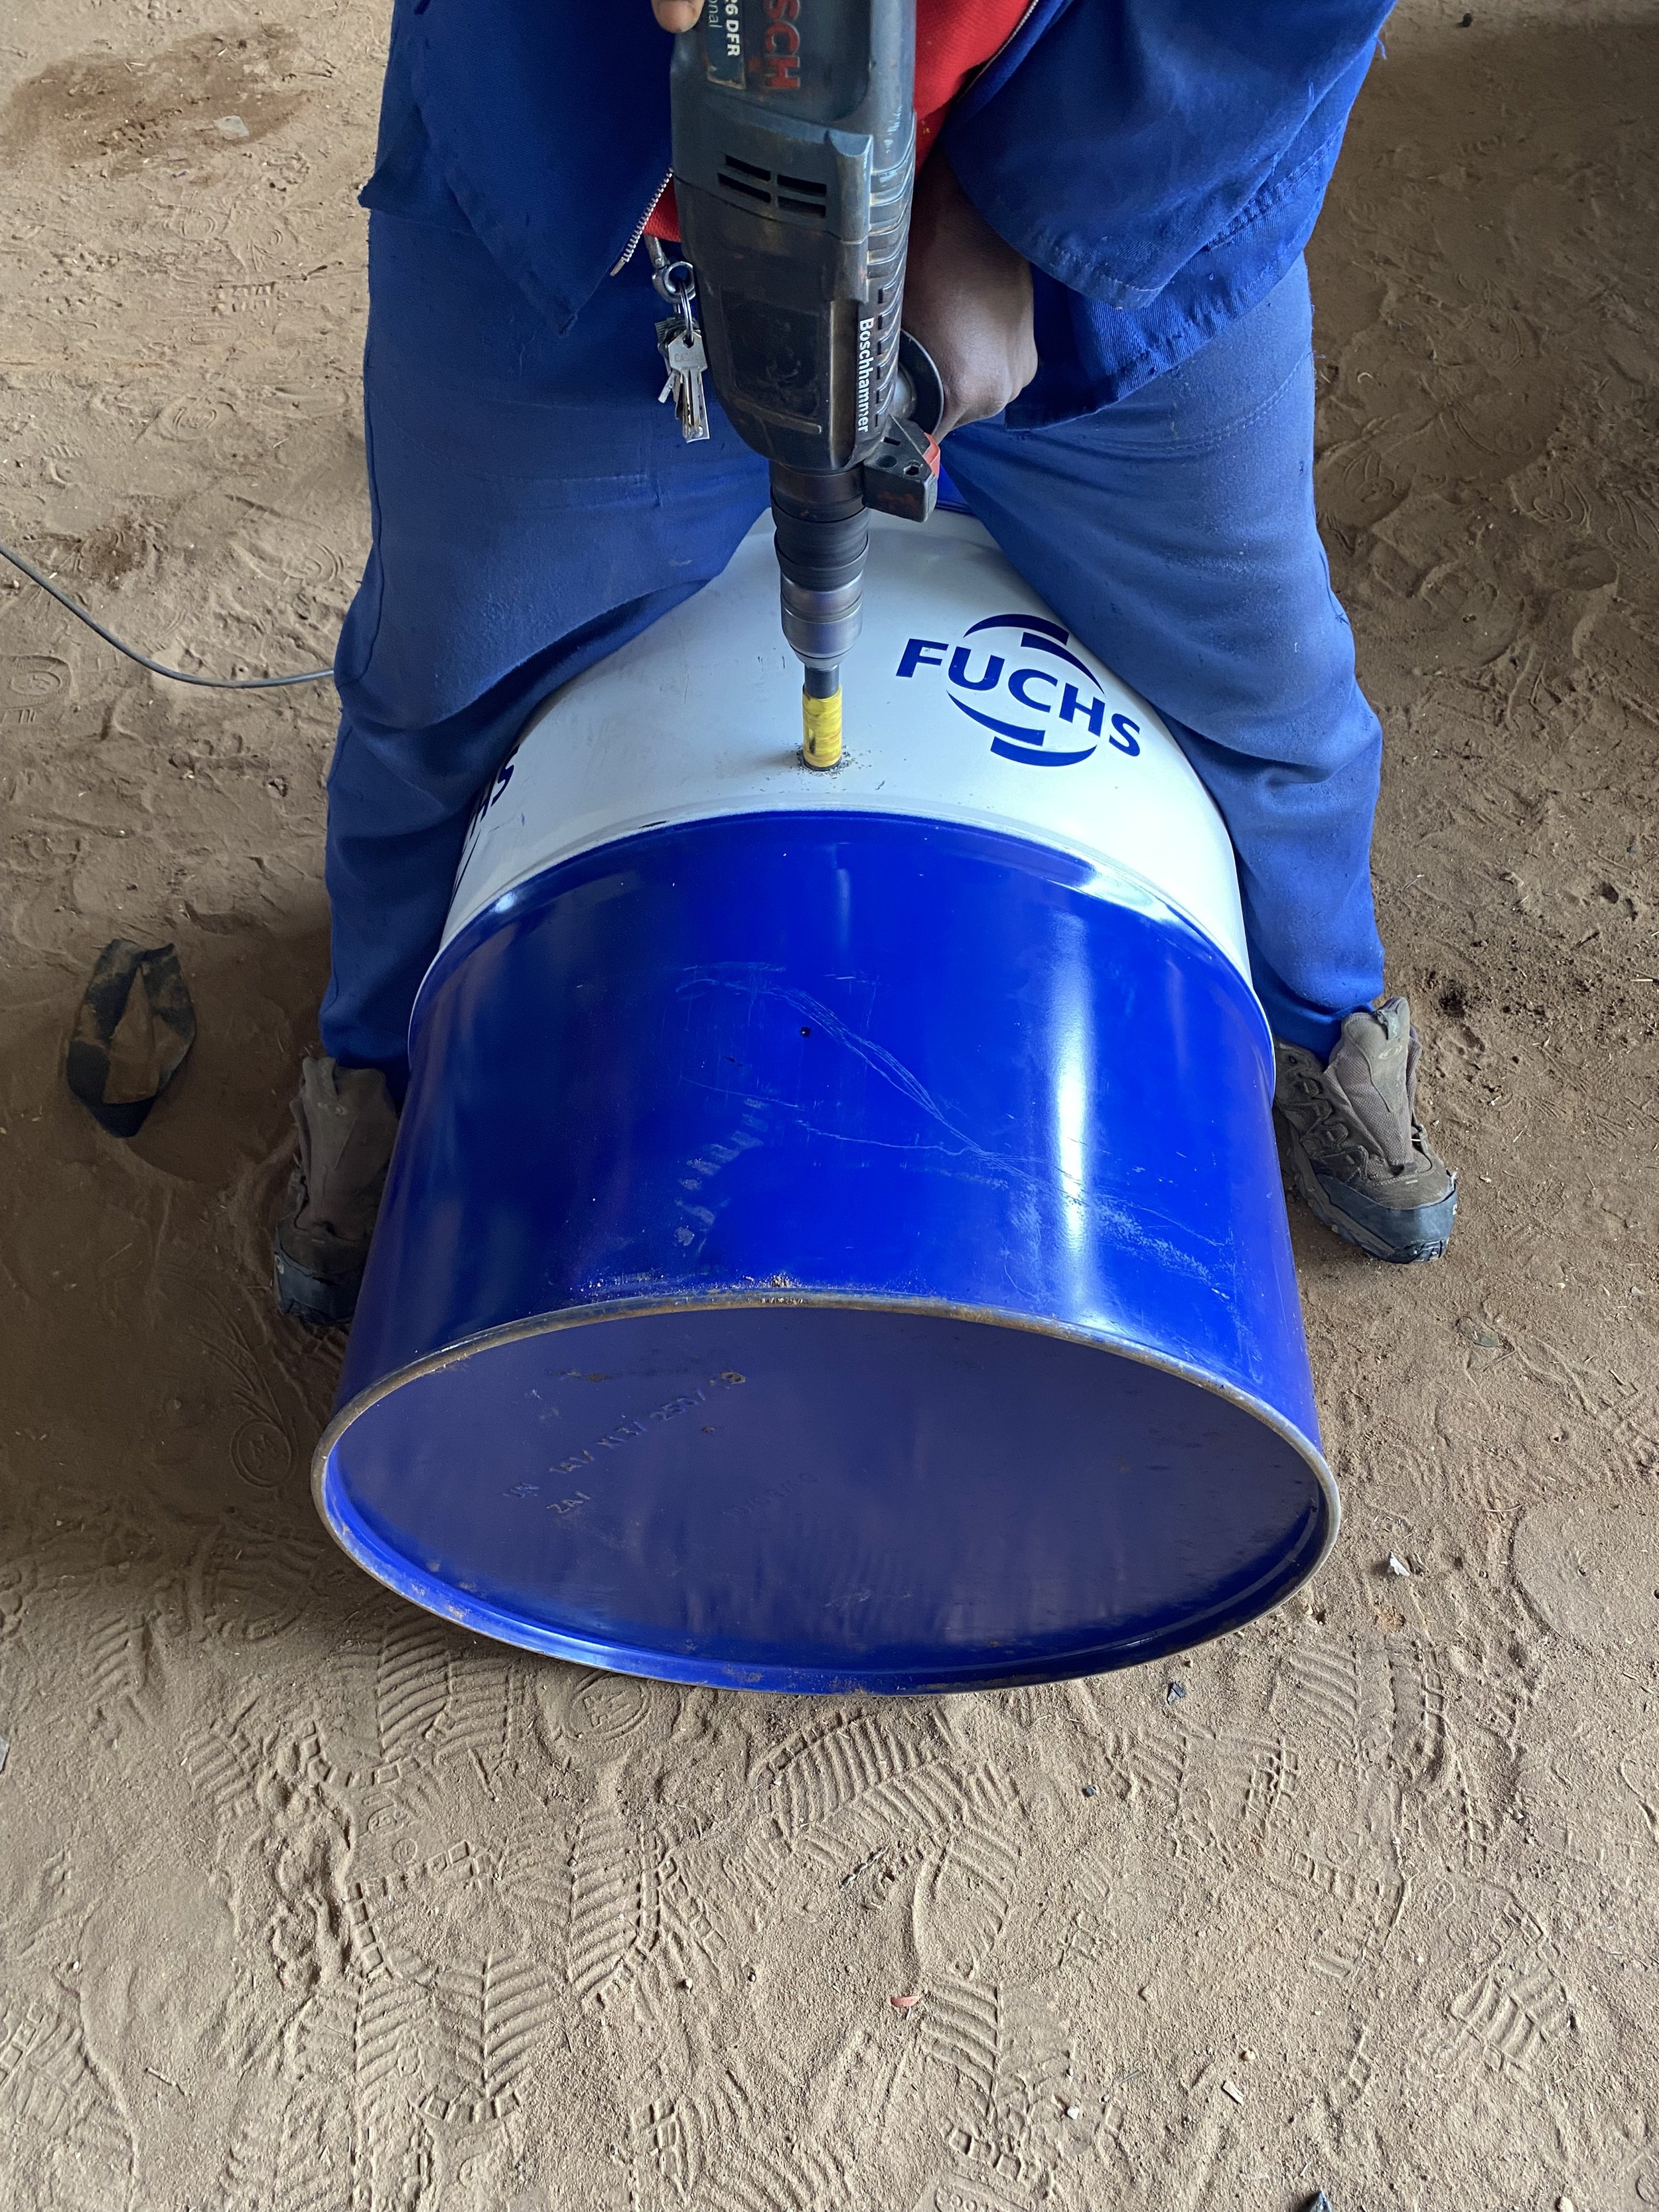
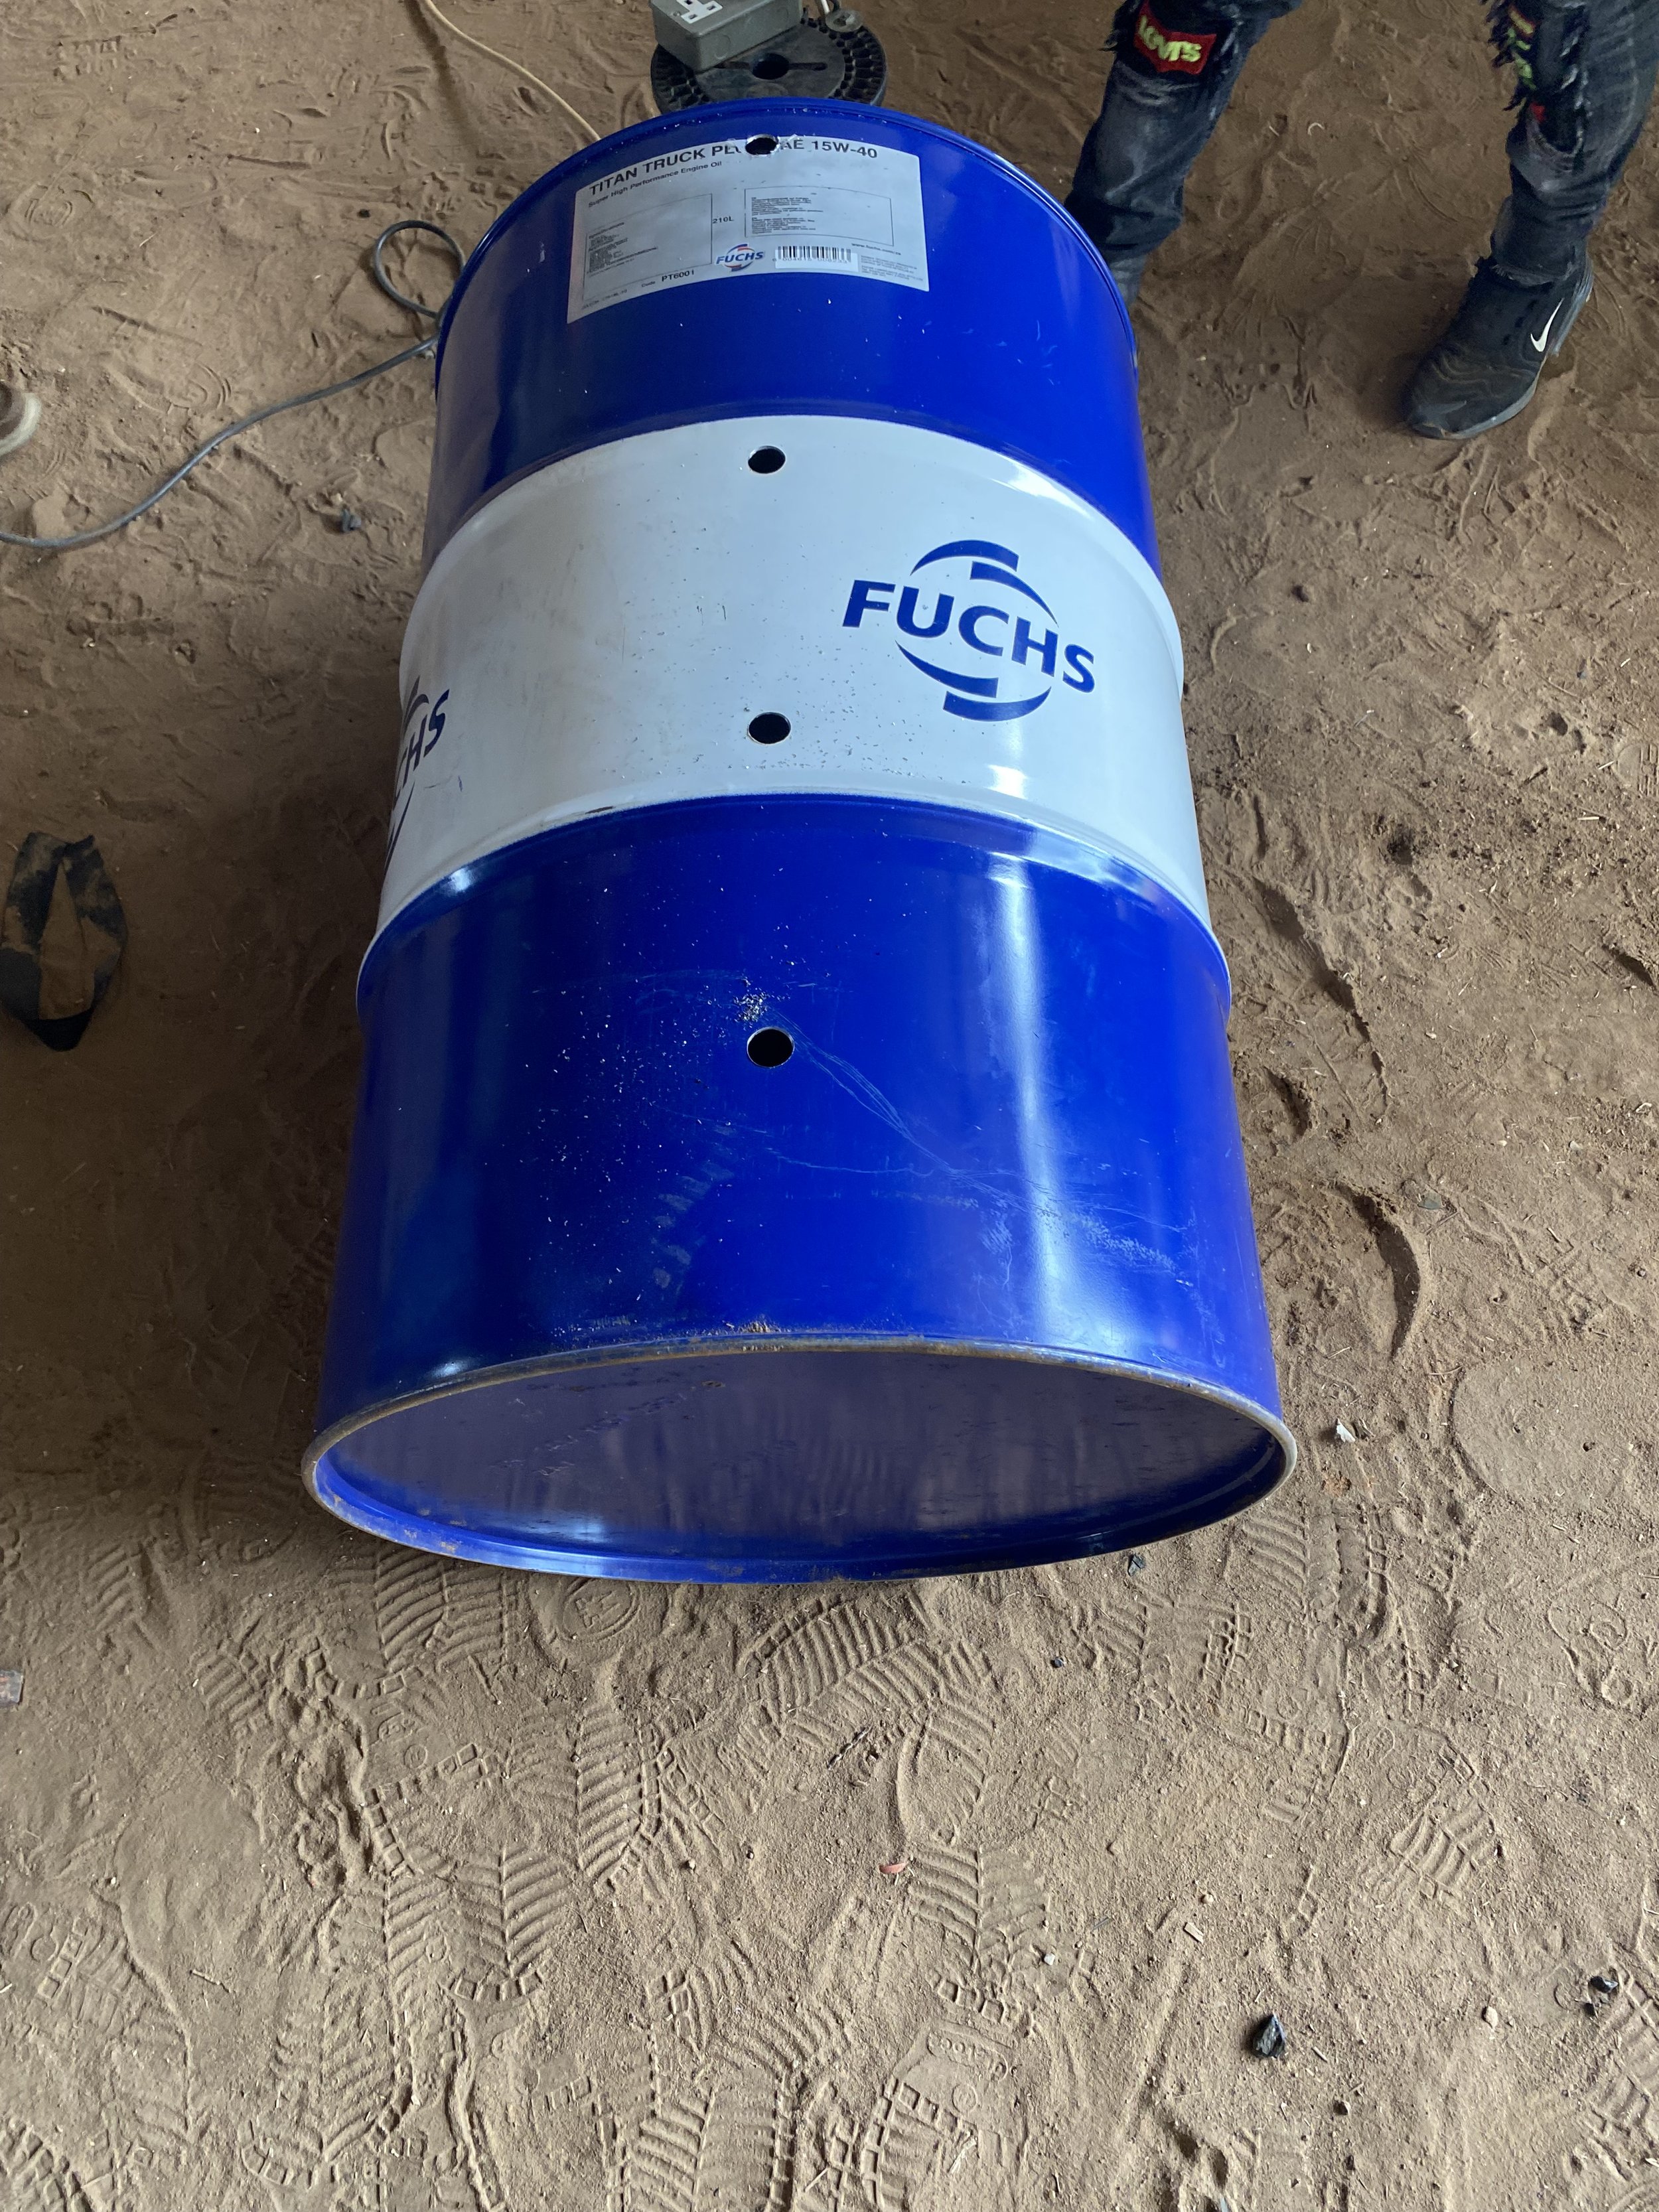
2. Drilling the 6 holes into the tank using a handheld drill and hole boring attachment.
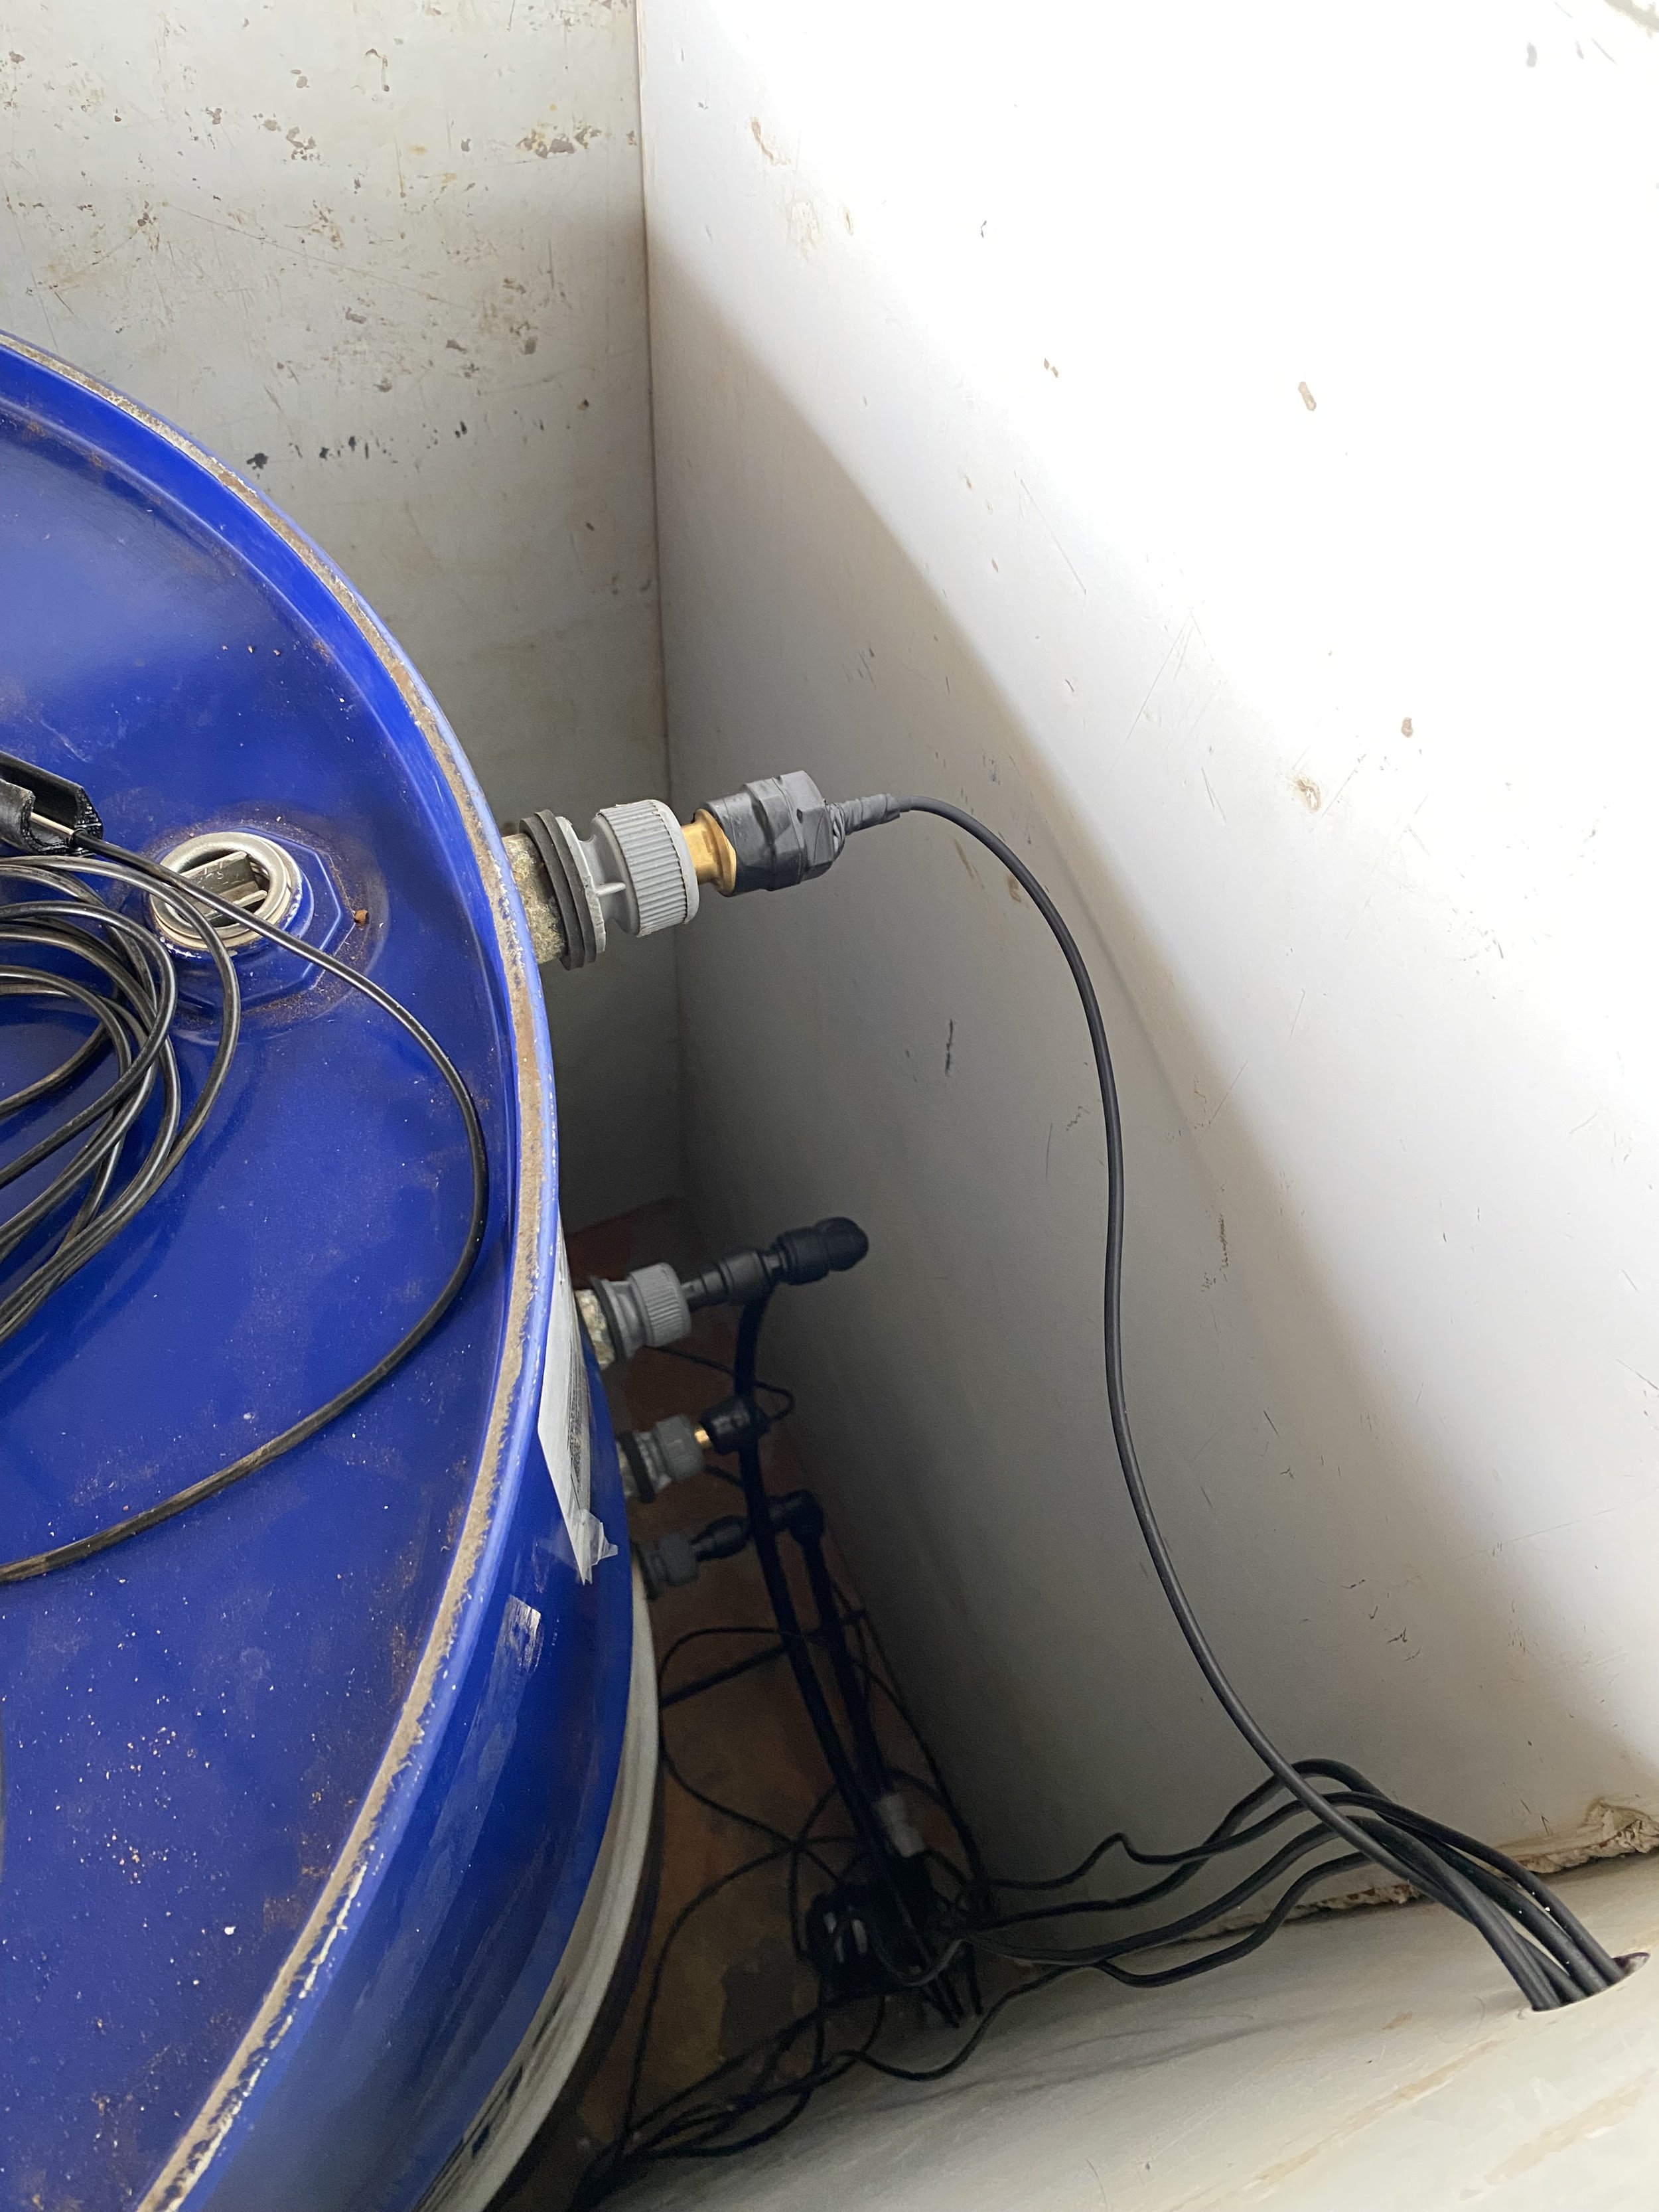
2 for temperature sensors,
2 for the solar loops’ flow and return,
2 for the cold feed to the tank and the hot supply from the tank.
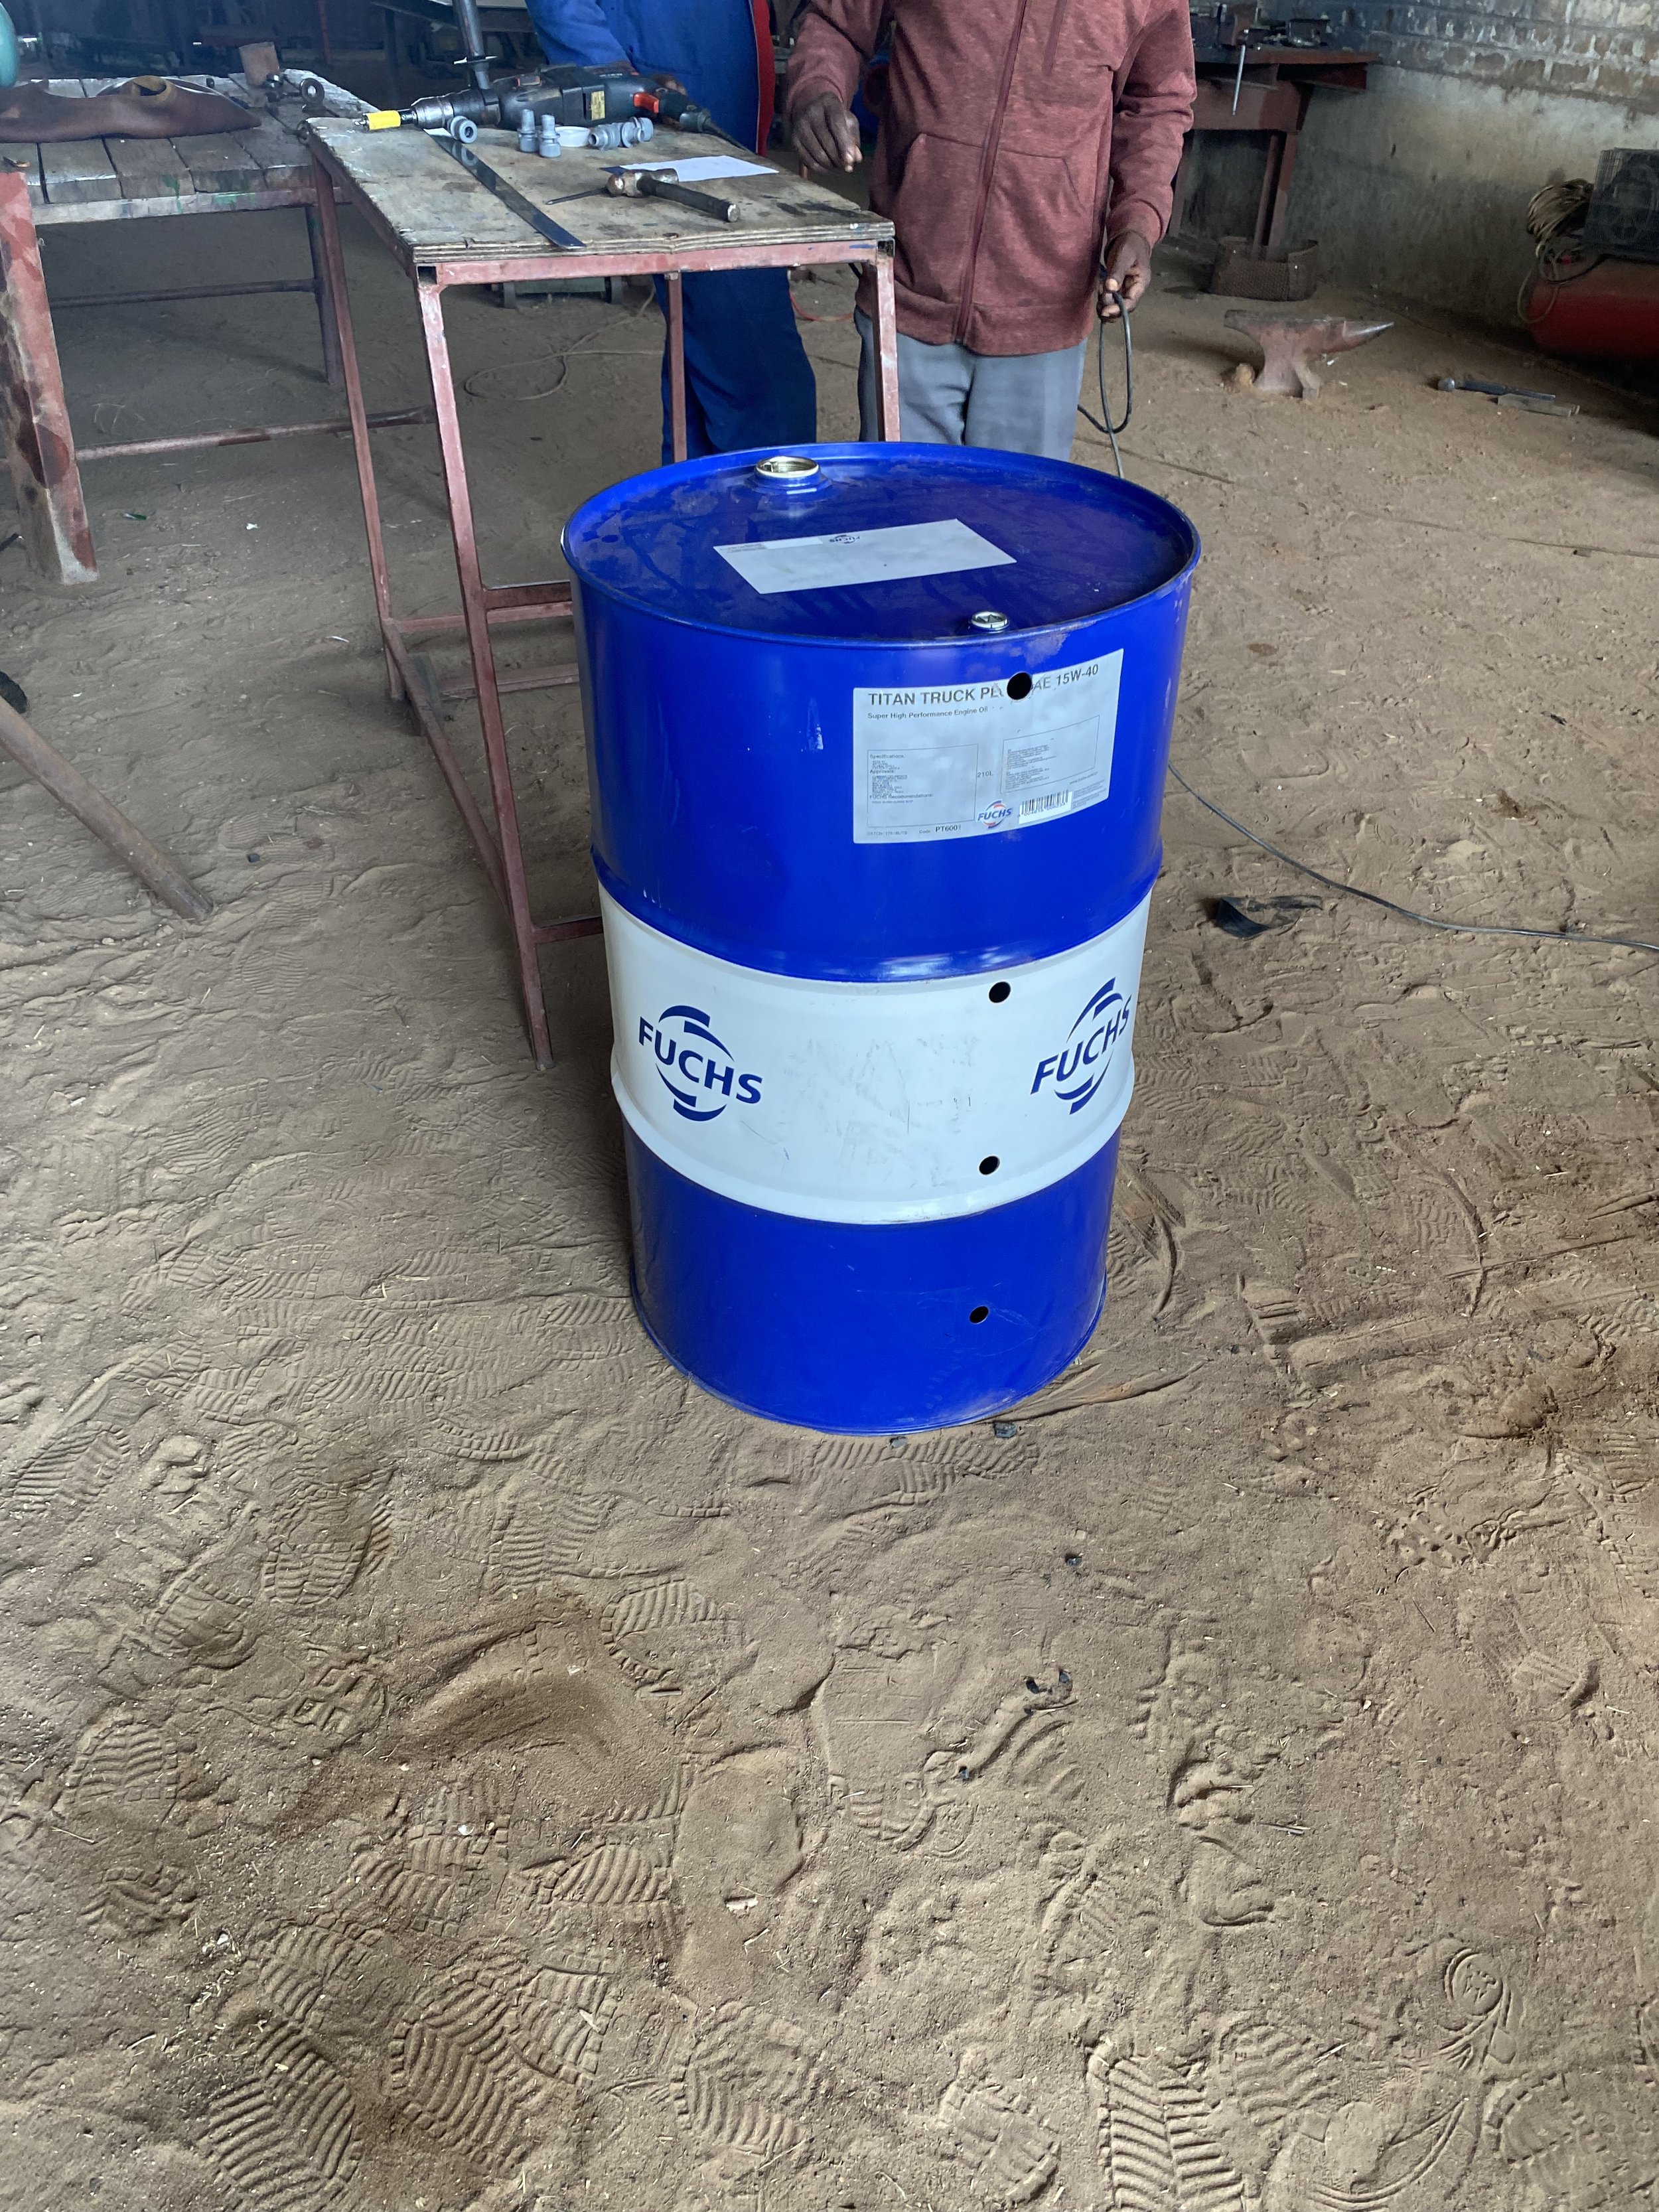
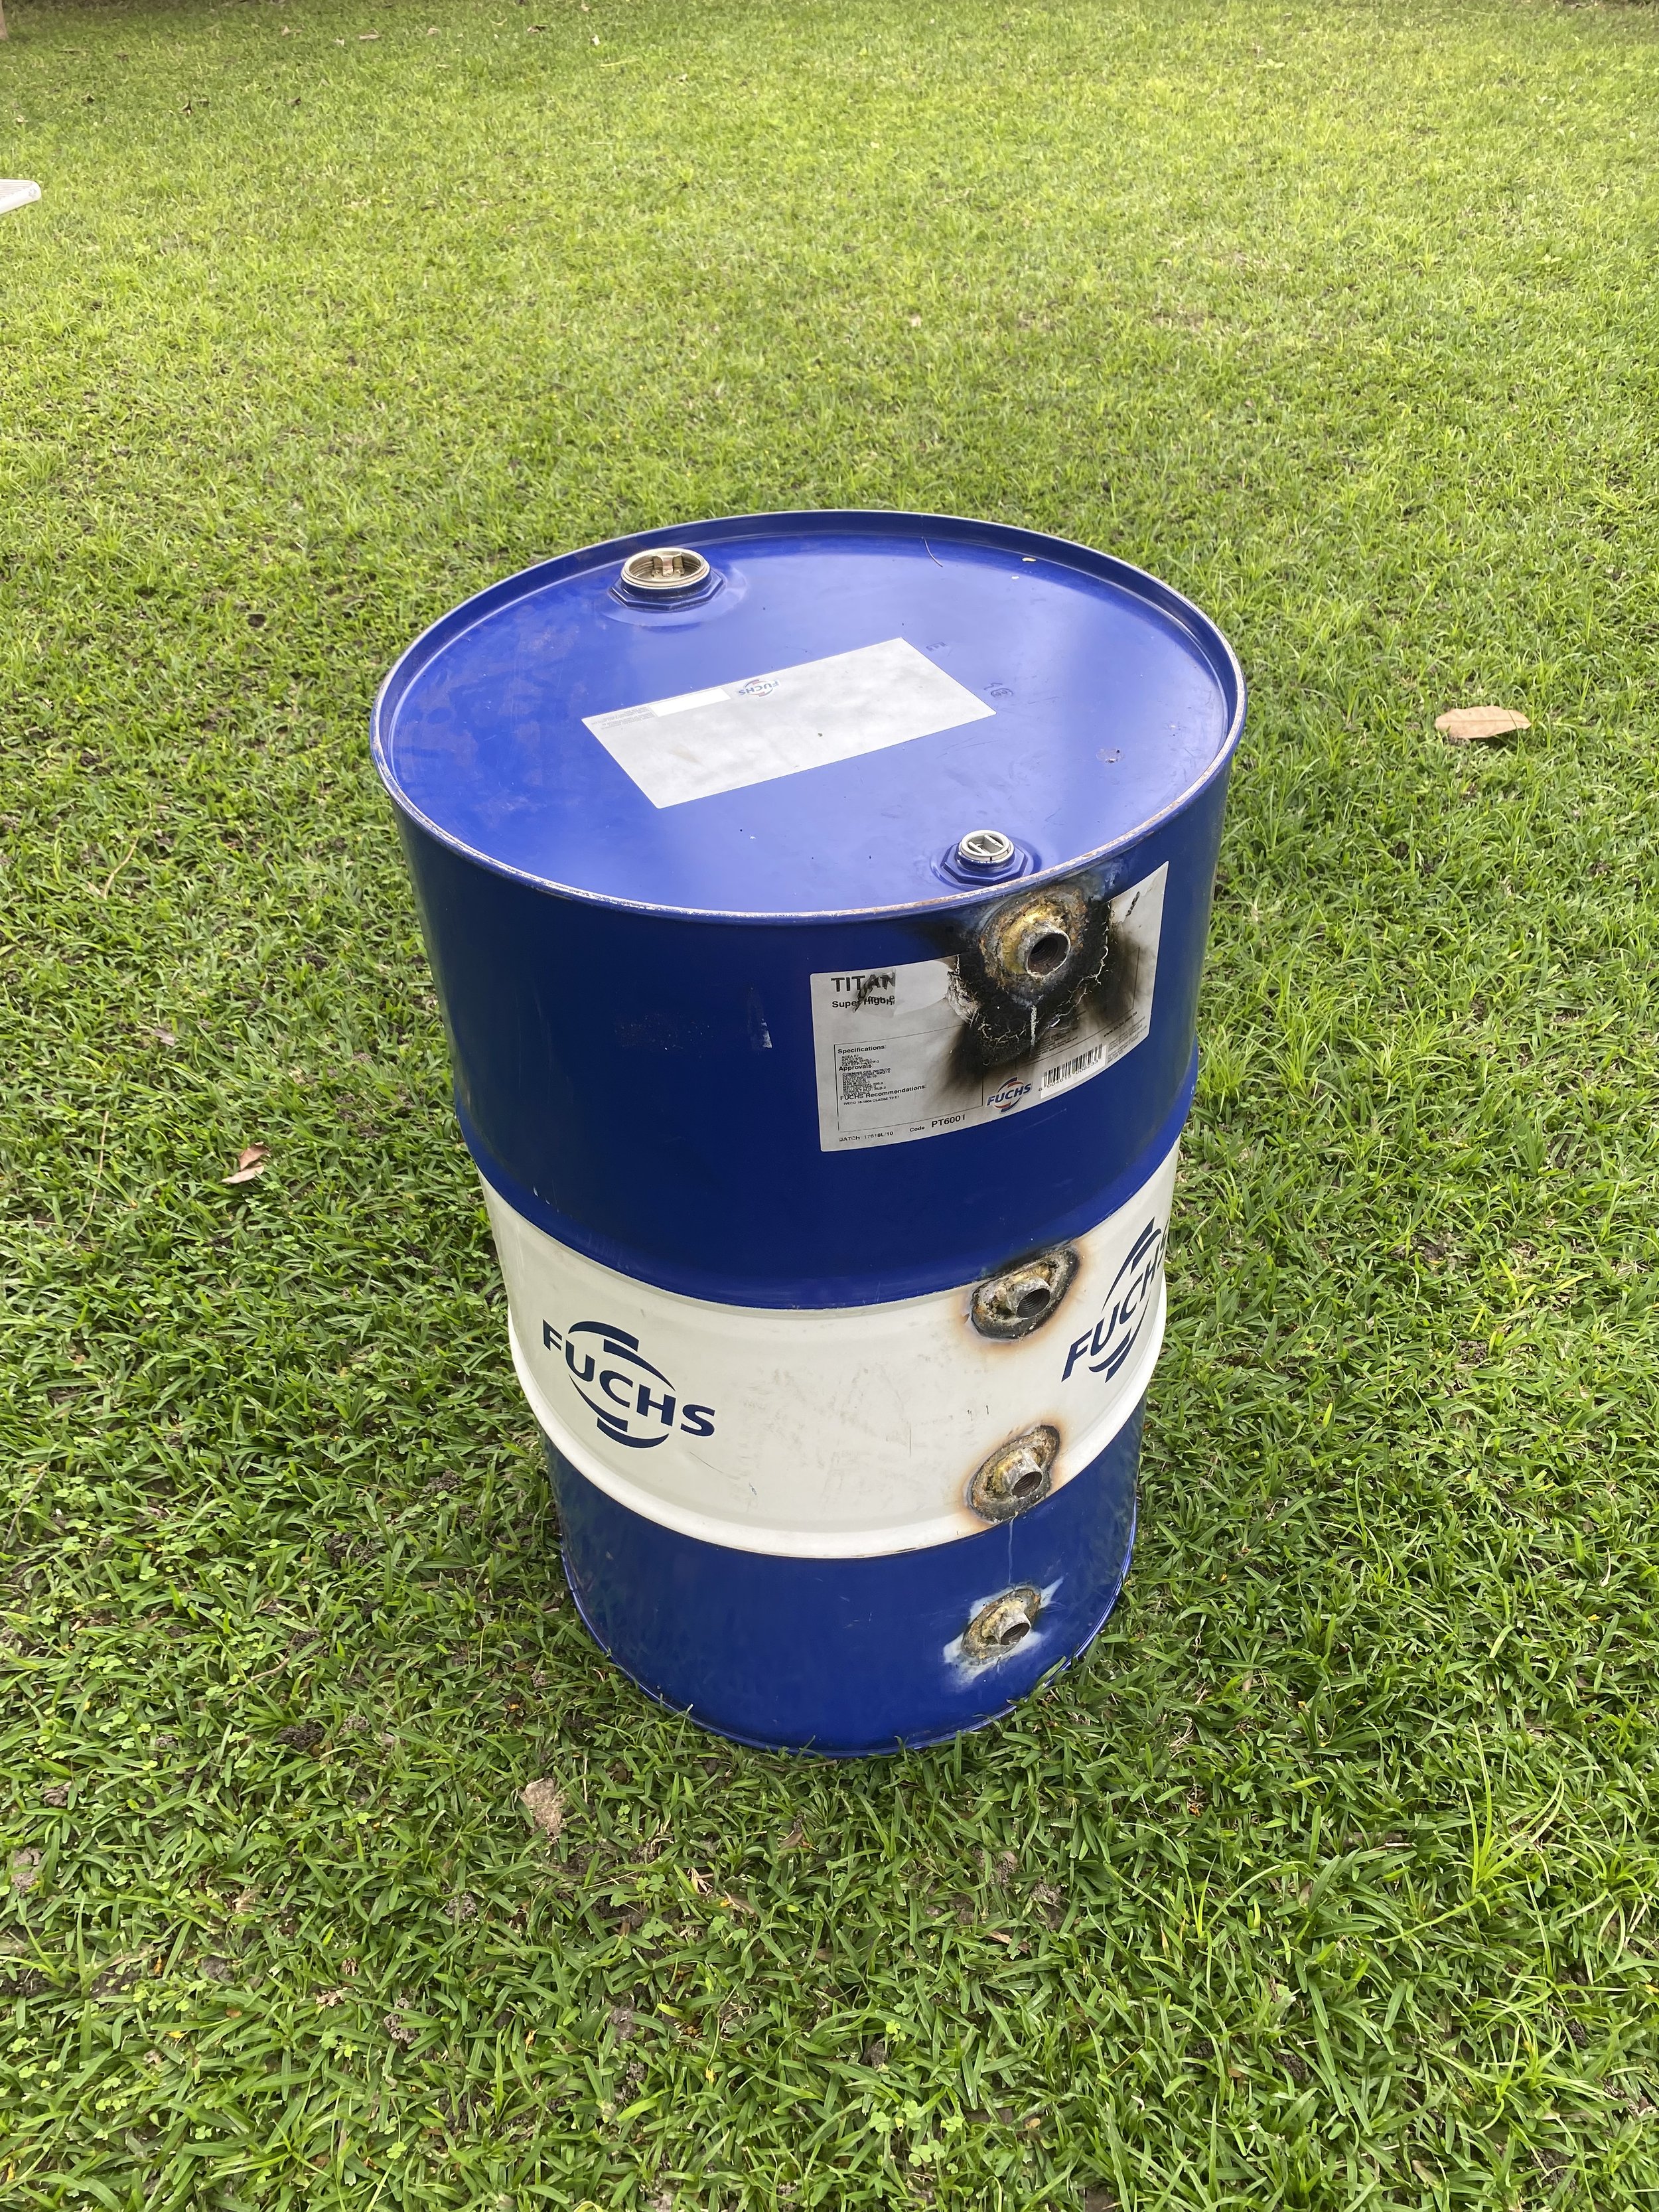
3. Cutting and Brazing: Cutting the 1/2inch socket in half to make 6 pieces that is needed for the 6 tank fittings. Then brazing the sockets over the holes onto the tank.
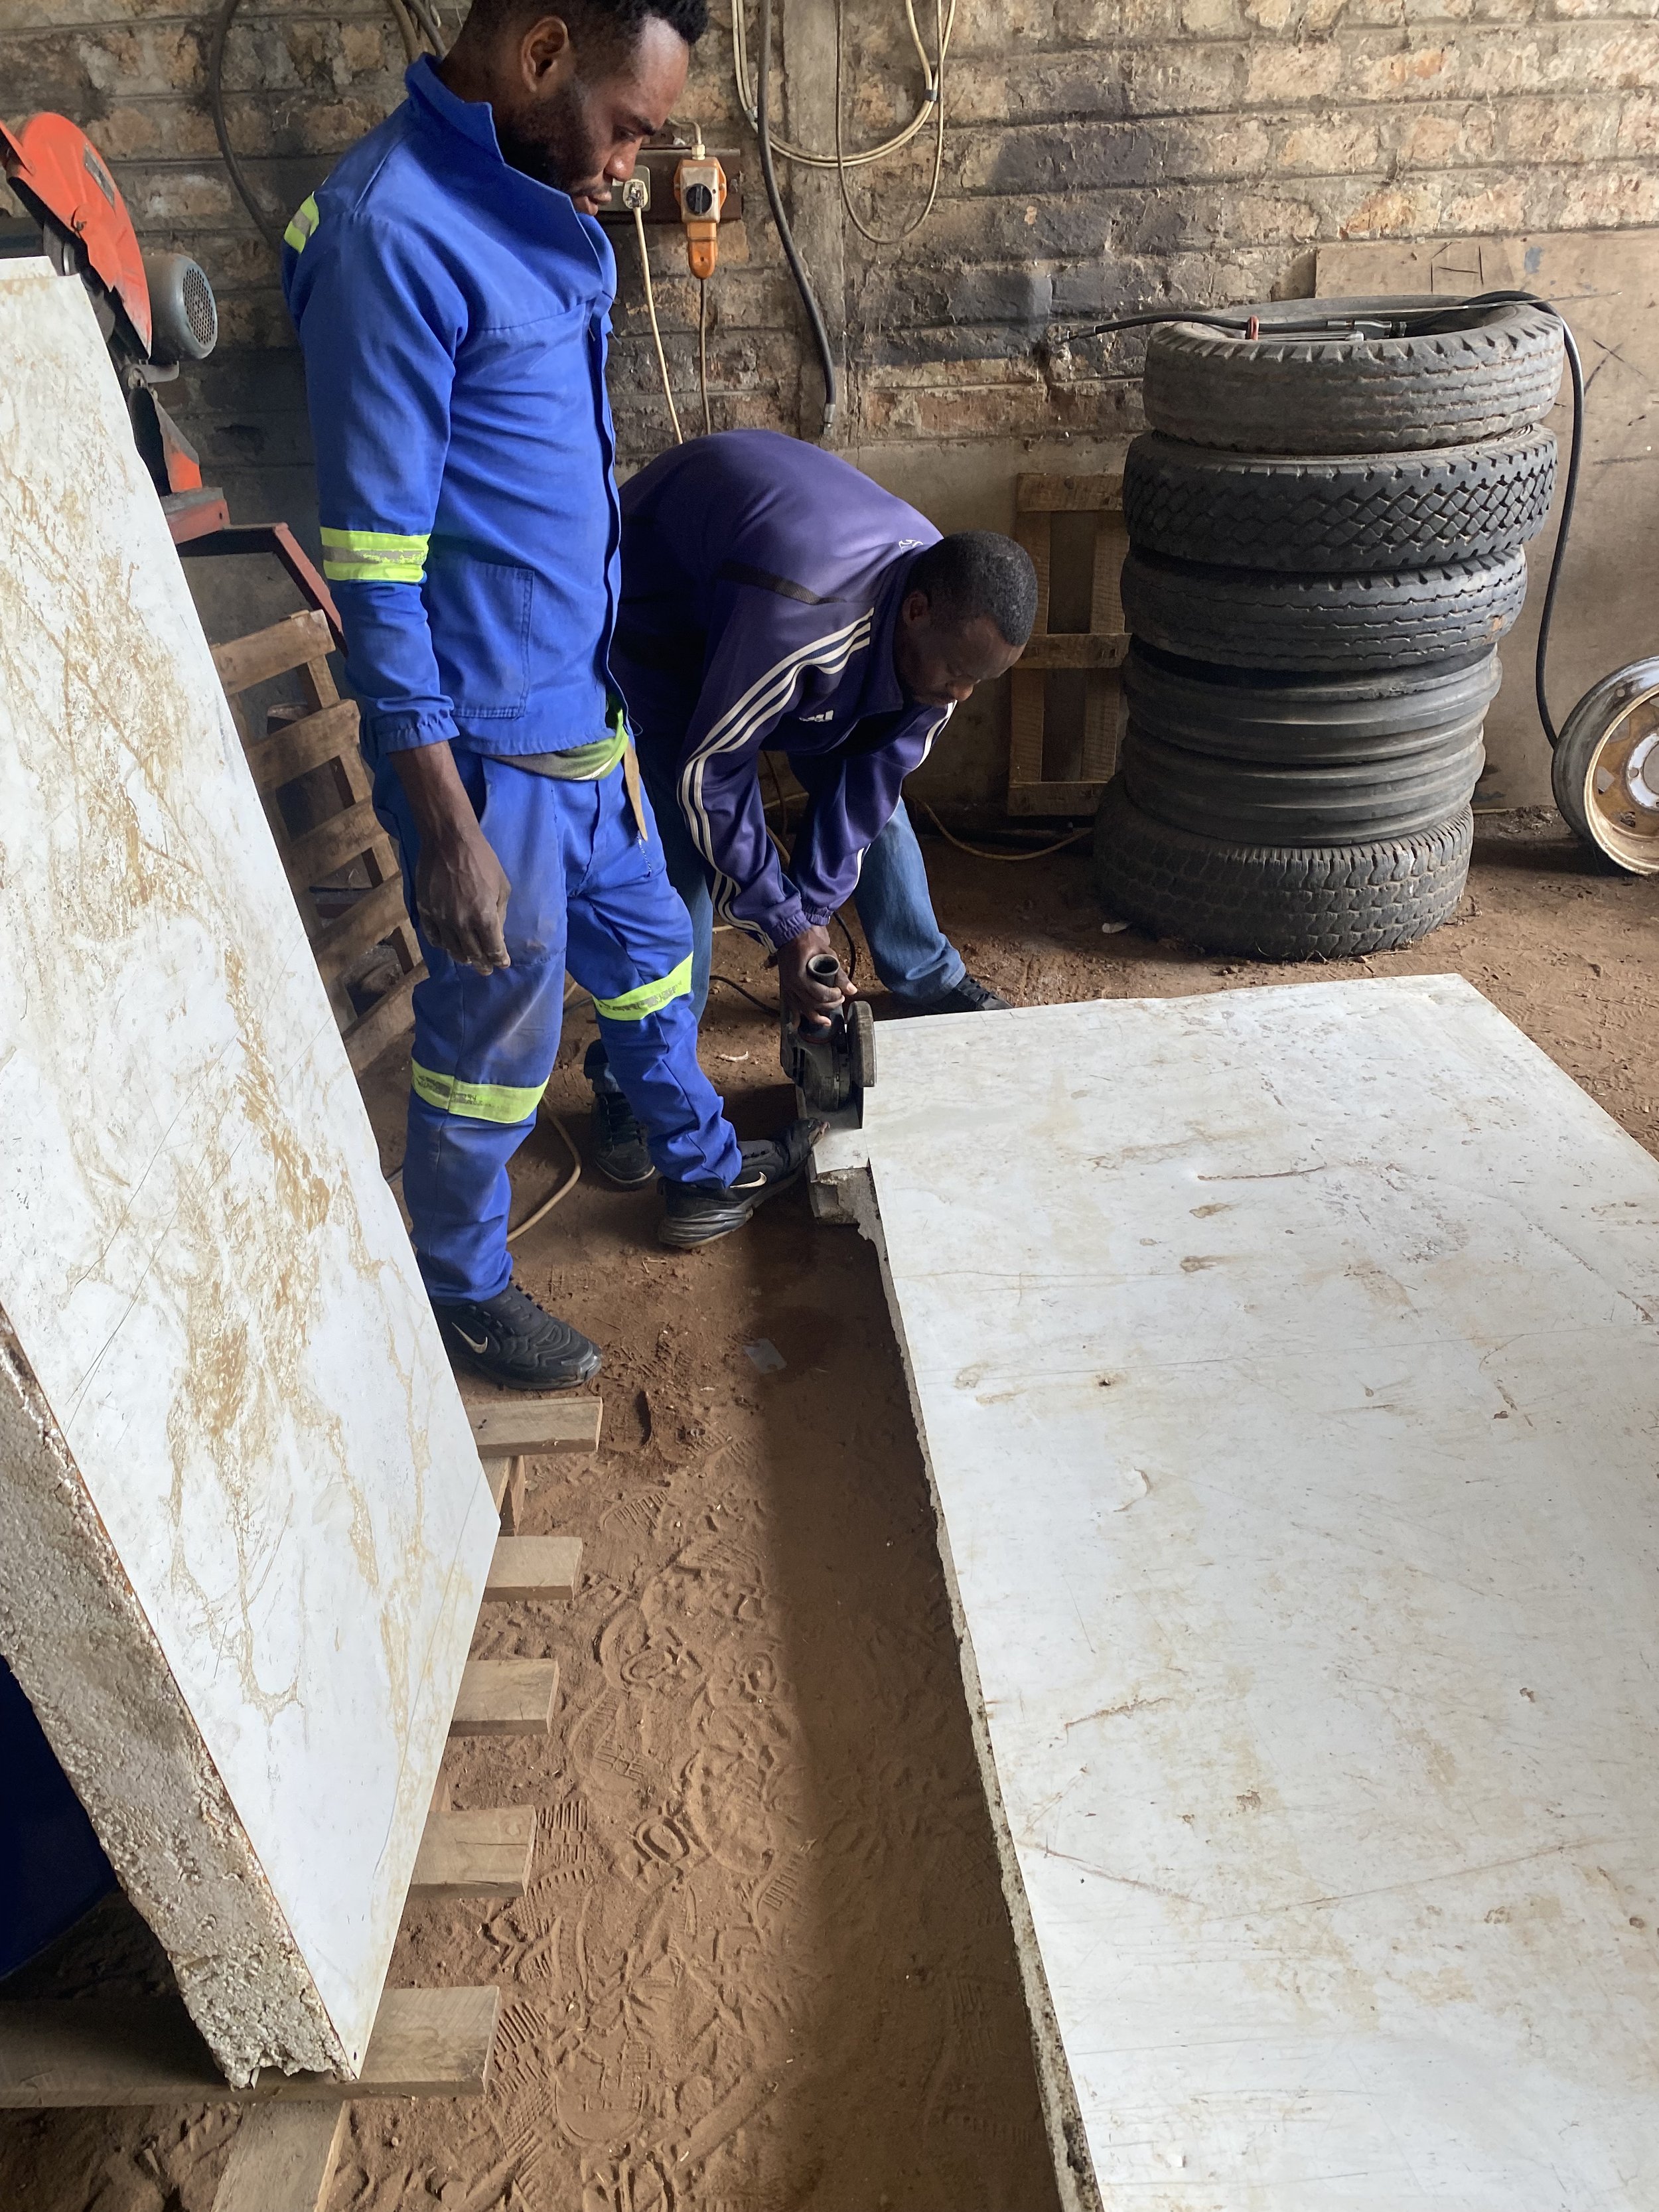
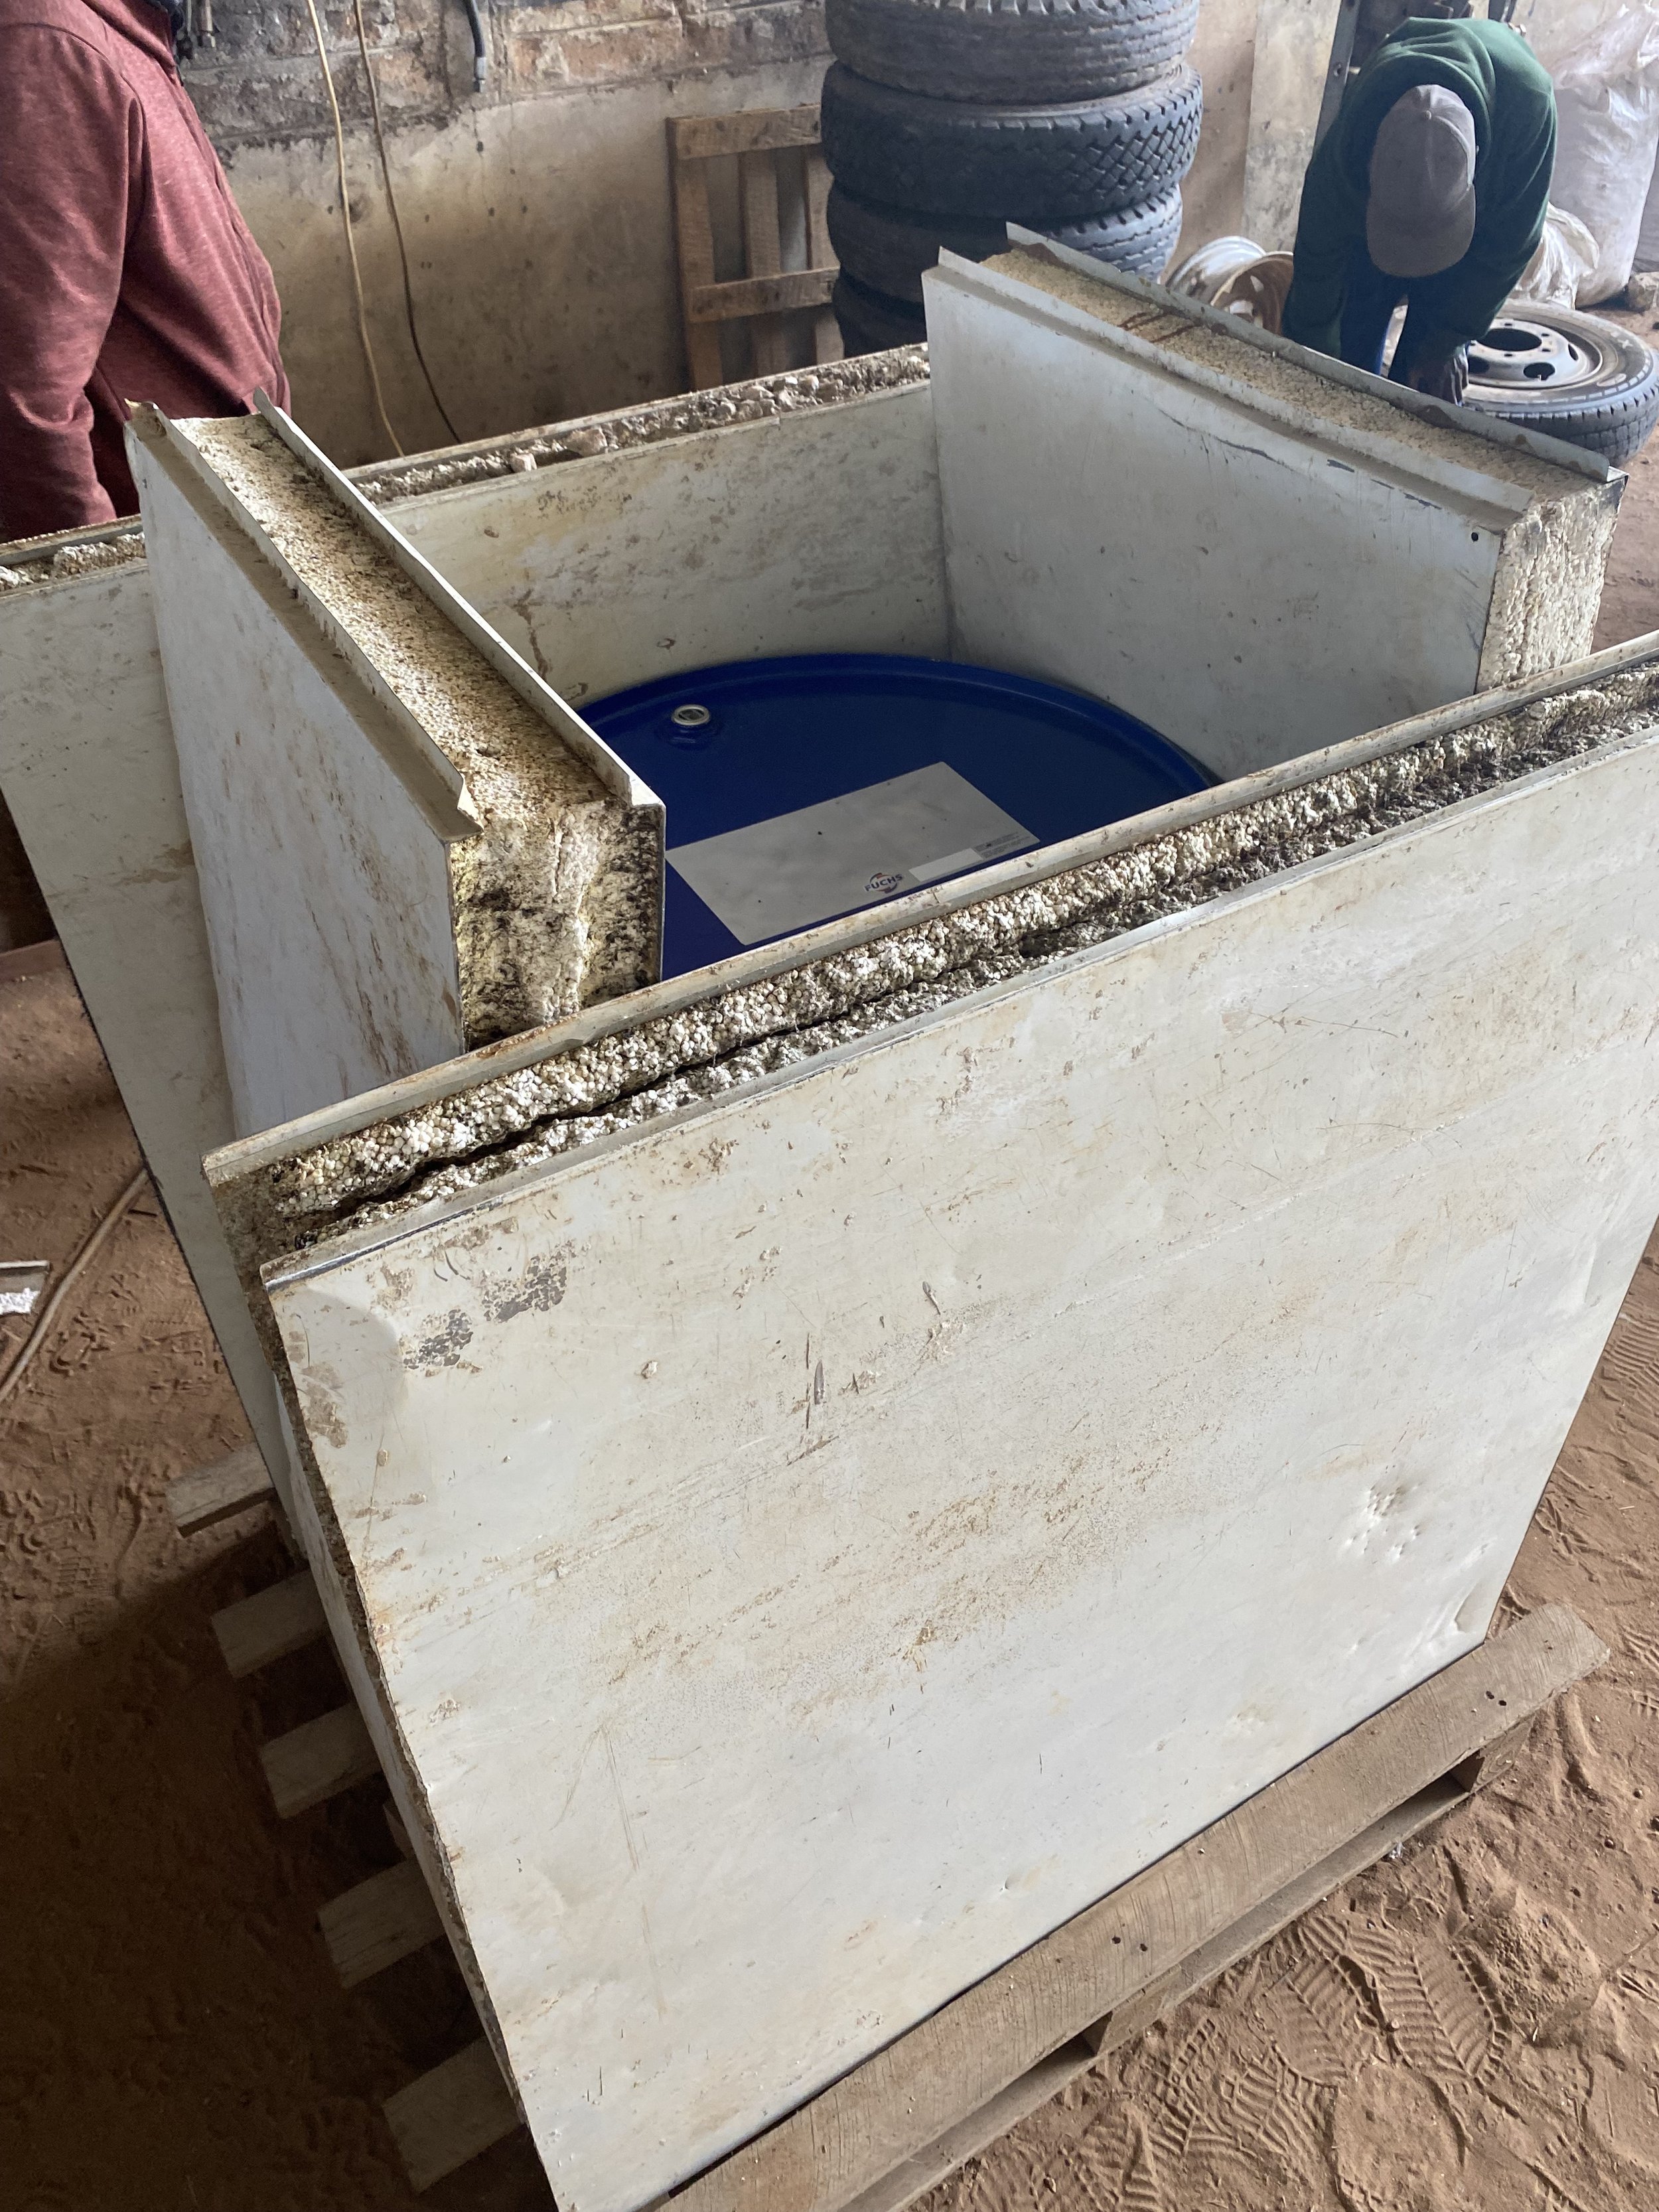
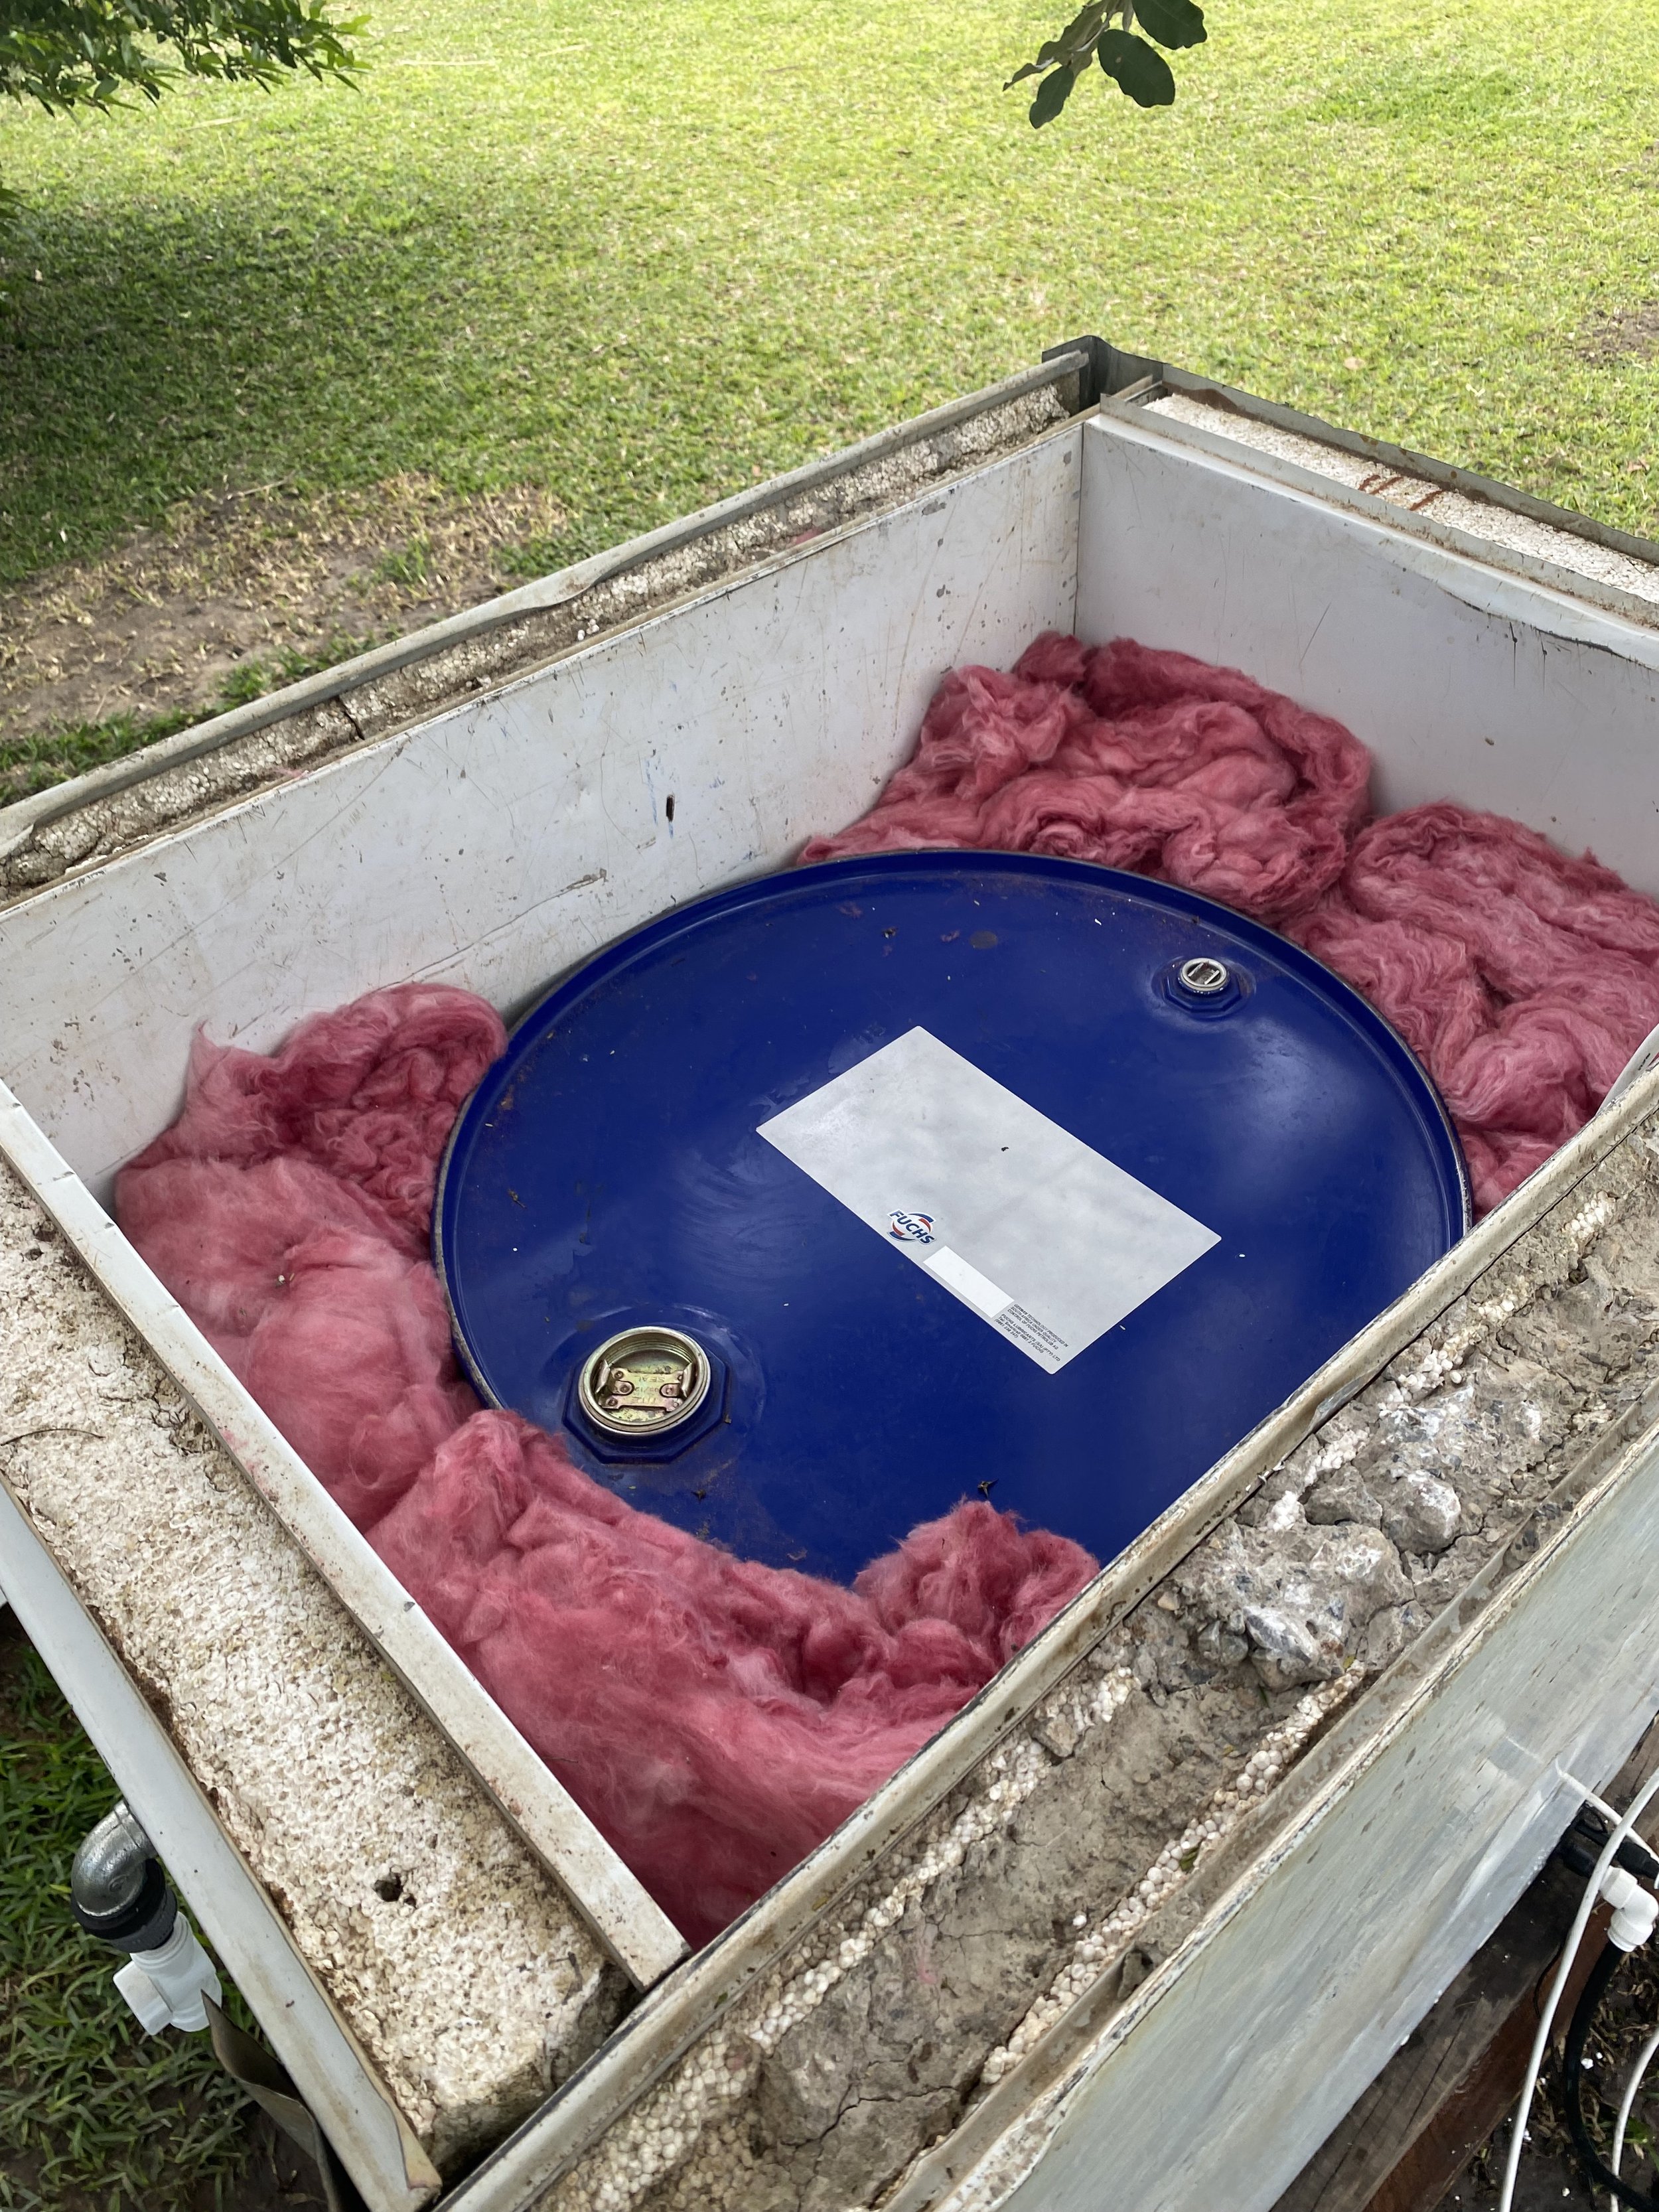
4. Outer Structure Assembly: Cutting the oddly shaped rigid insulation to size for the outer structure and placing it around the tank. With the use of old roofing as a bracketing to hold the structure together. Holes were drilled into the structure for piping and electrical sensor cables to be fed through.
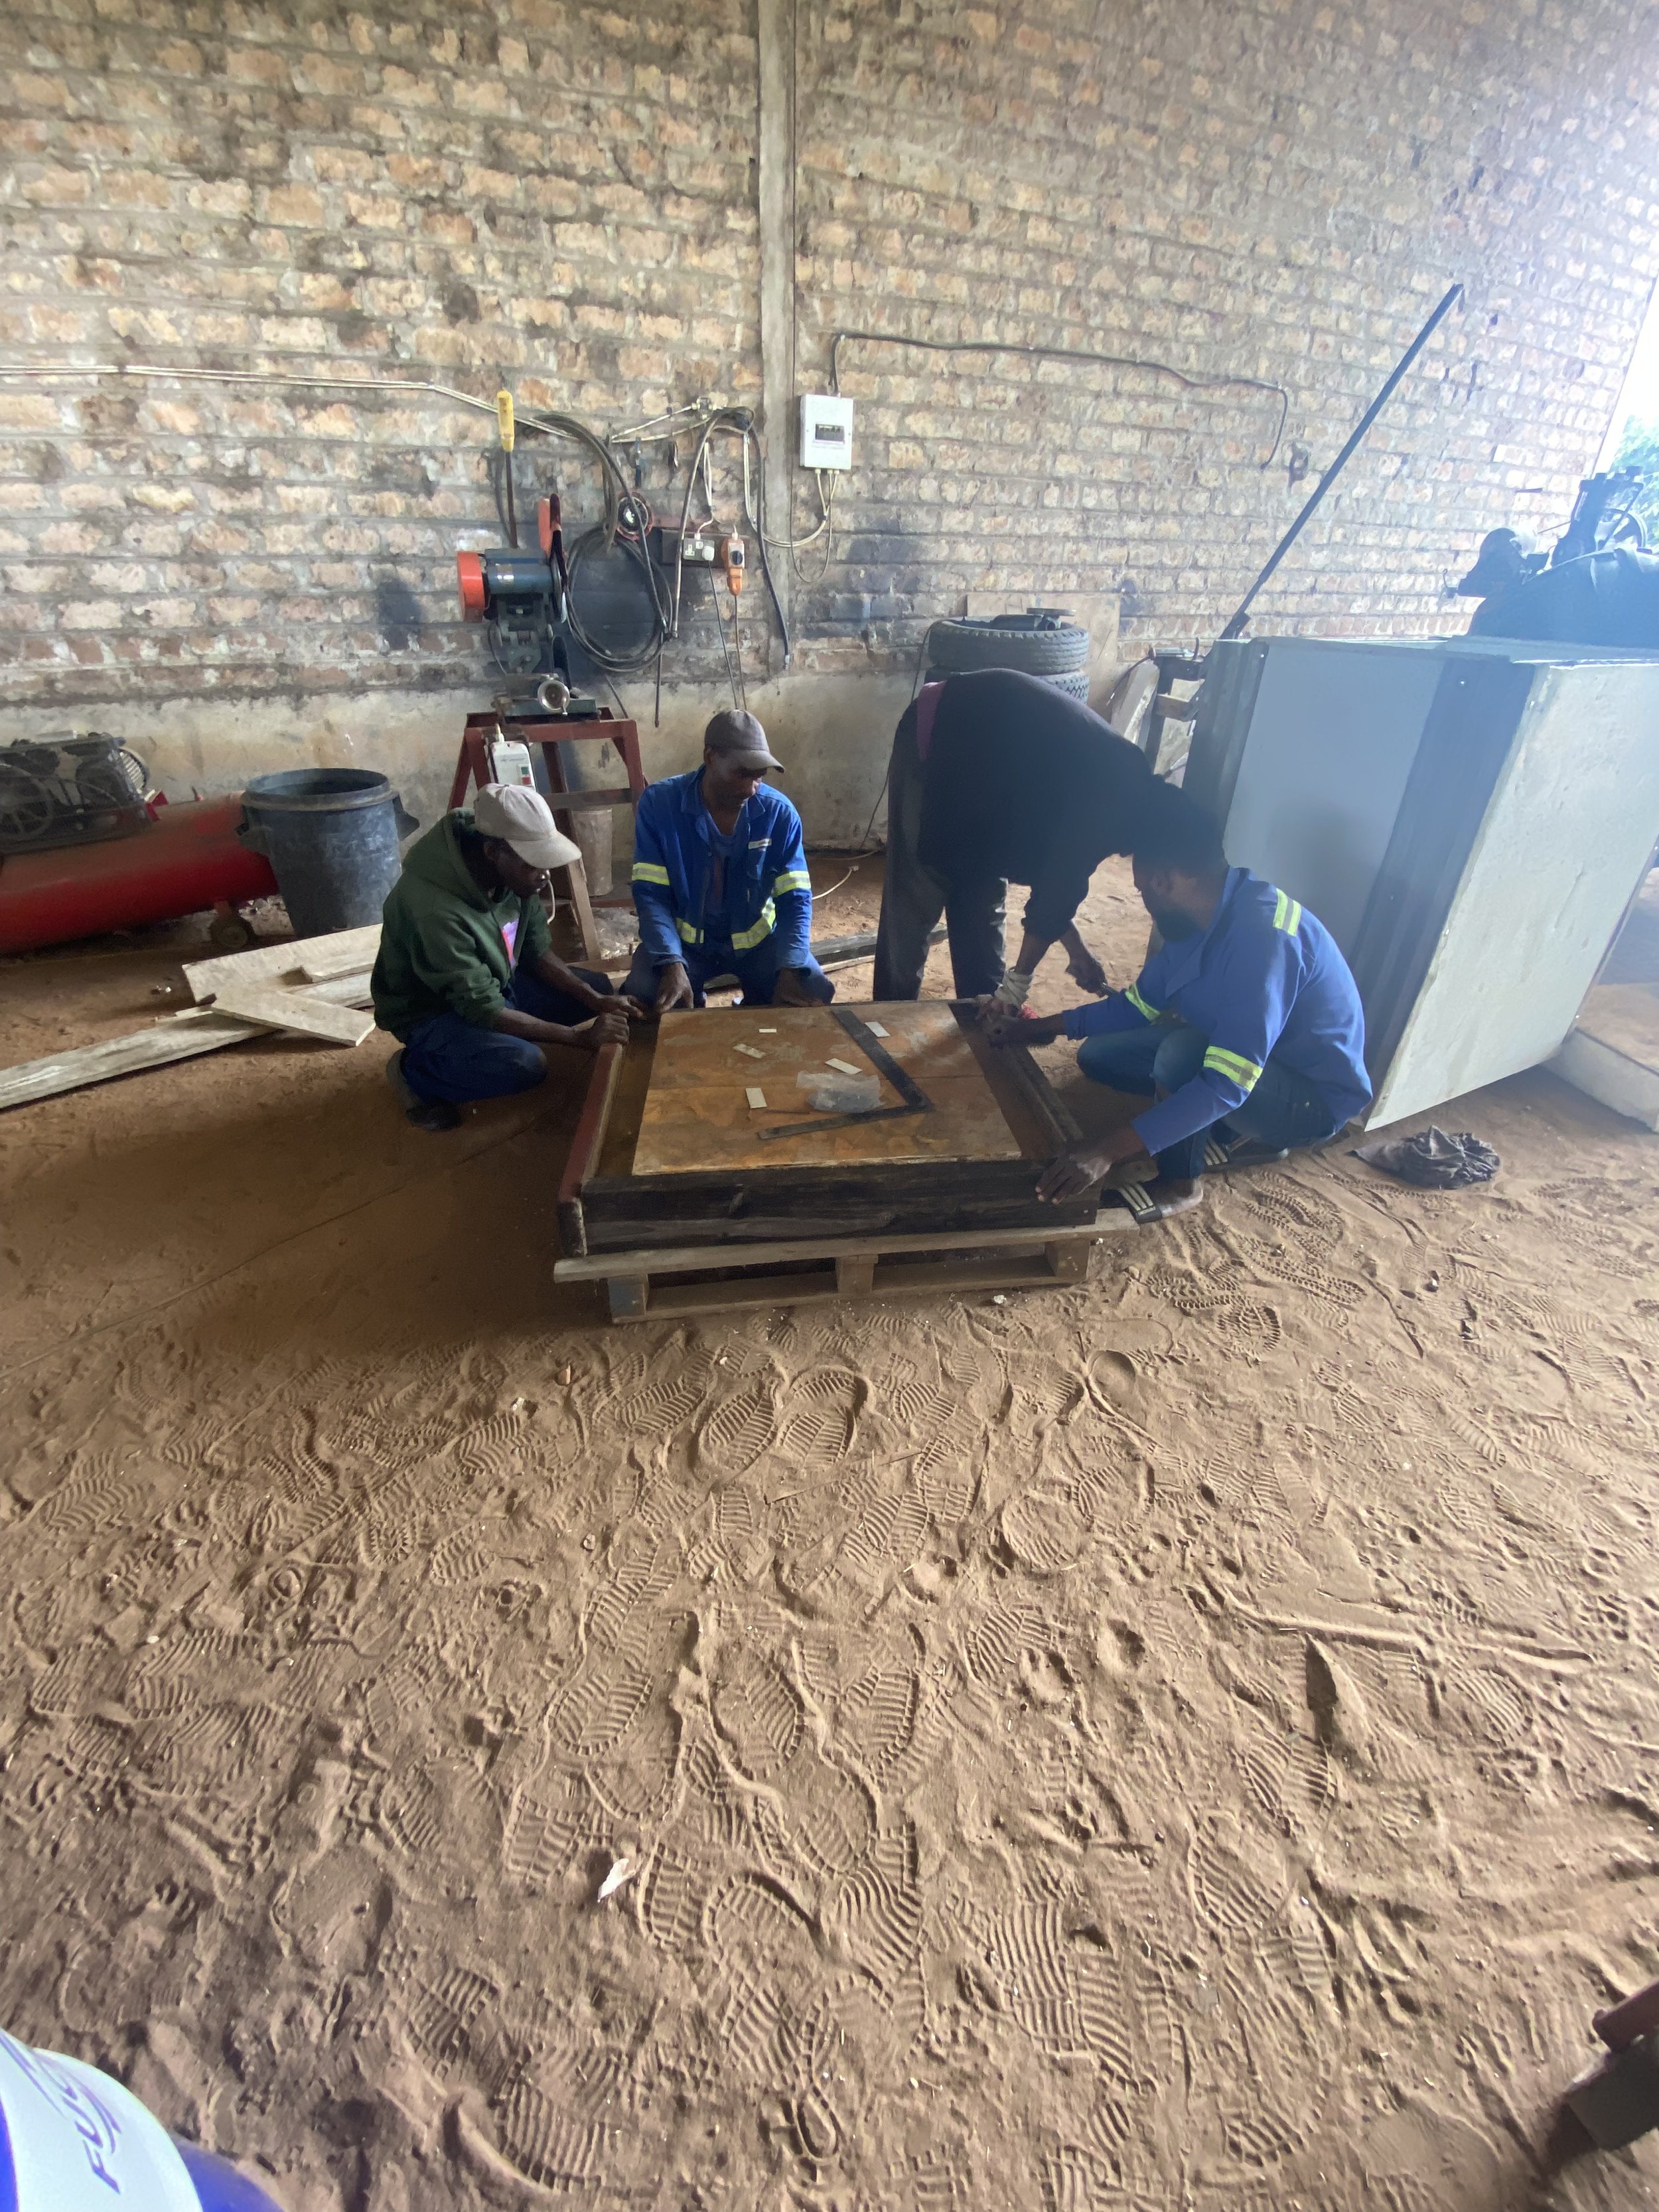
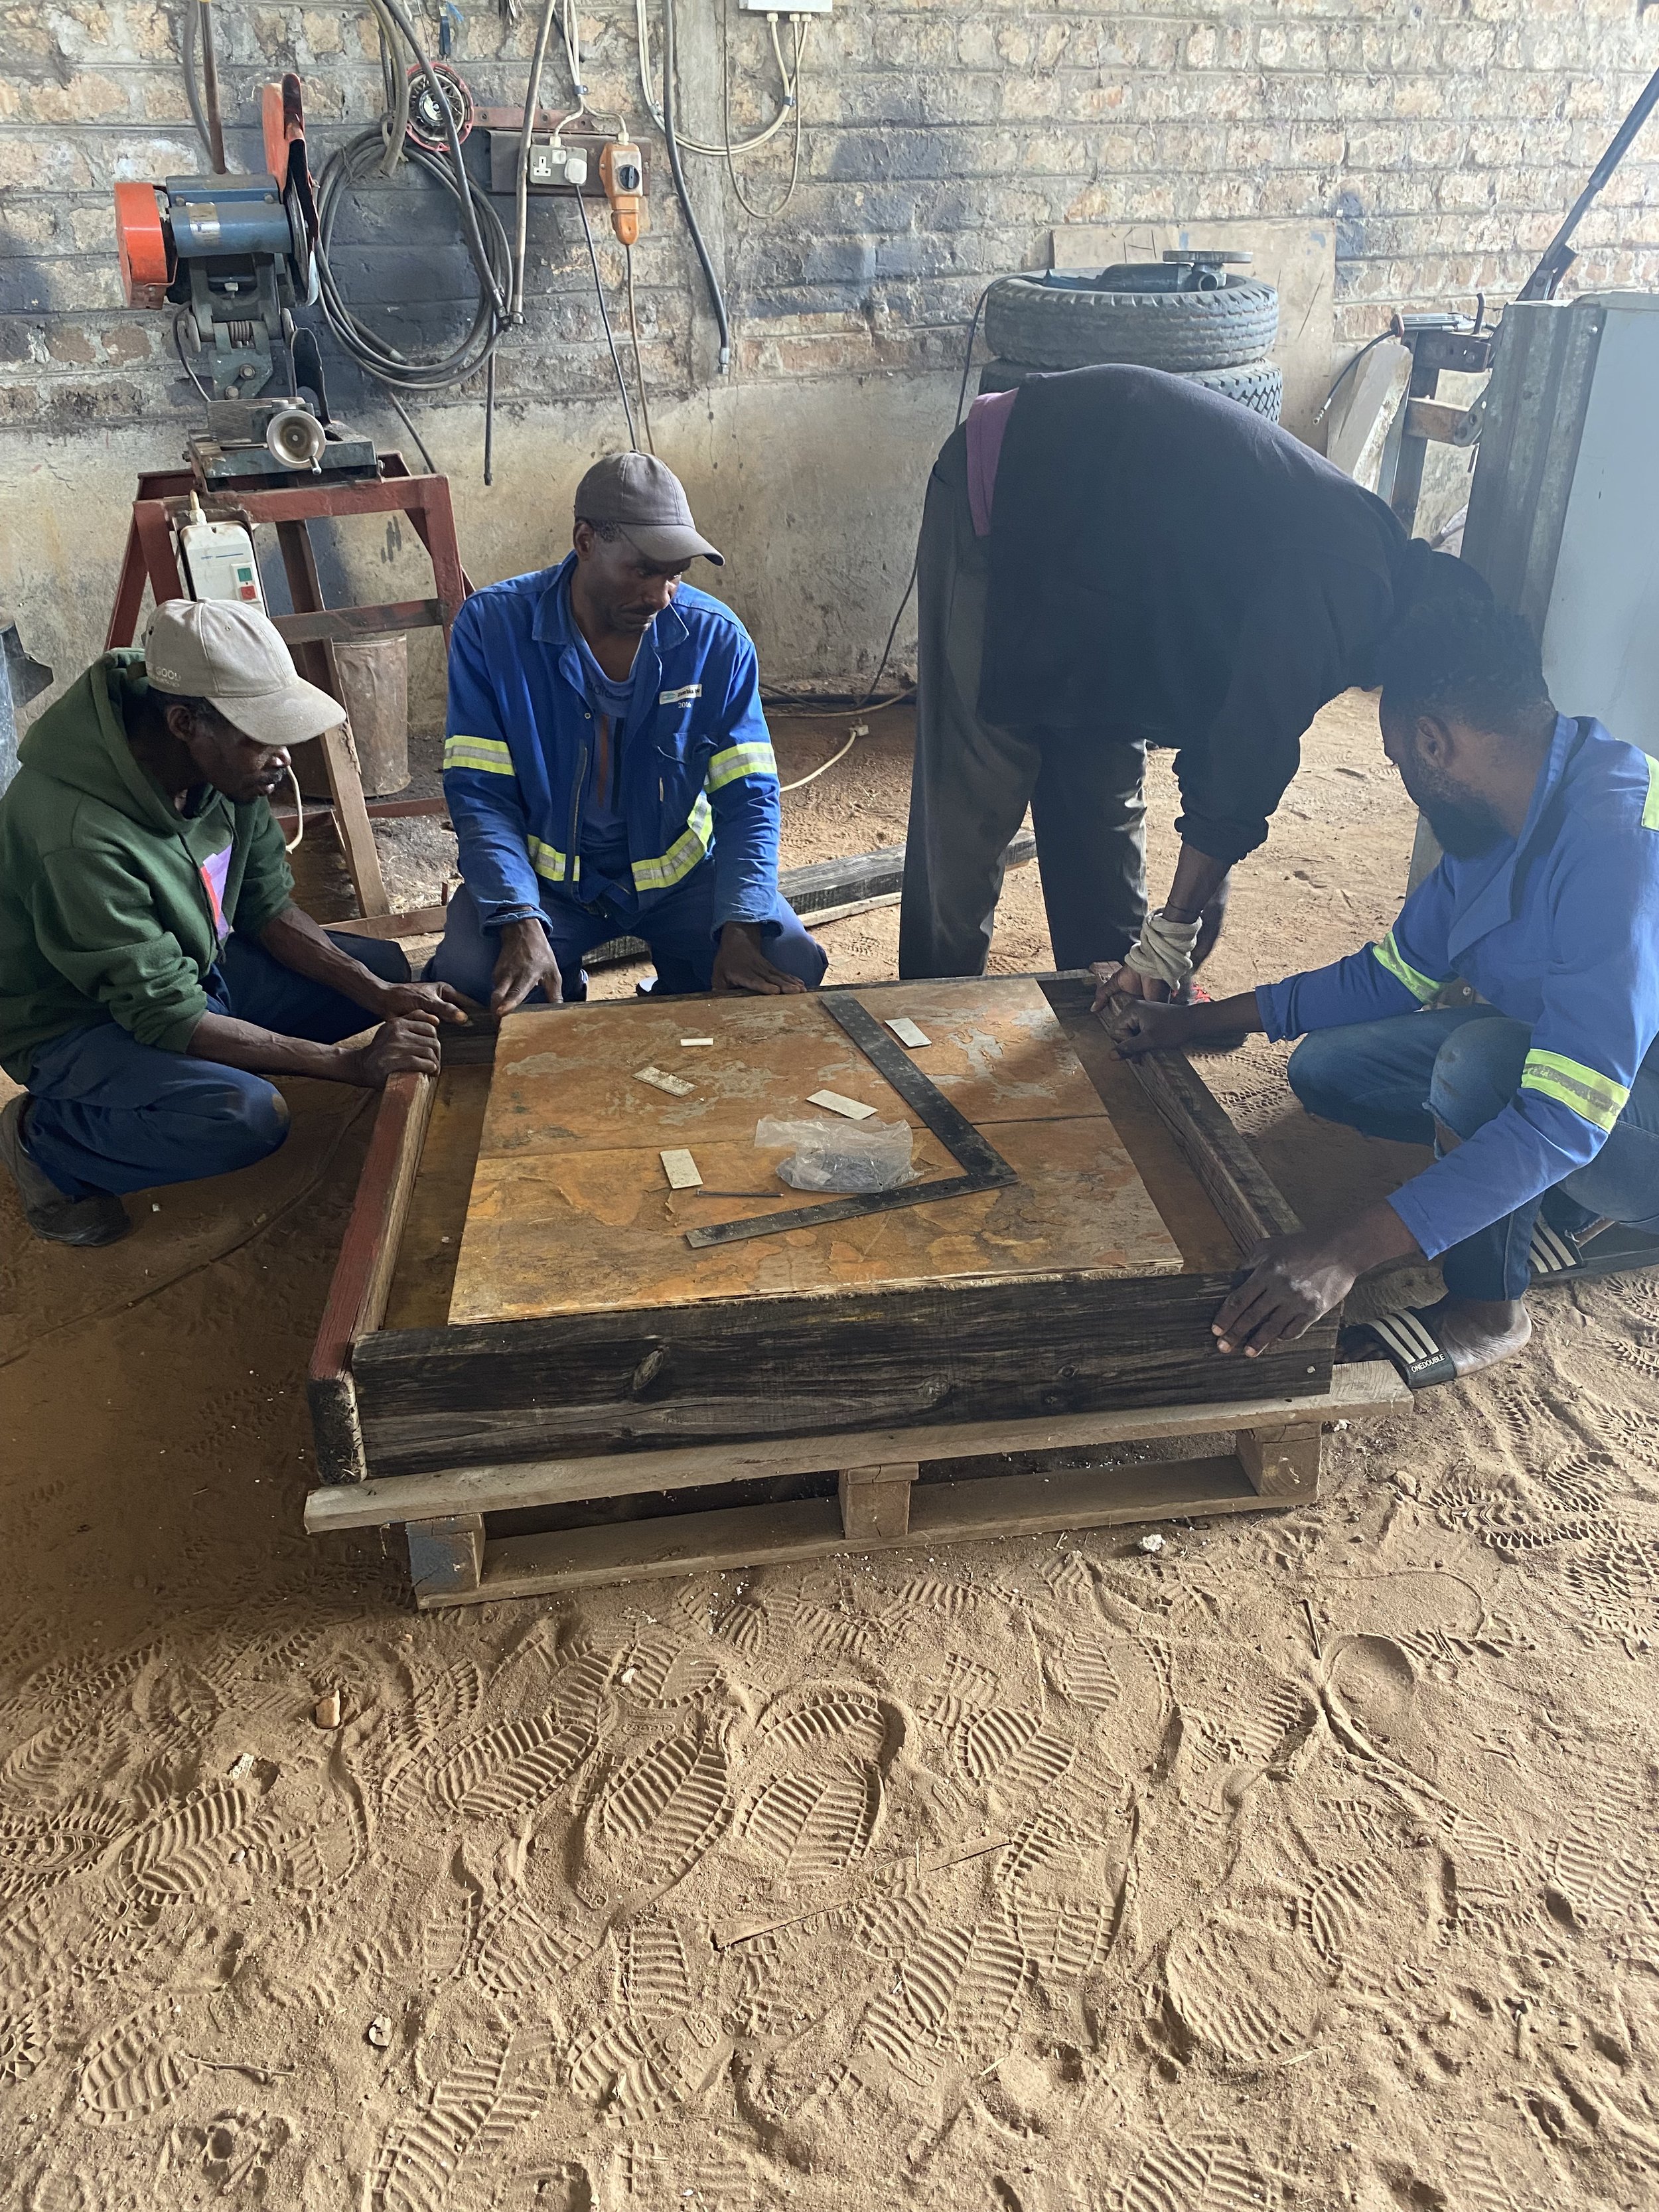
5. Base Assembly: A base was needed for the structure to be built on top of, which will allow for easier transport too. I simply used a wooden pallet and a few planks.
6. Roof Assembly: Using some old tobacco slat packs and a bit of old roofing, I built a frame and nailed the roof to it. This assembly will be placed on top of the outer structure.

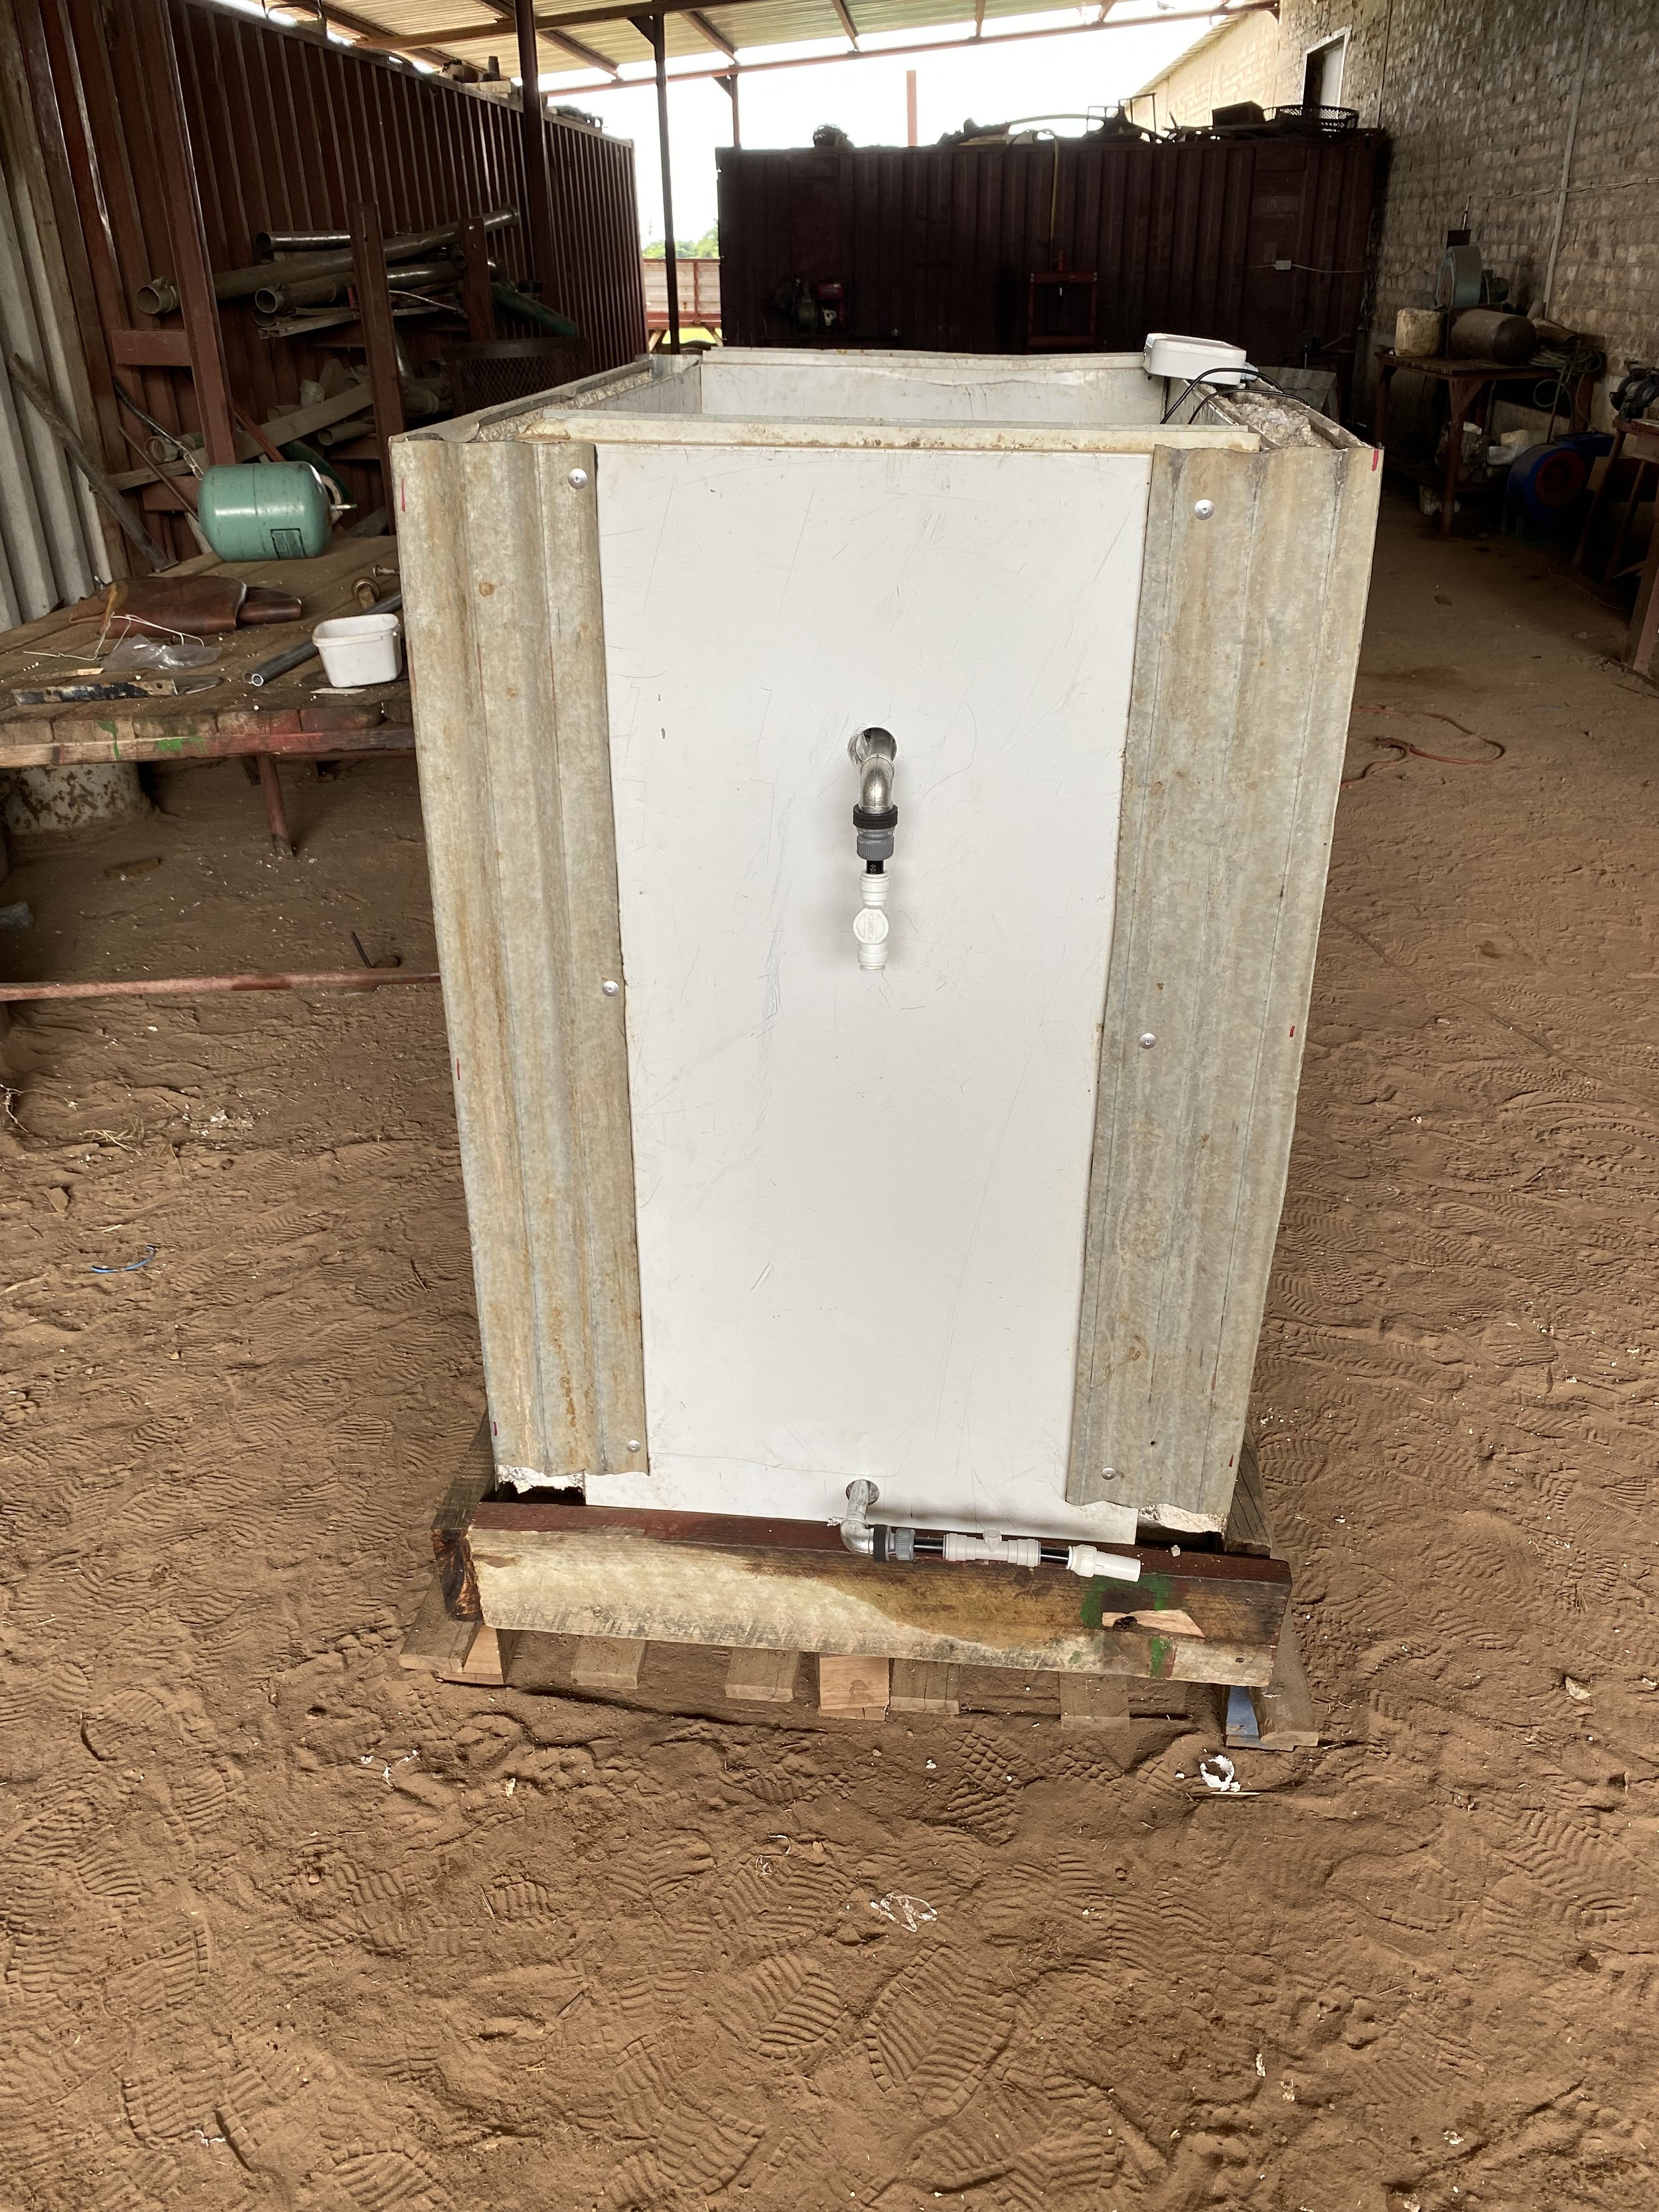
7. Plumbing: The grey tank fittings will be screwed into the sockets that have been brazed onto the tank. From there the piping and DC pump can be plumbed into the system accordingly to complete the solar direct loop. I fitted valves to the cold feed and hot supply.
8. Solar Controller: Next I installed the solar controller and placed the temperature sensors into the sensor pockets in the tank. Plugged the pump into the controller and the controller into a power supply.

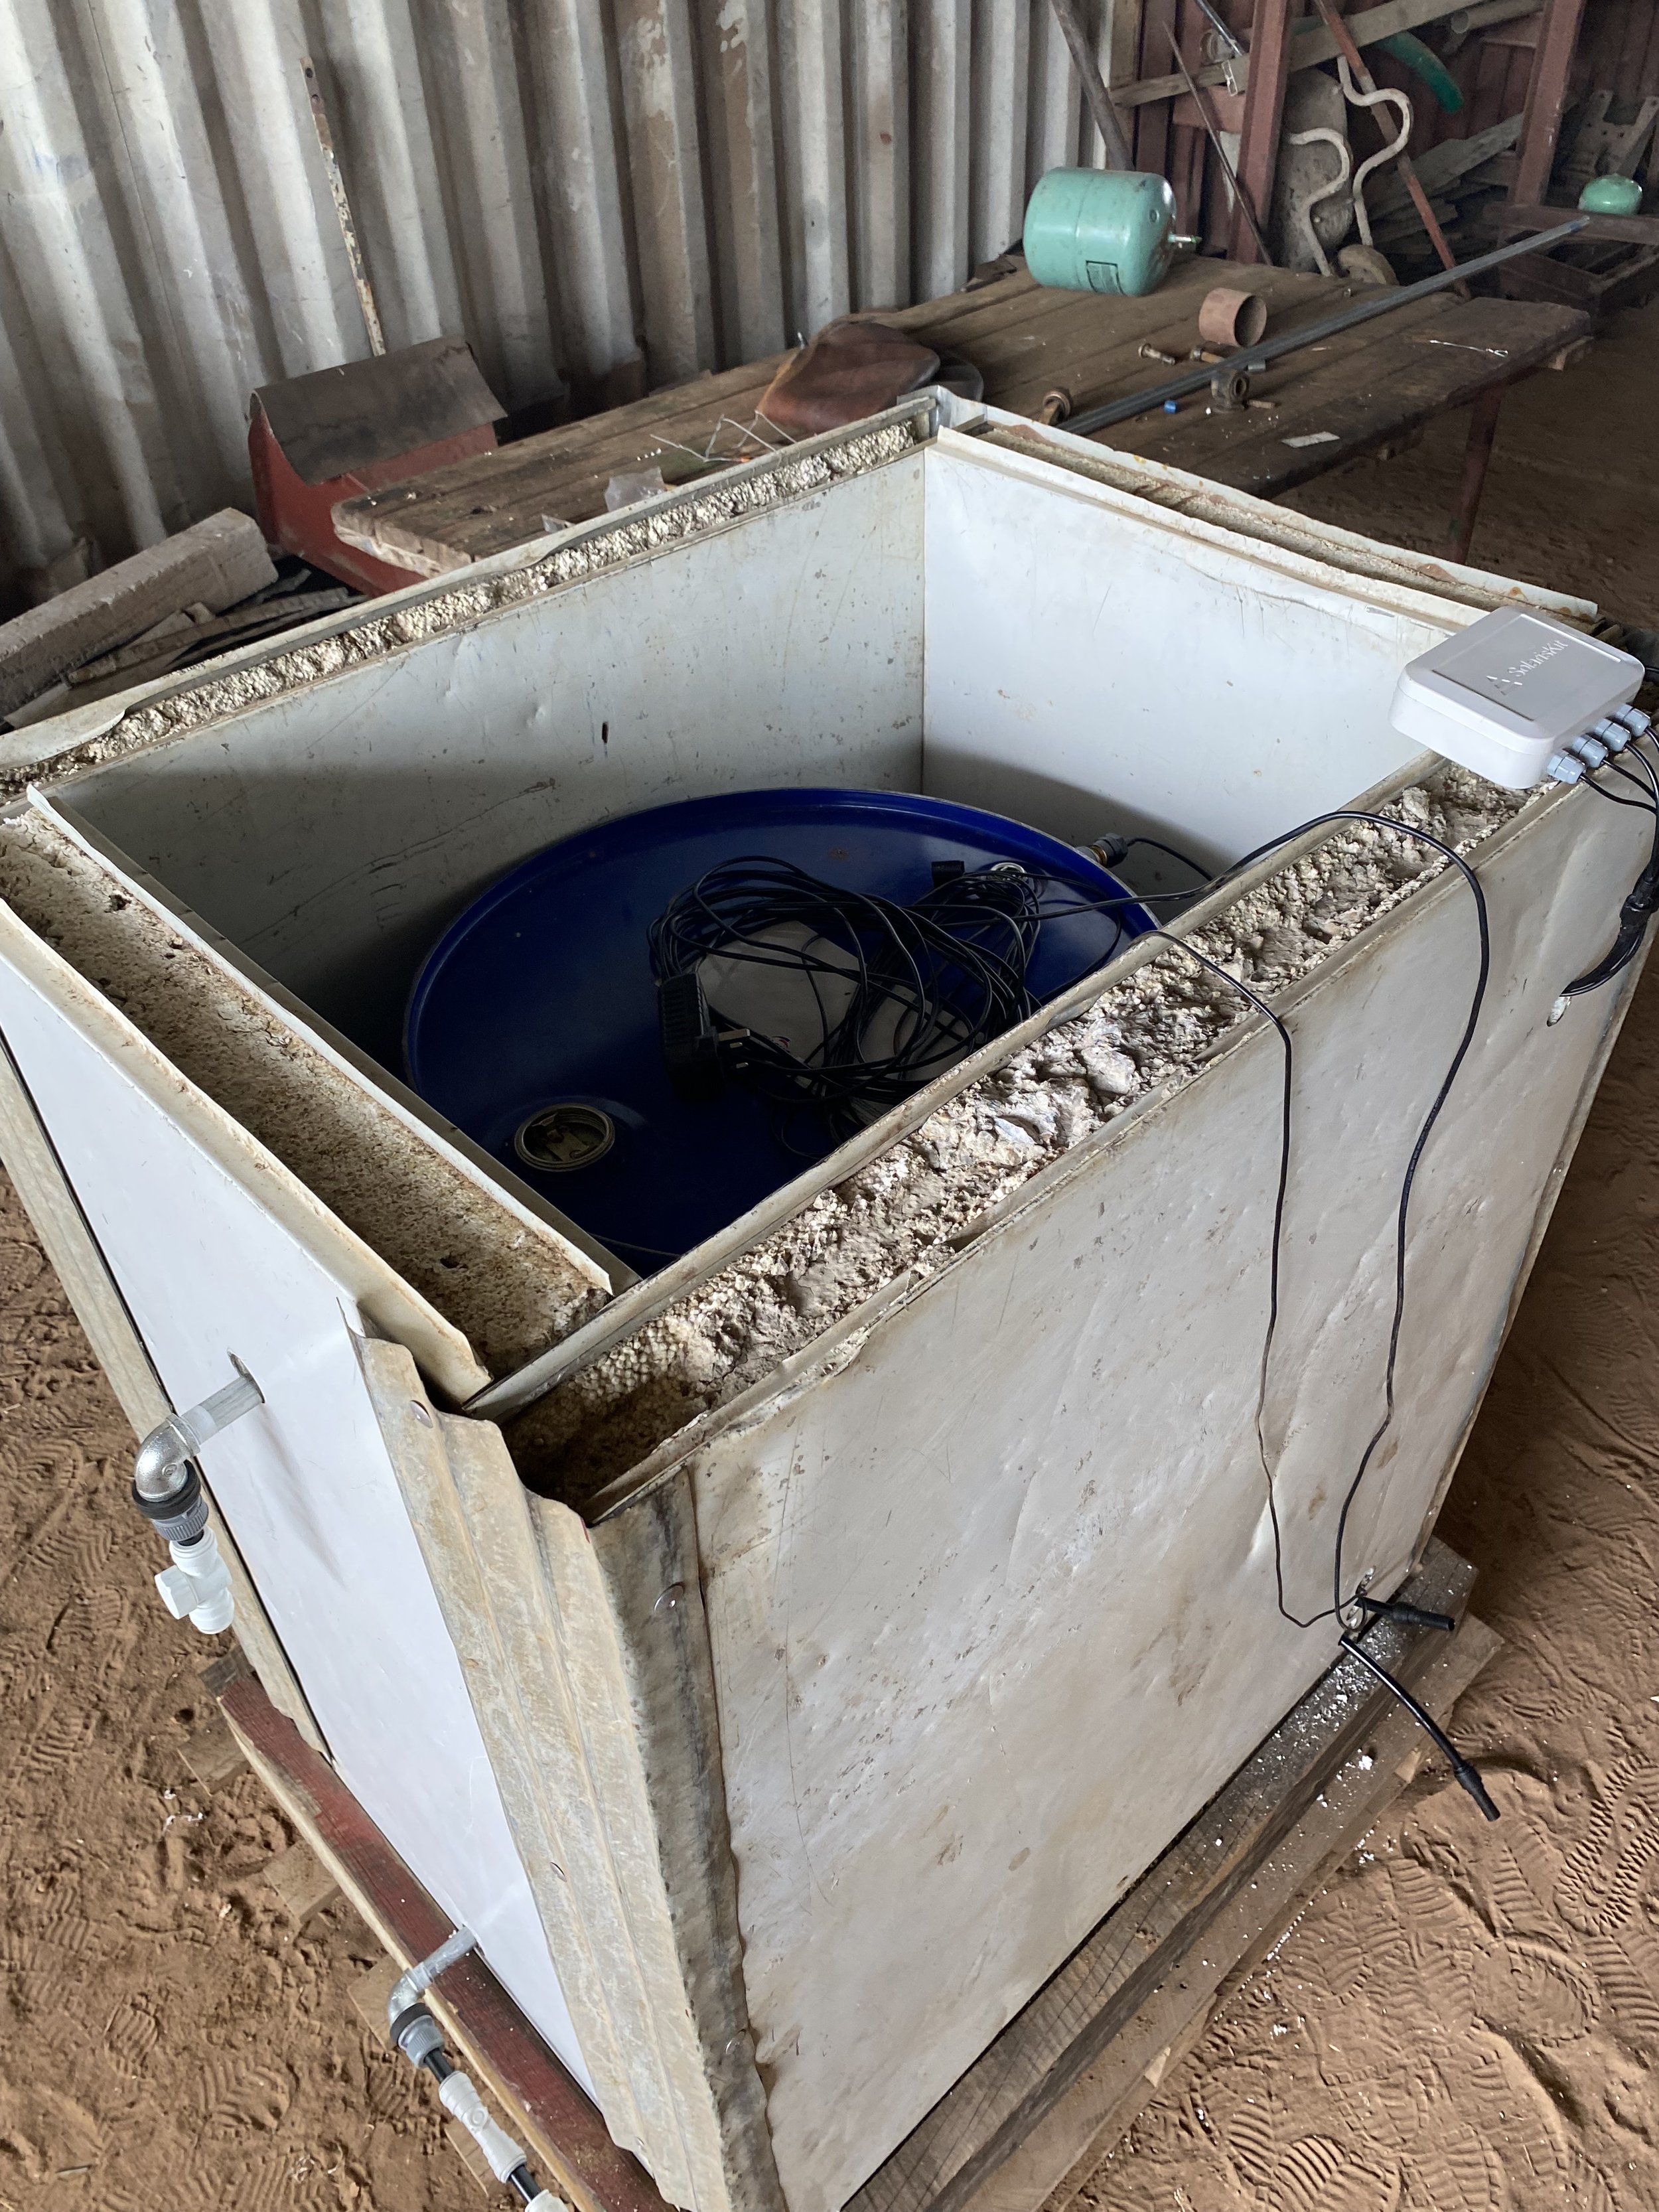
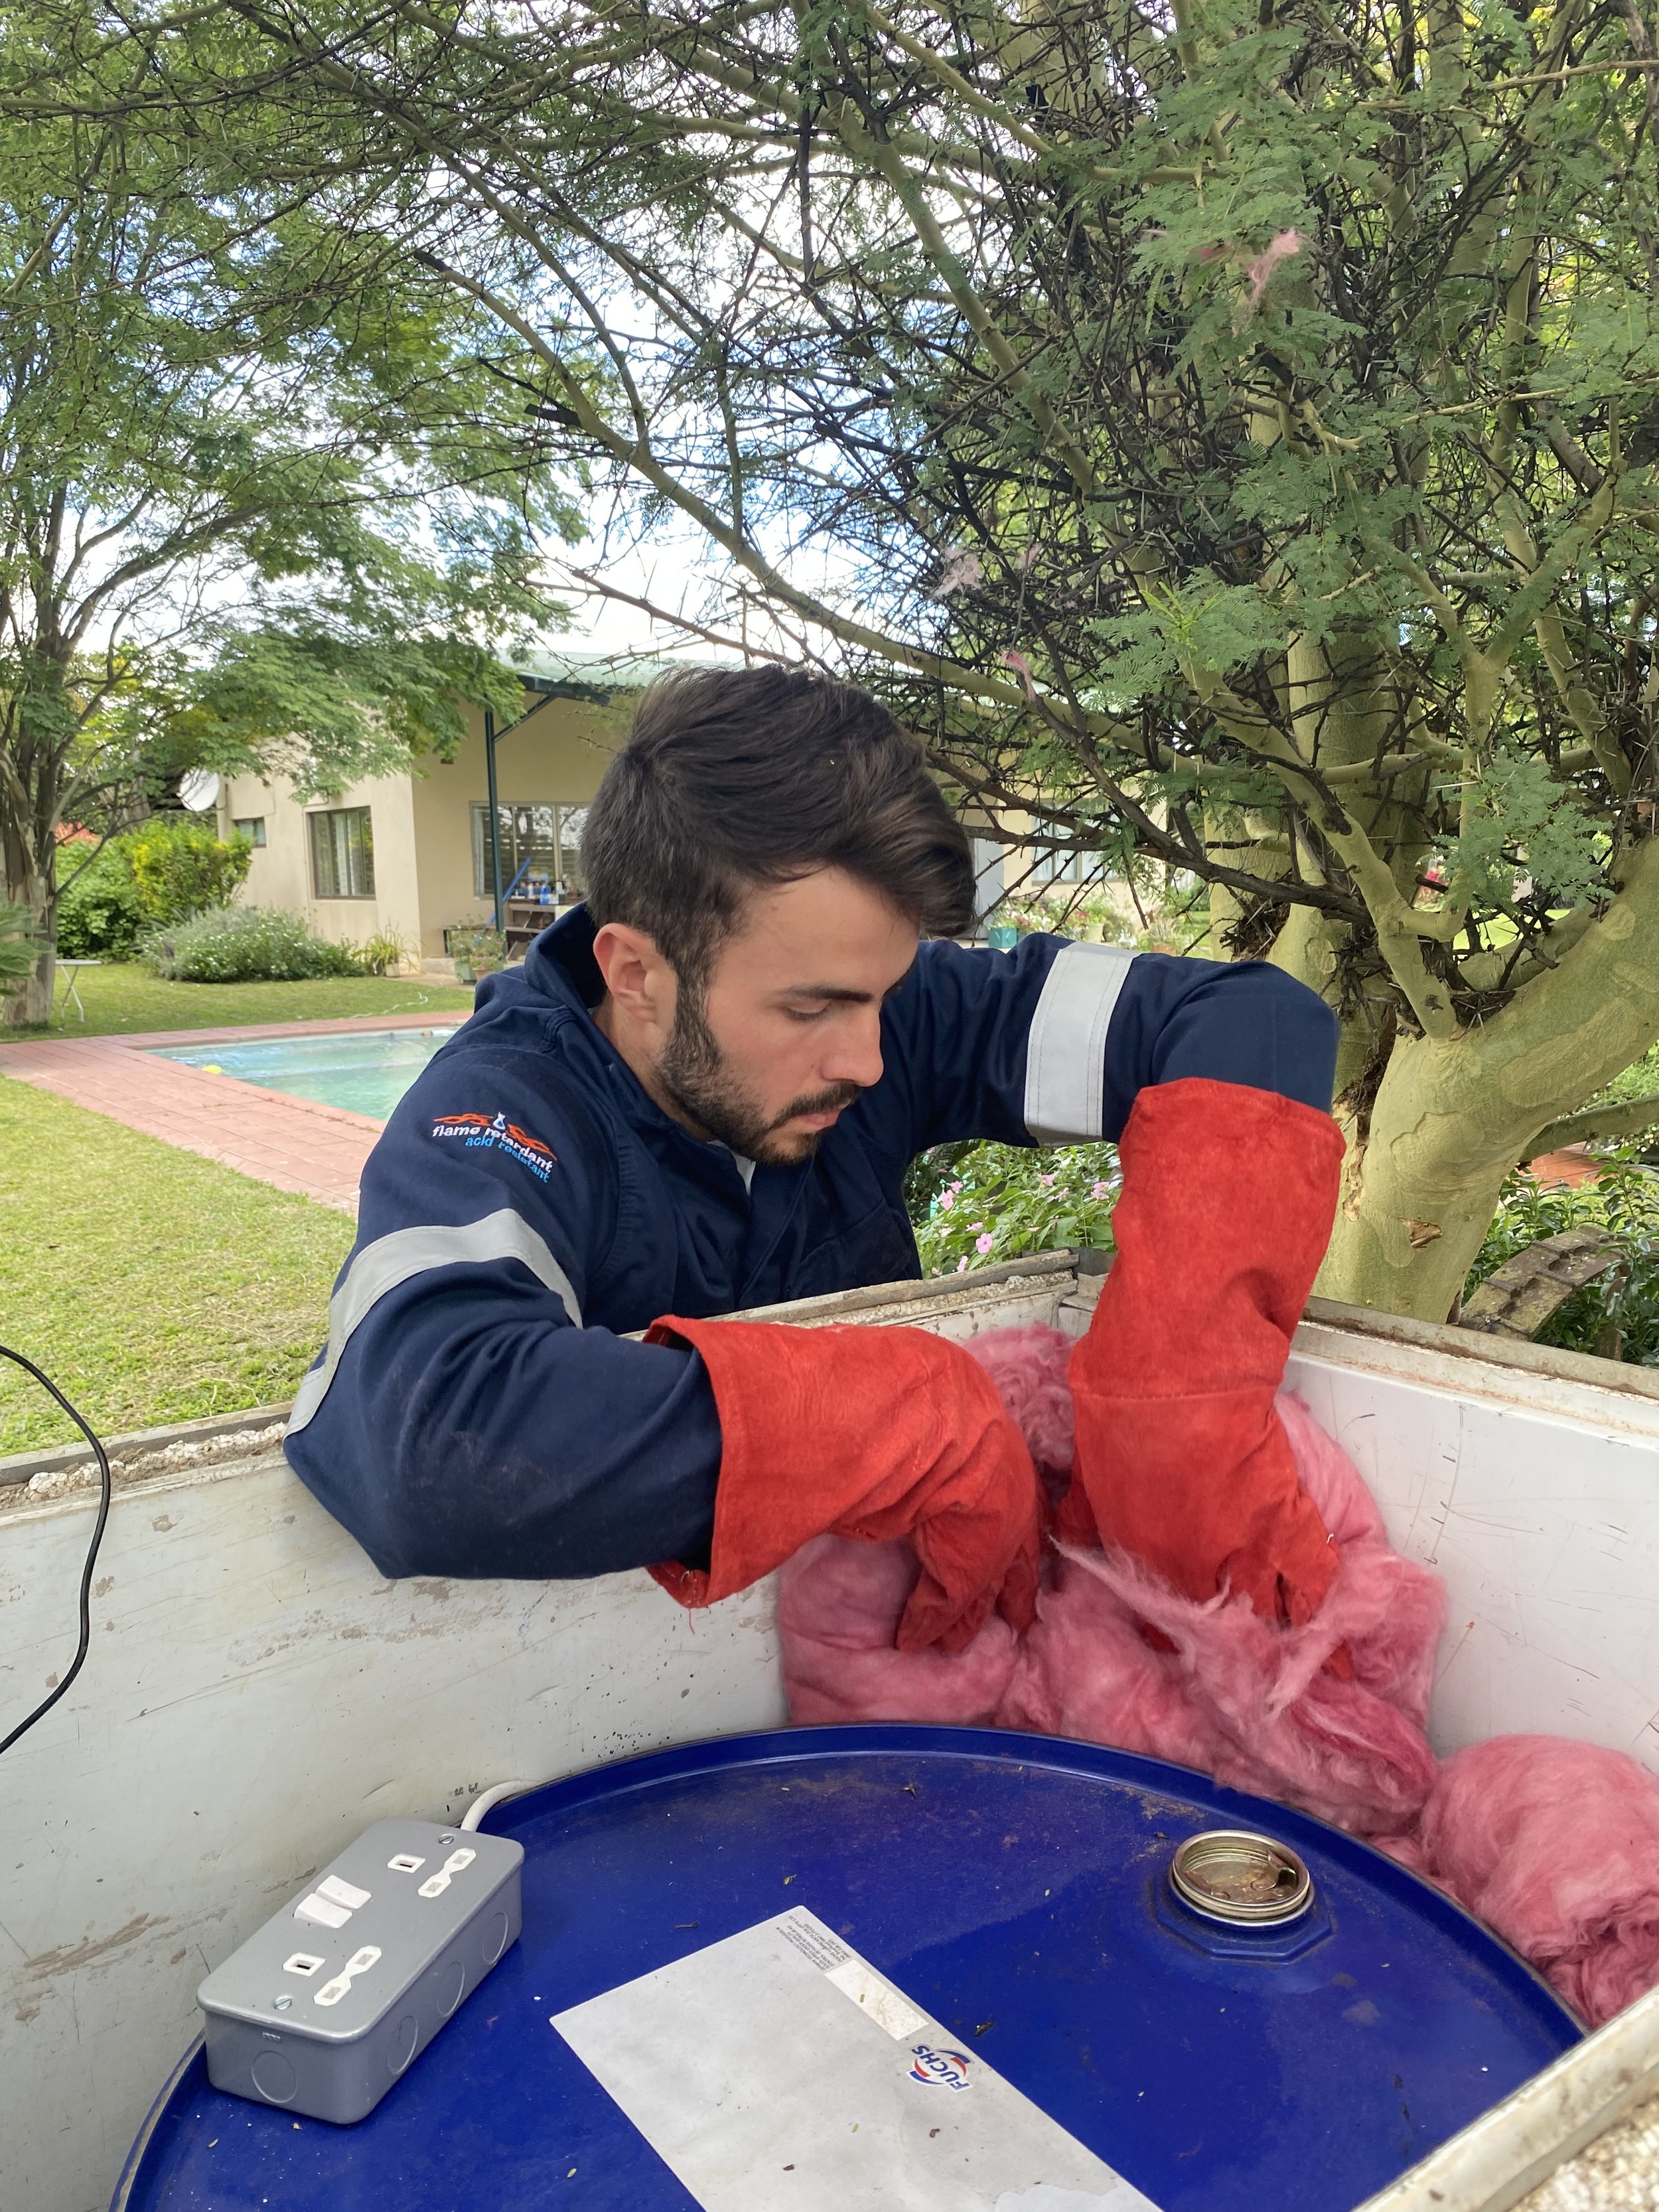
9. Insulating: Now that I was ready to seal off the tank, as all plumbing and electrical work is done. I measured out the insulation into 5 pieces of 2x2m, 4 for the corners and 1 for the top of the tank. I then stuffed the sections into the cavities around the tank. I wore large gloves and a boiler suit to avoid skin irritation from the insulation, however, I later figured that the insulation did not make me itch as it had been improved compared to previous years.
10. Coupling to Collector Array: Connecting the solar flow and return between the collector array and the relevant pipes that are connected to the pump and the DC pump.
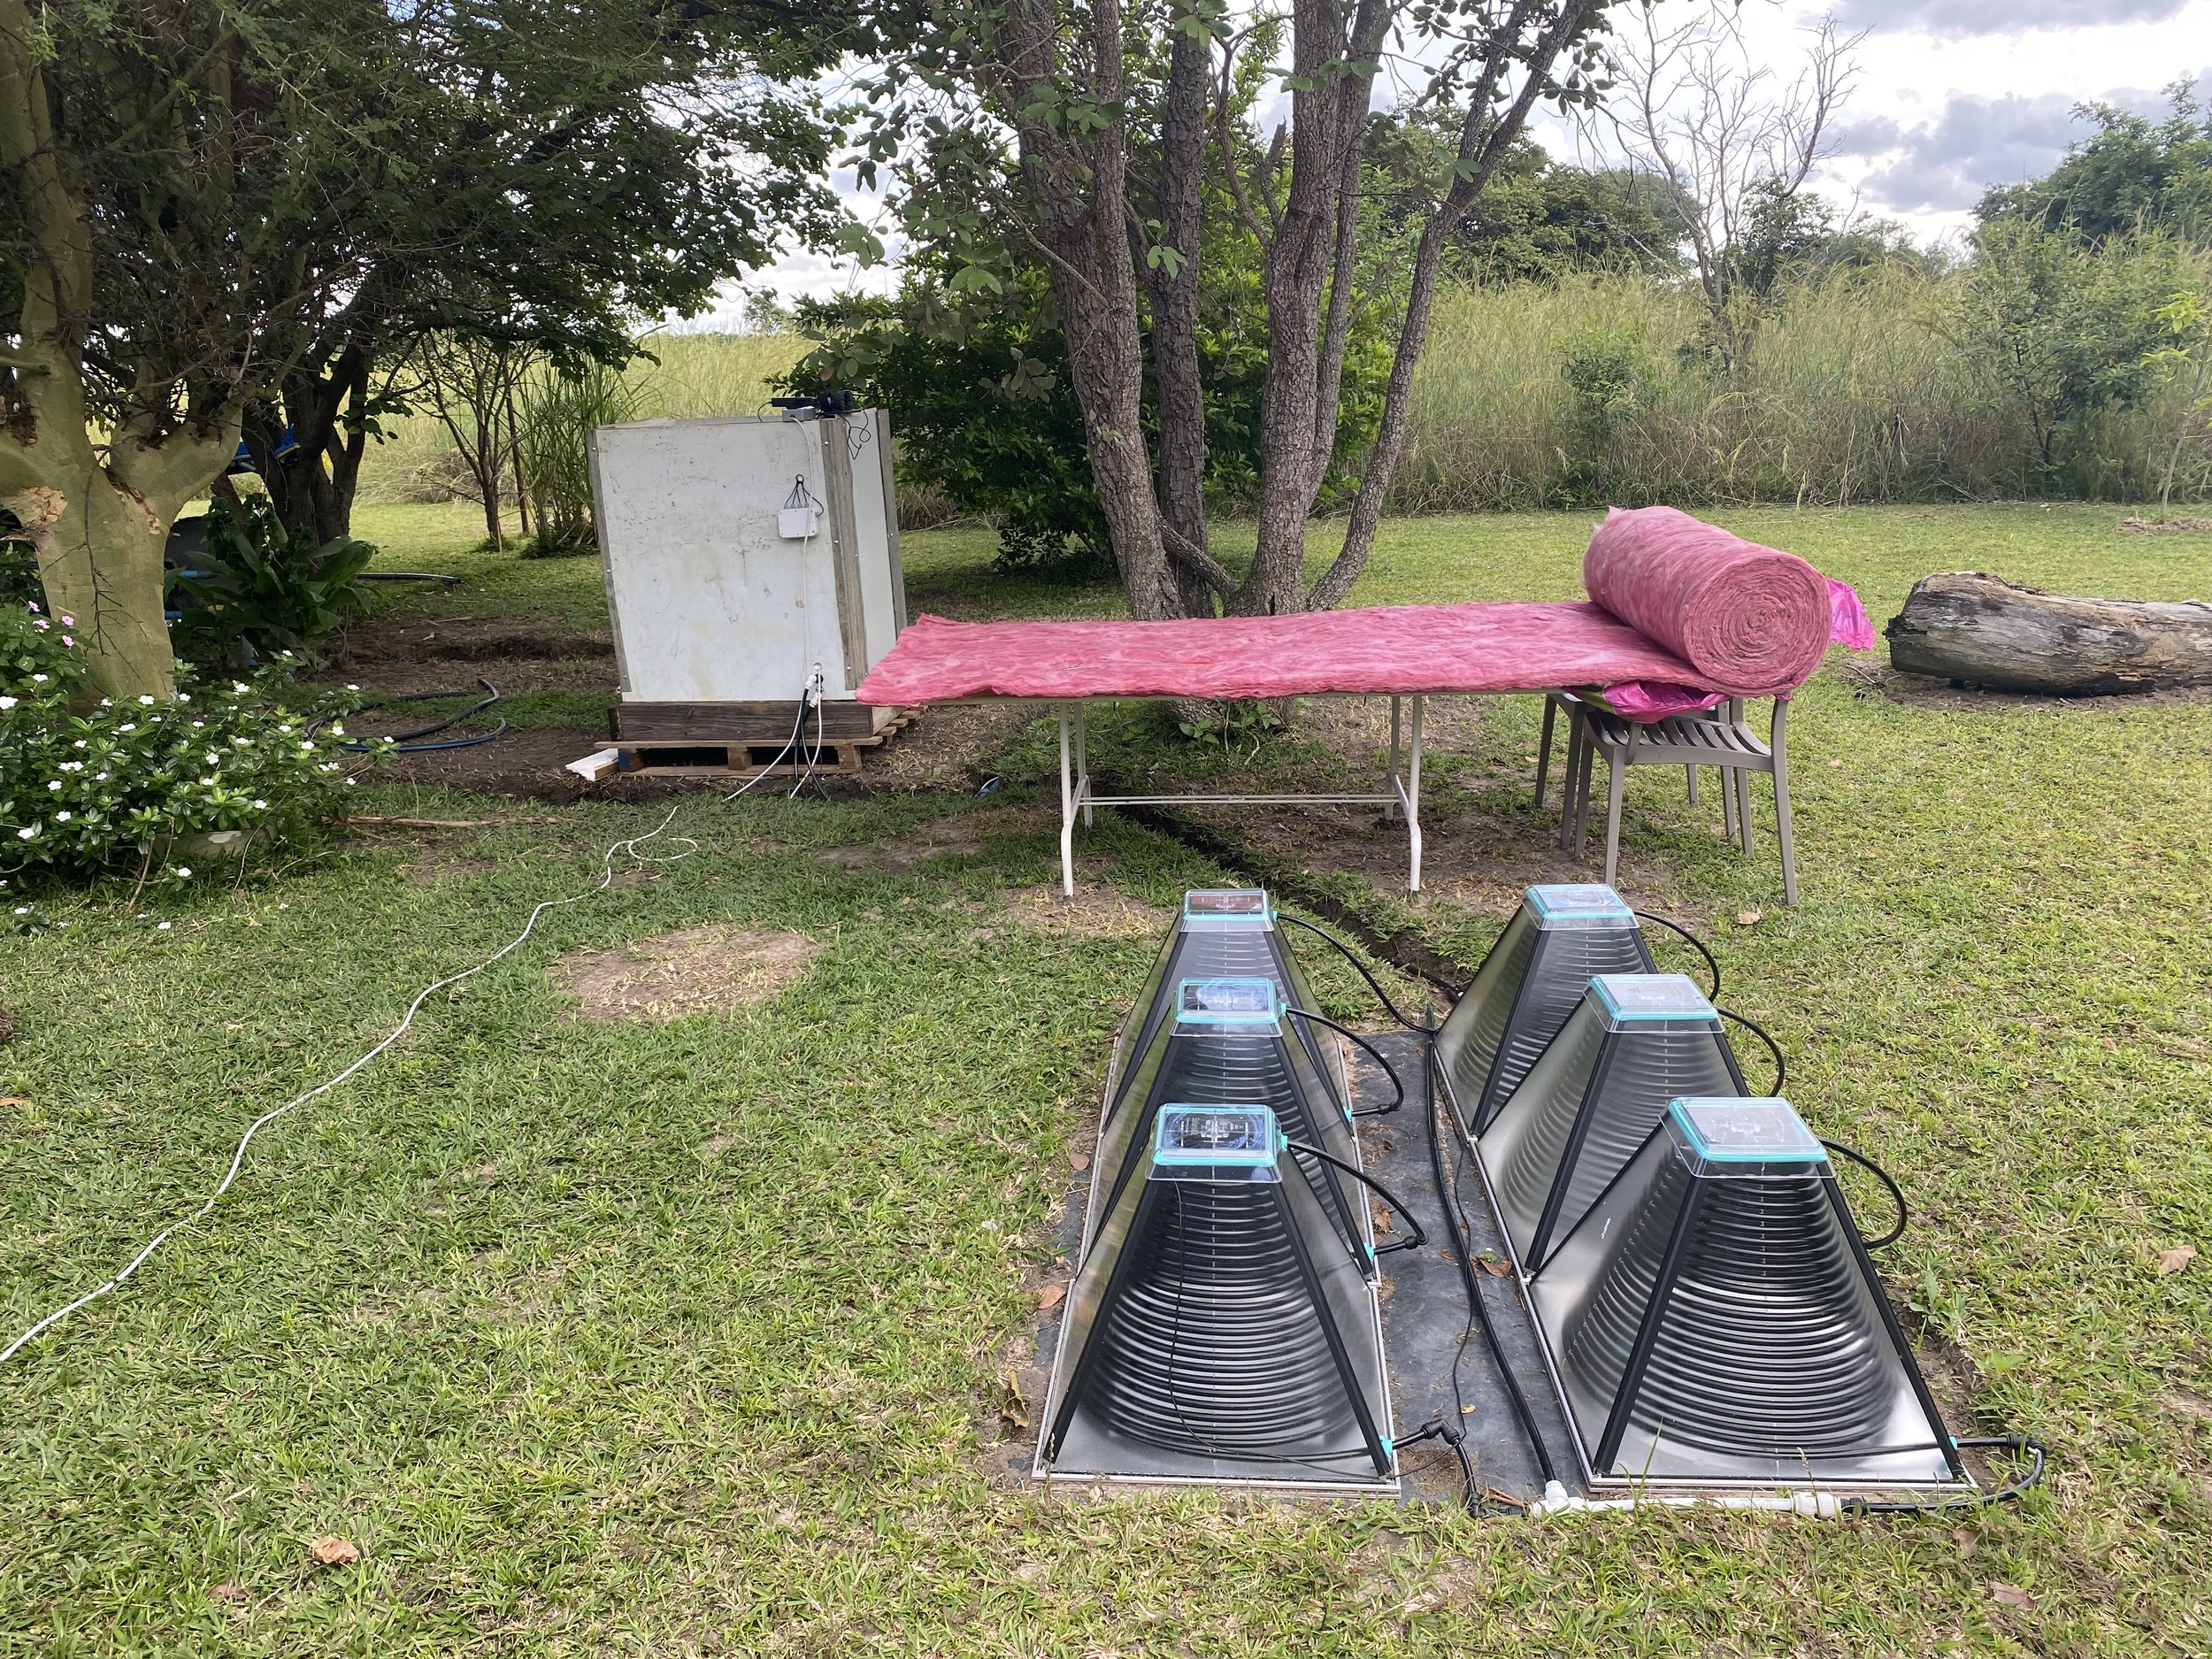
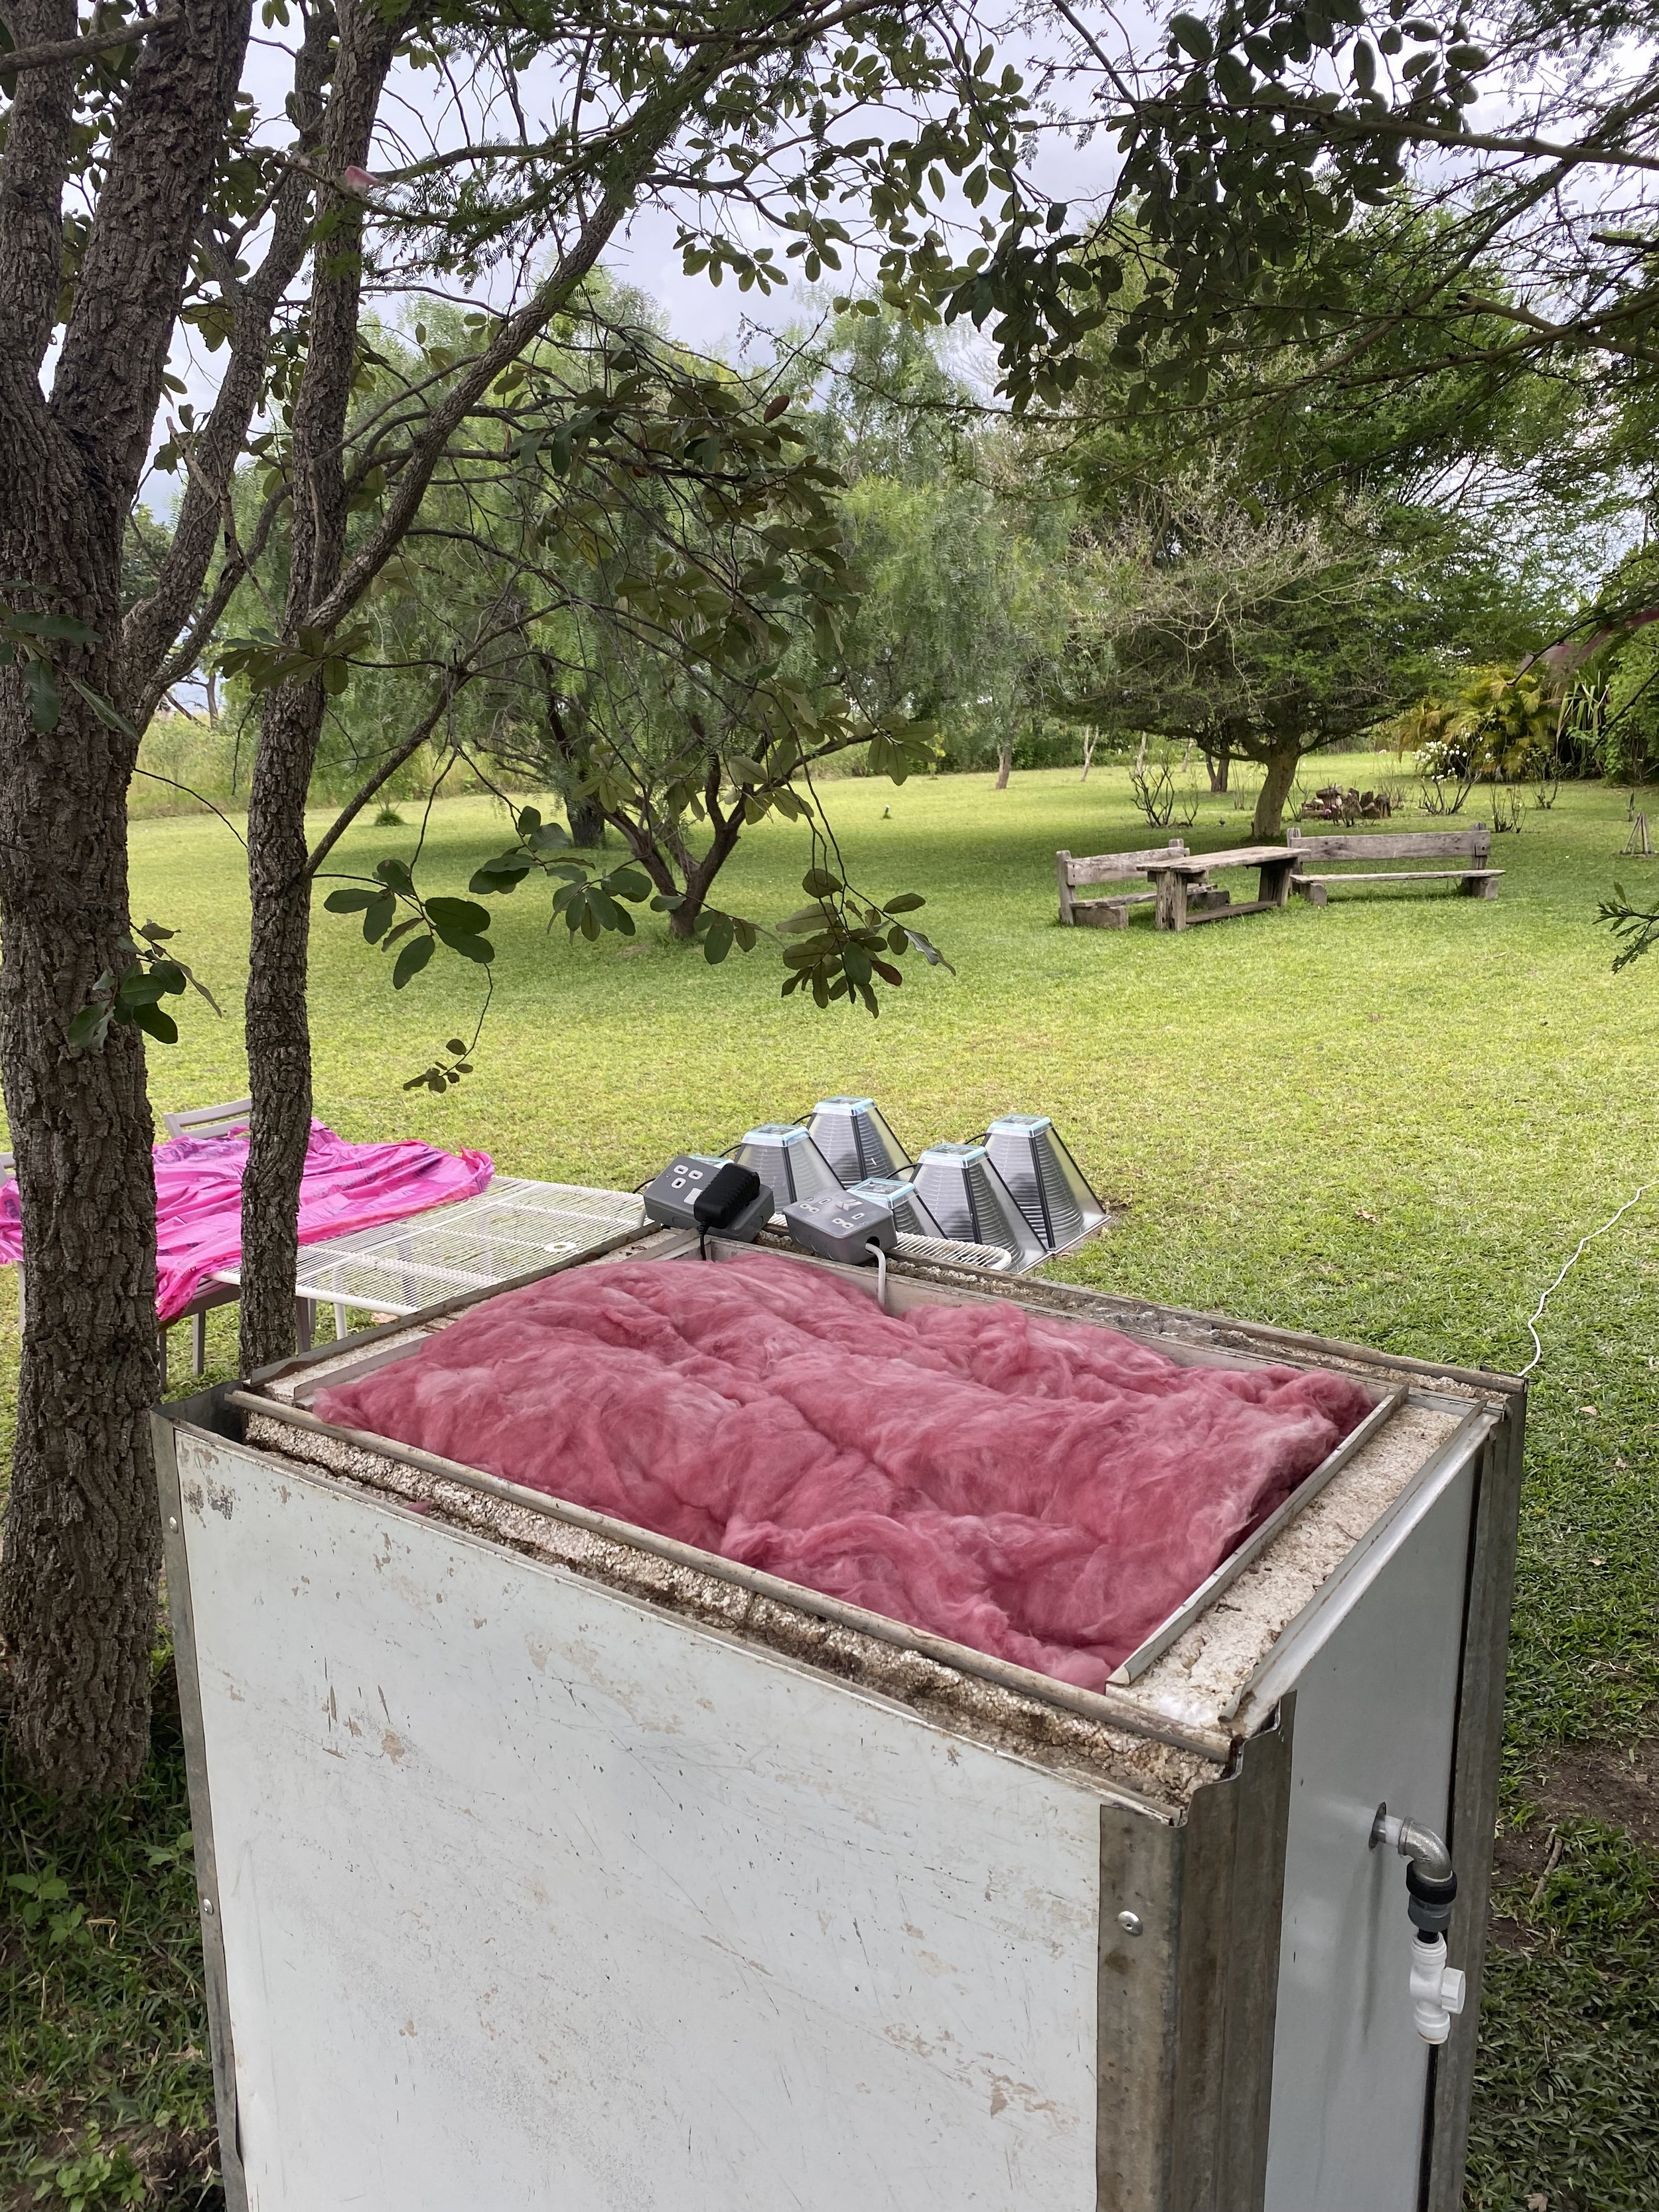
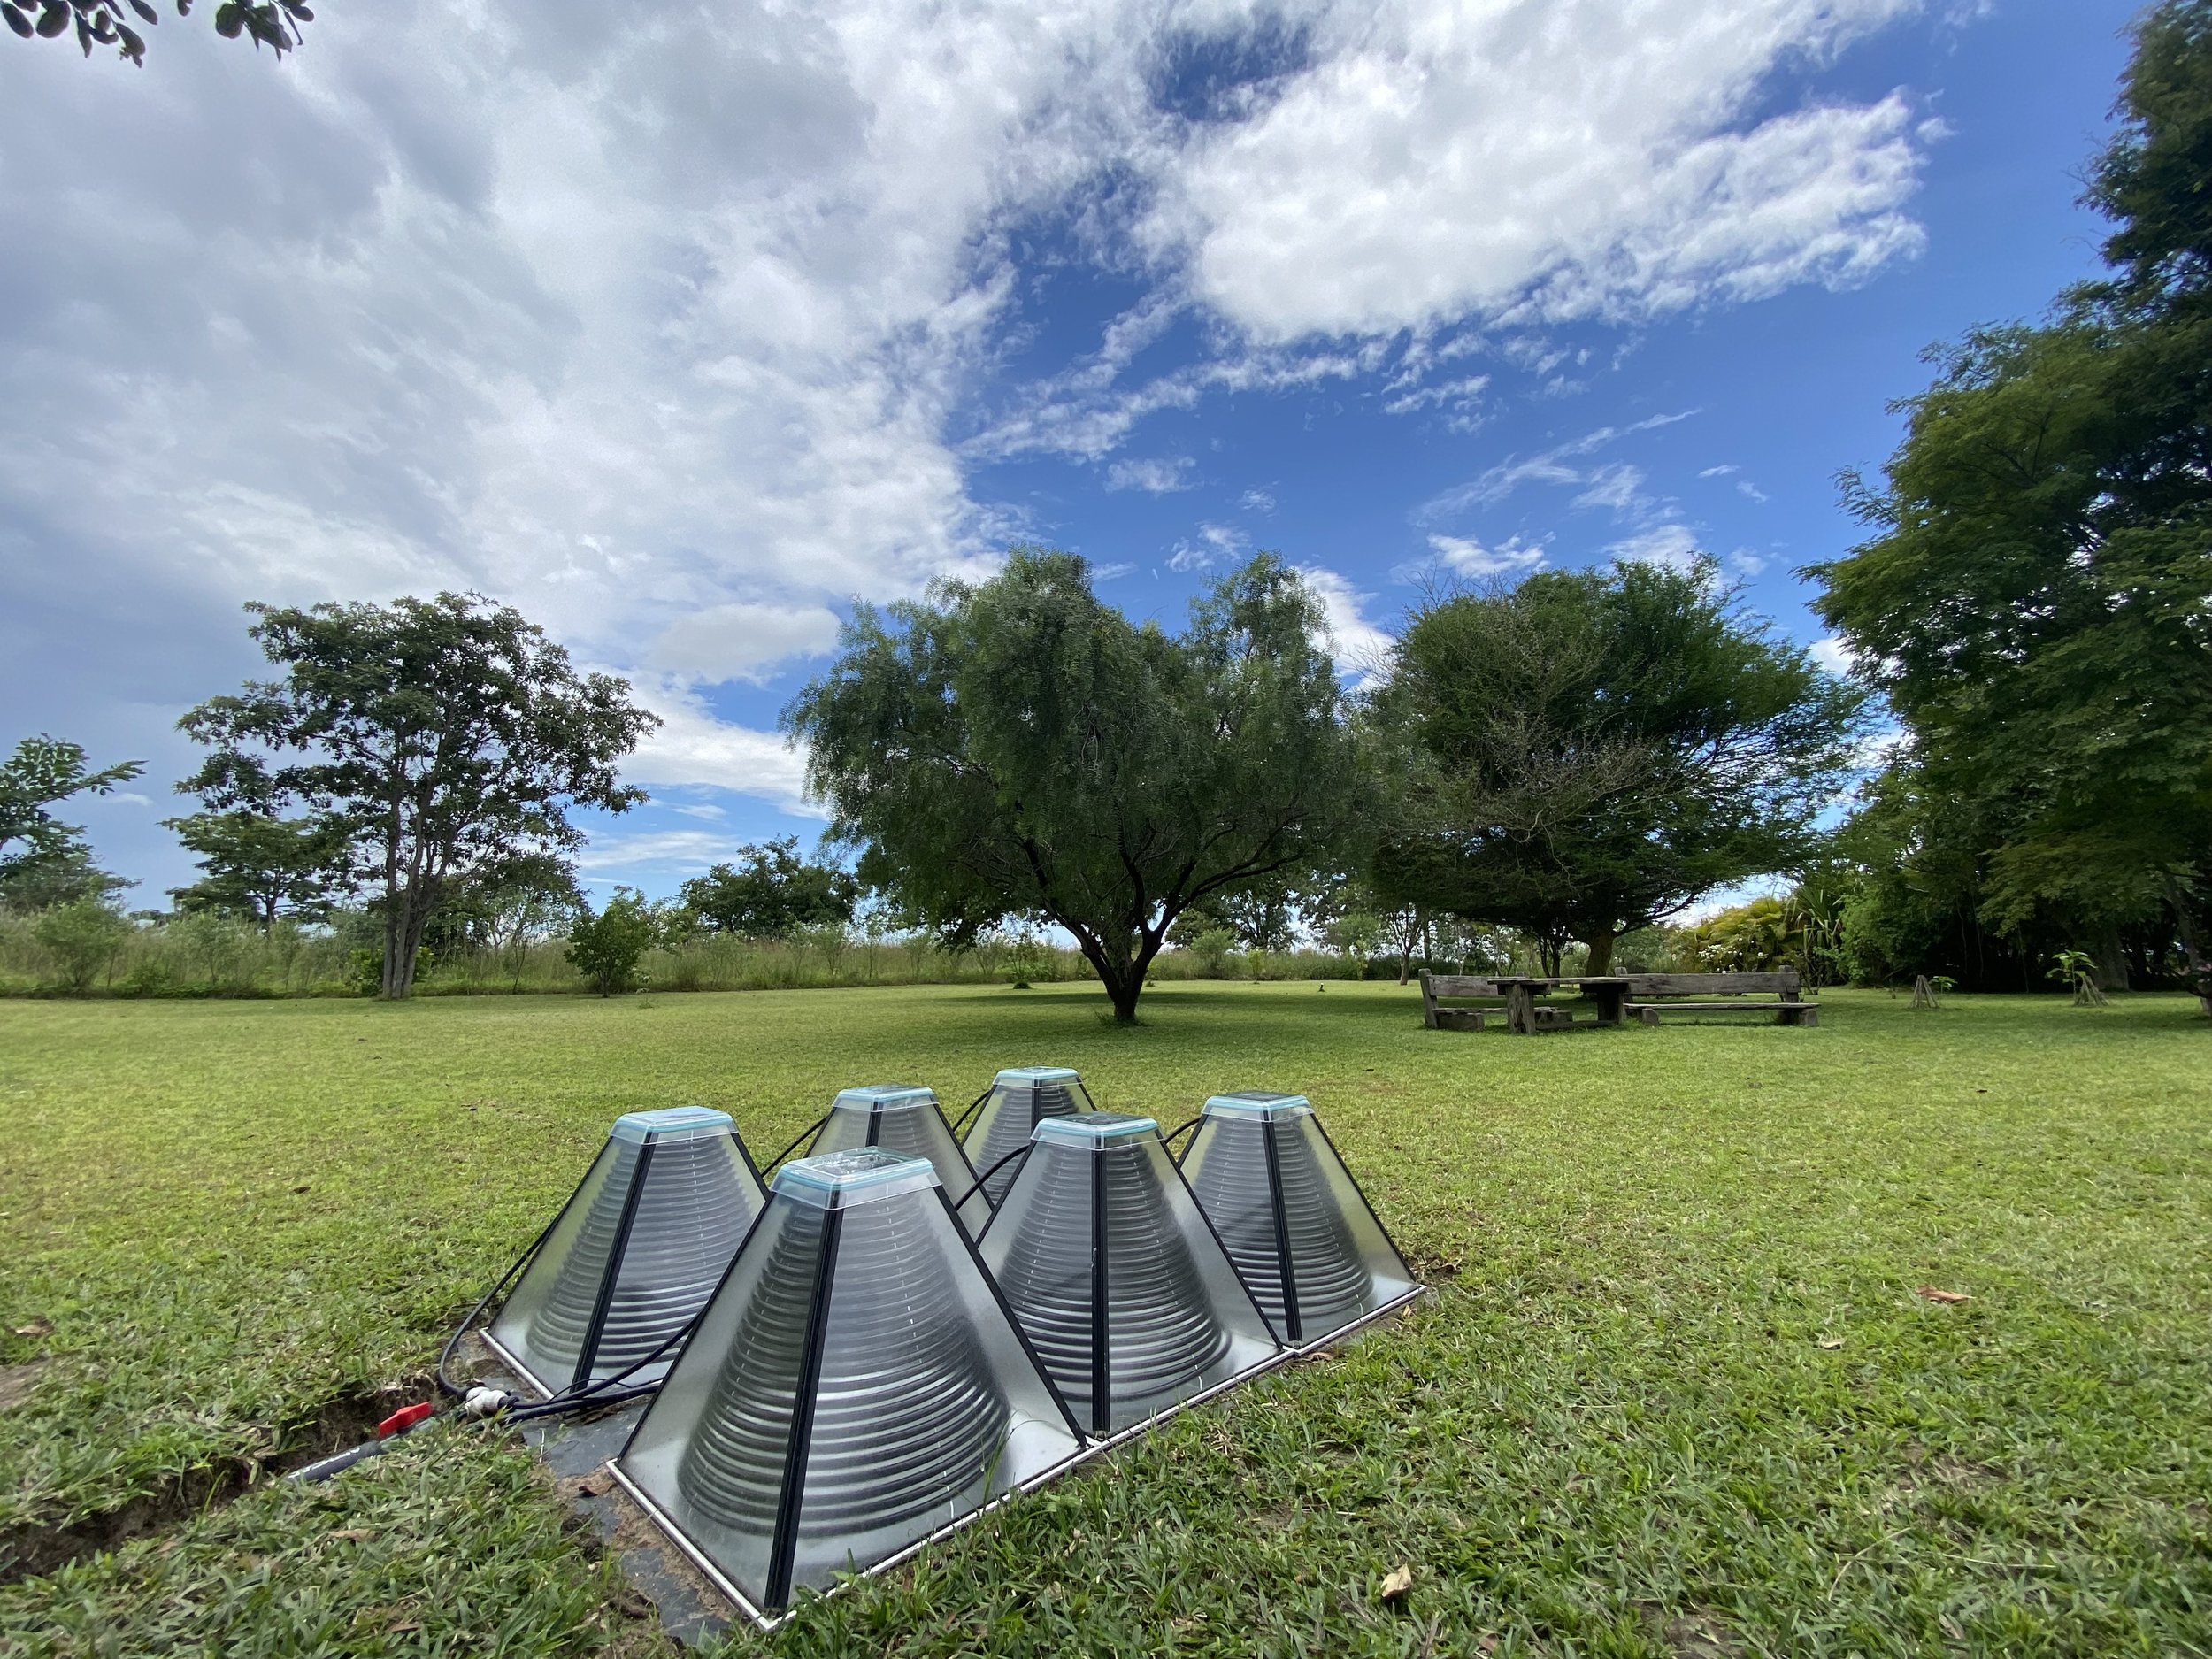
I connected 6 SolarisKit Solar Thermal Collectors to the 210L drum. This worked out that each collector would have to heat 35L of water, for the Zambian climate this was ideal and manageable.
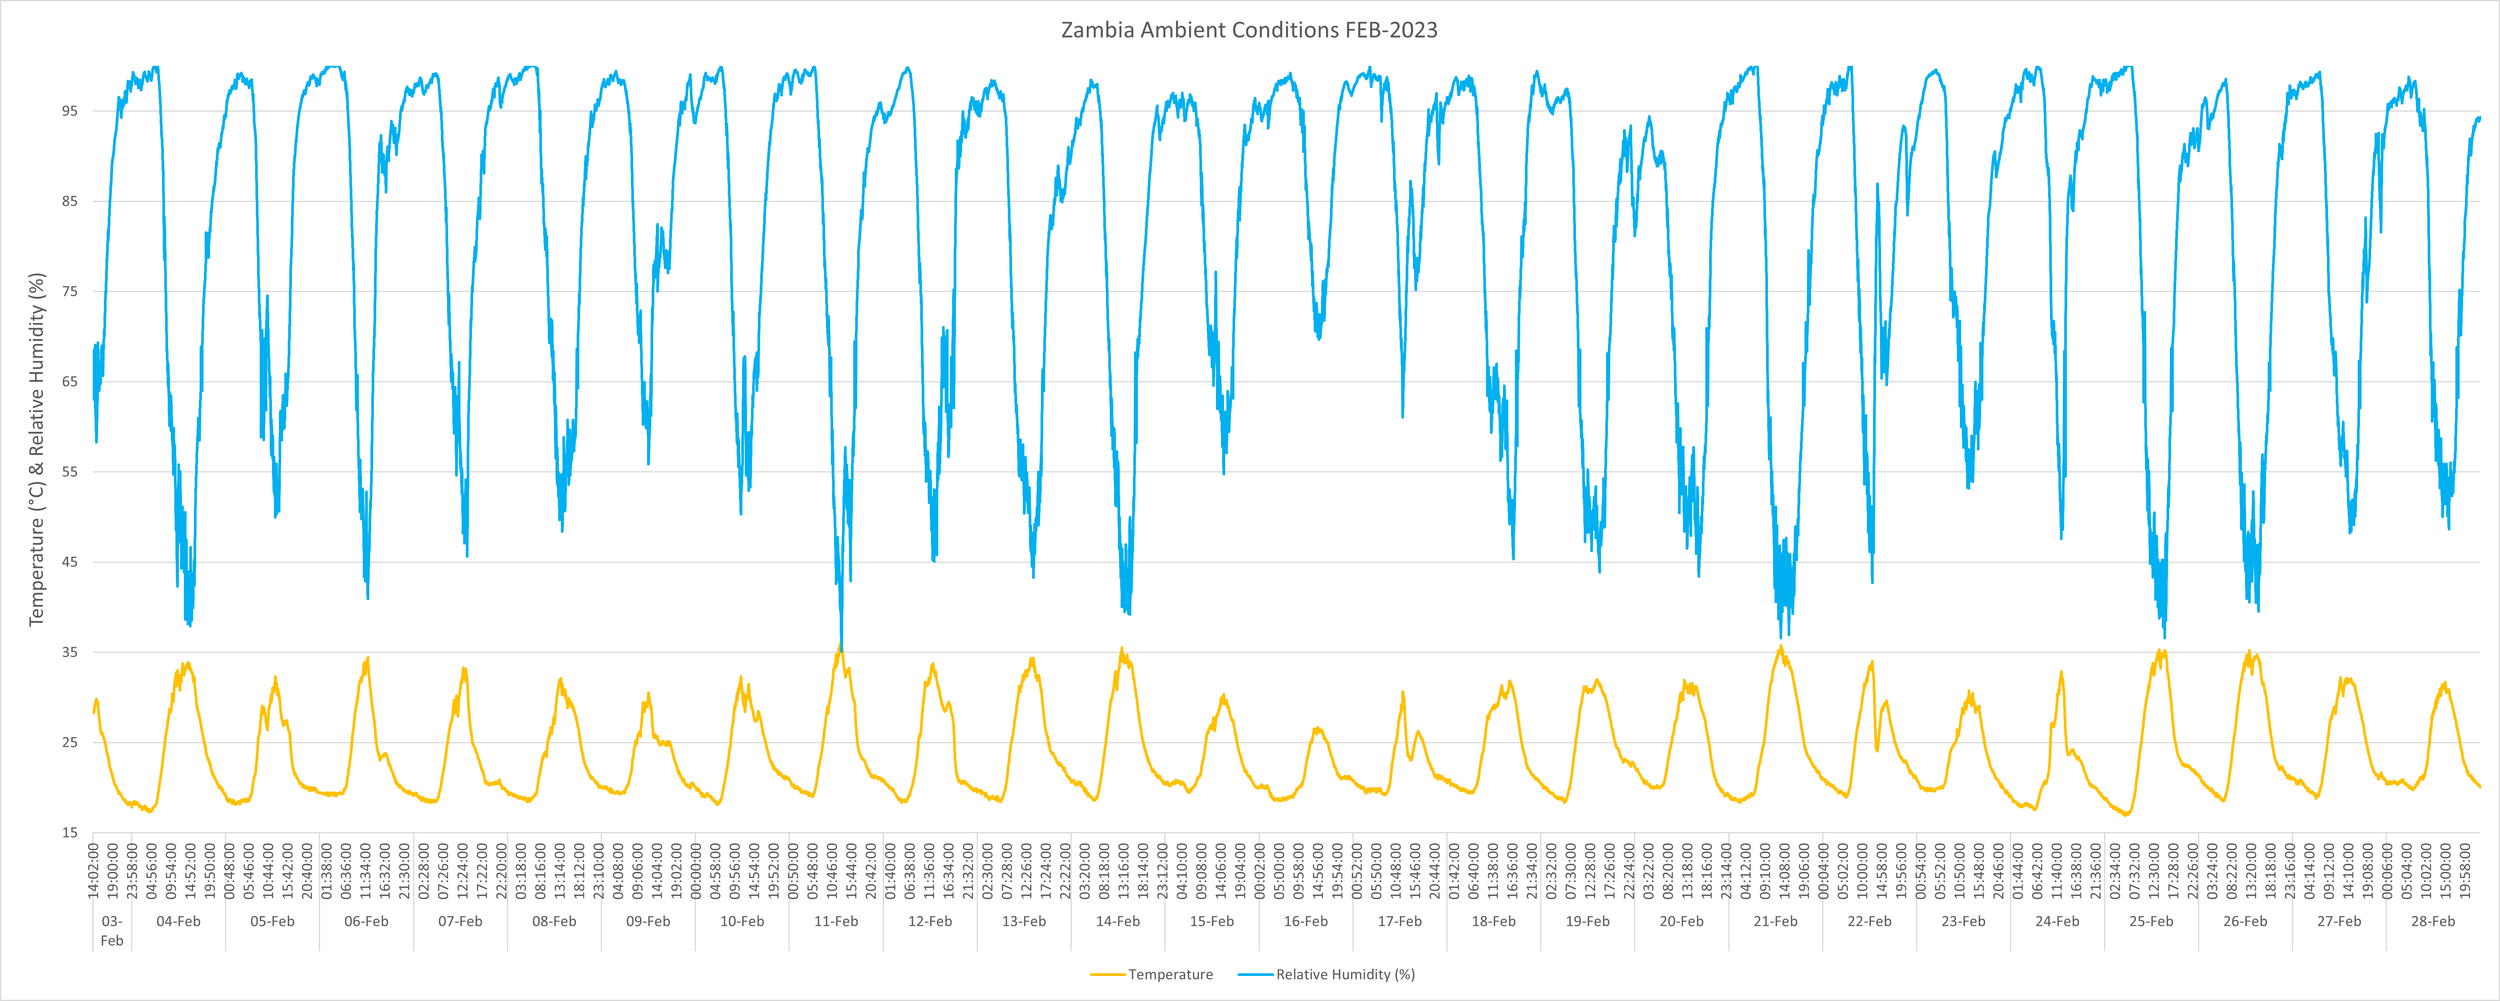
Below are two graphs showing data for the month of February 2023.
First graph showing ambient temperature and relative humidity (Yellow & Light-Blue)
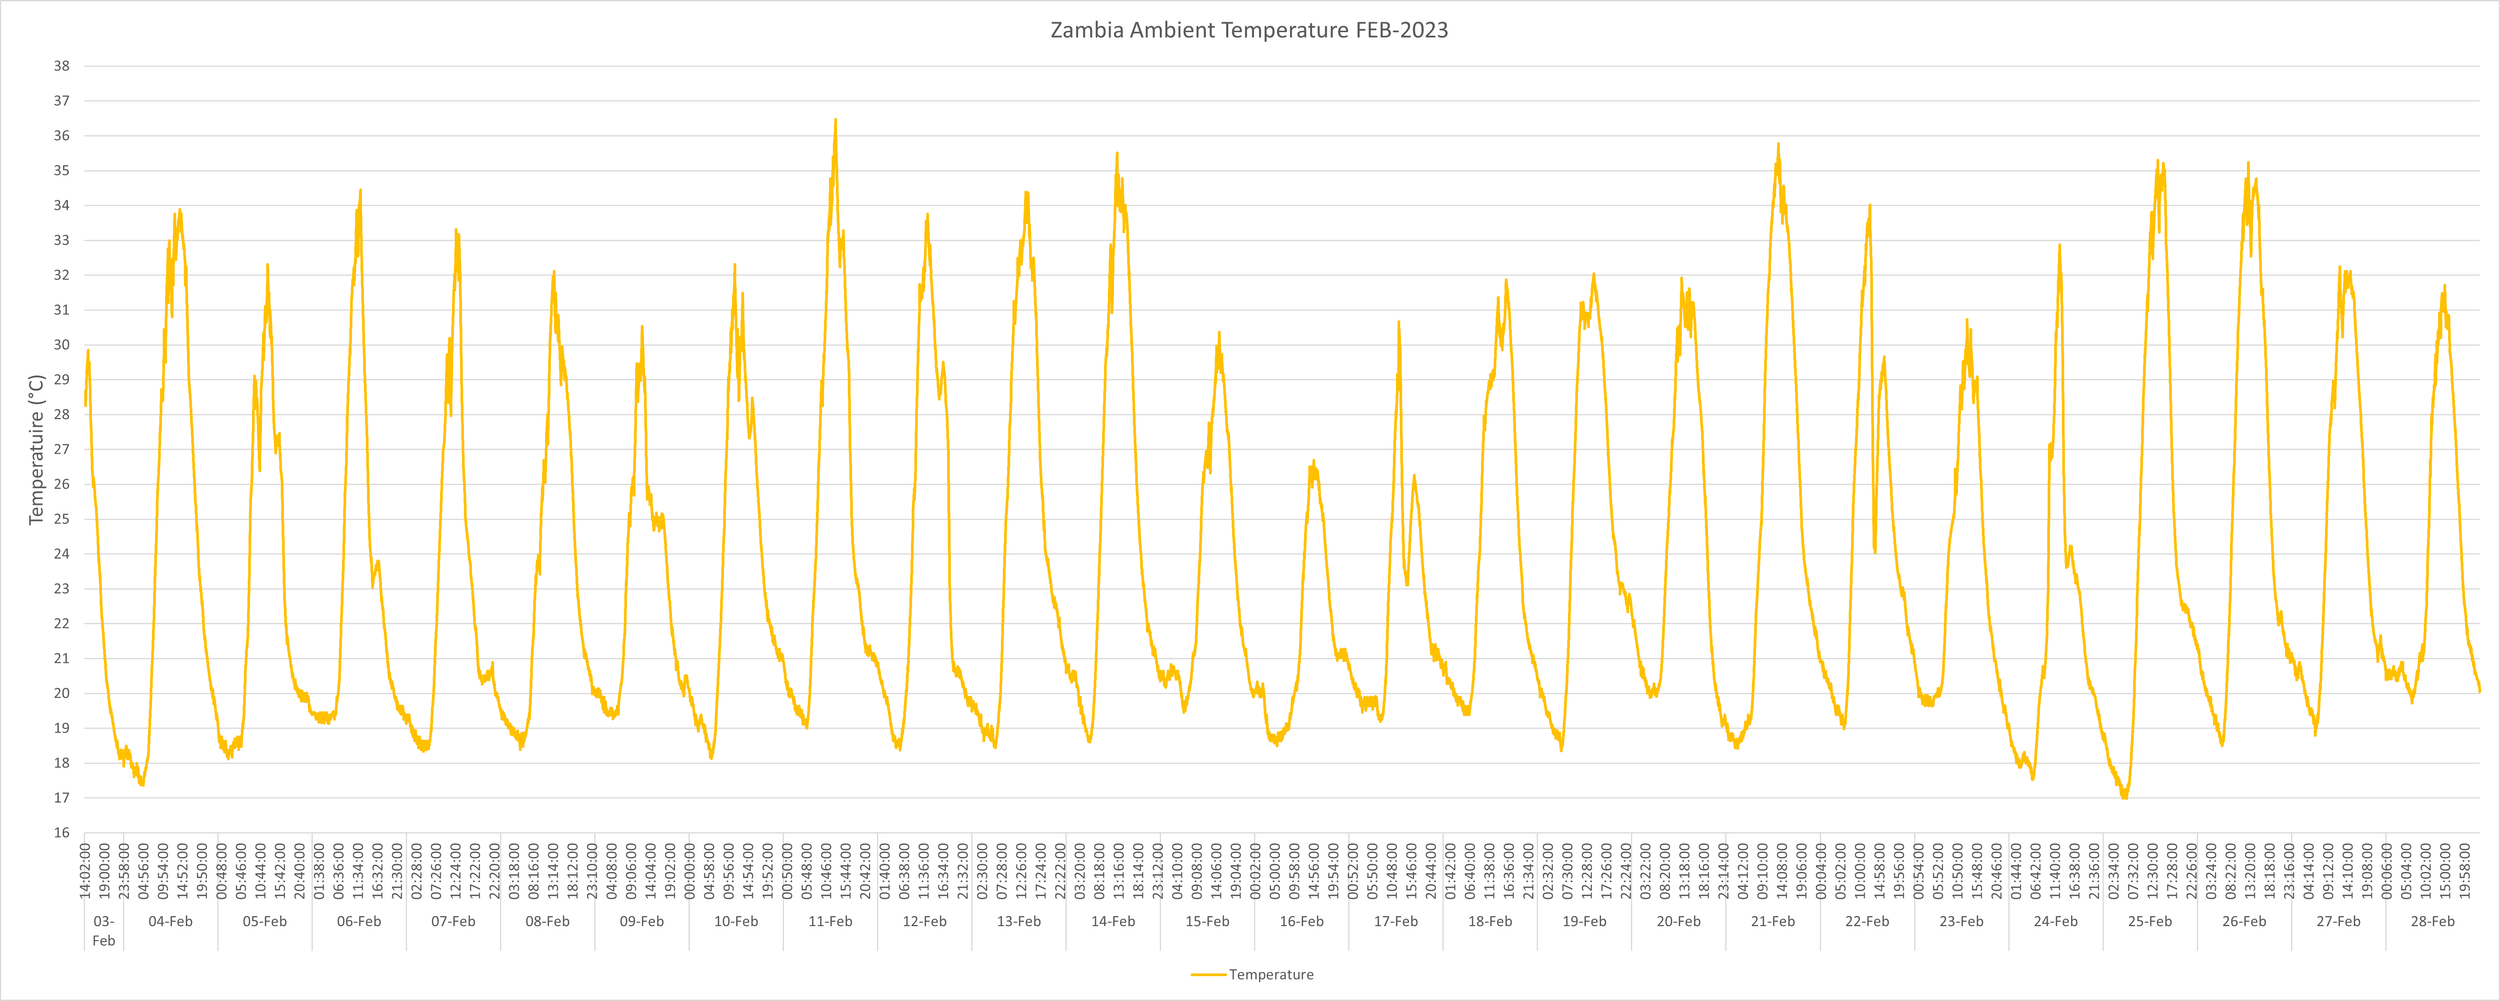
Second graph showing the ambient temperatures experienced (Yellow):
Ranging between 17°C and 37°C.
With an average temperature drop of 15°C over night compared to daytime temperatures
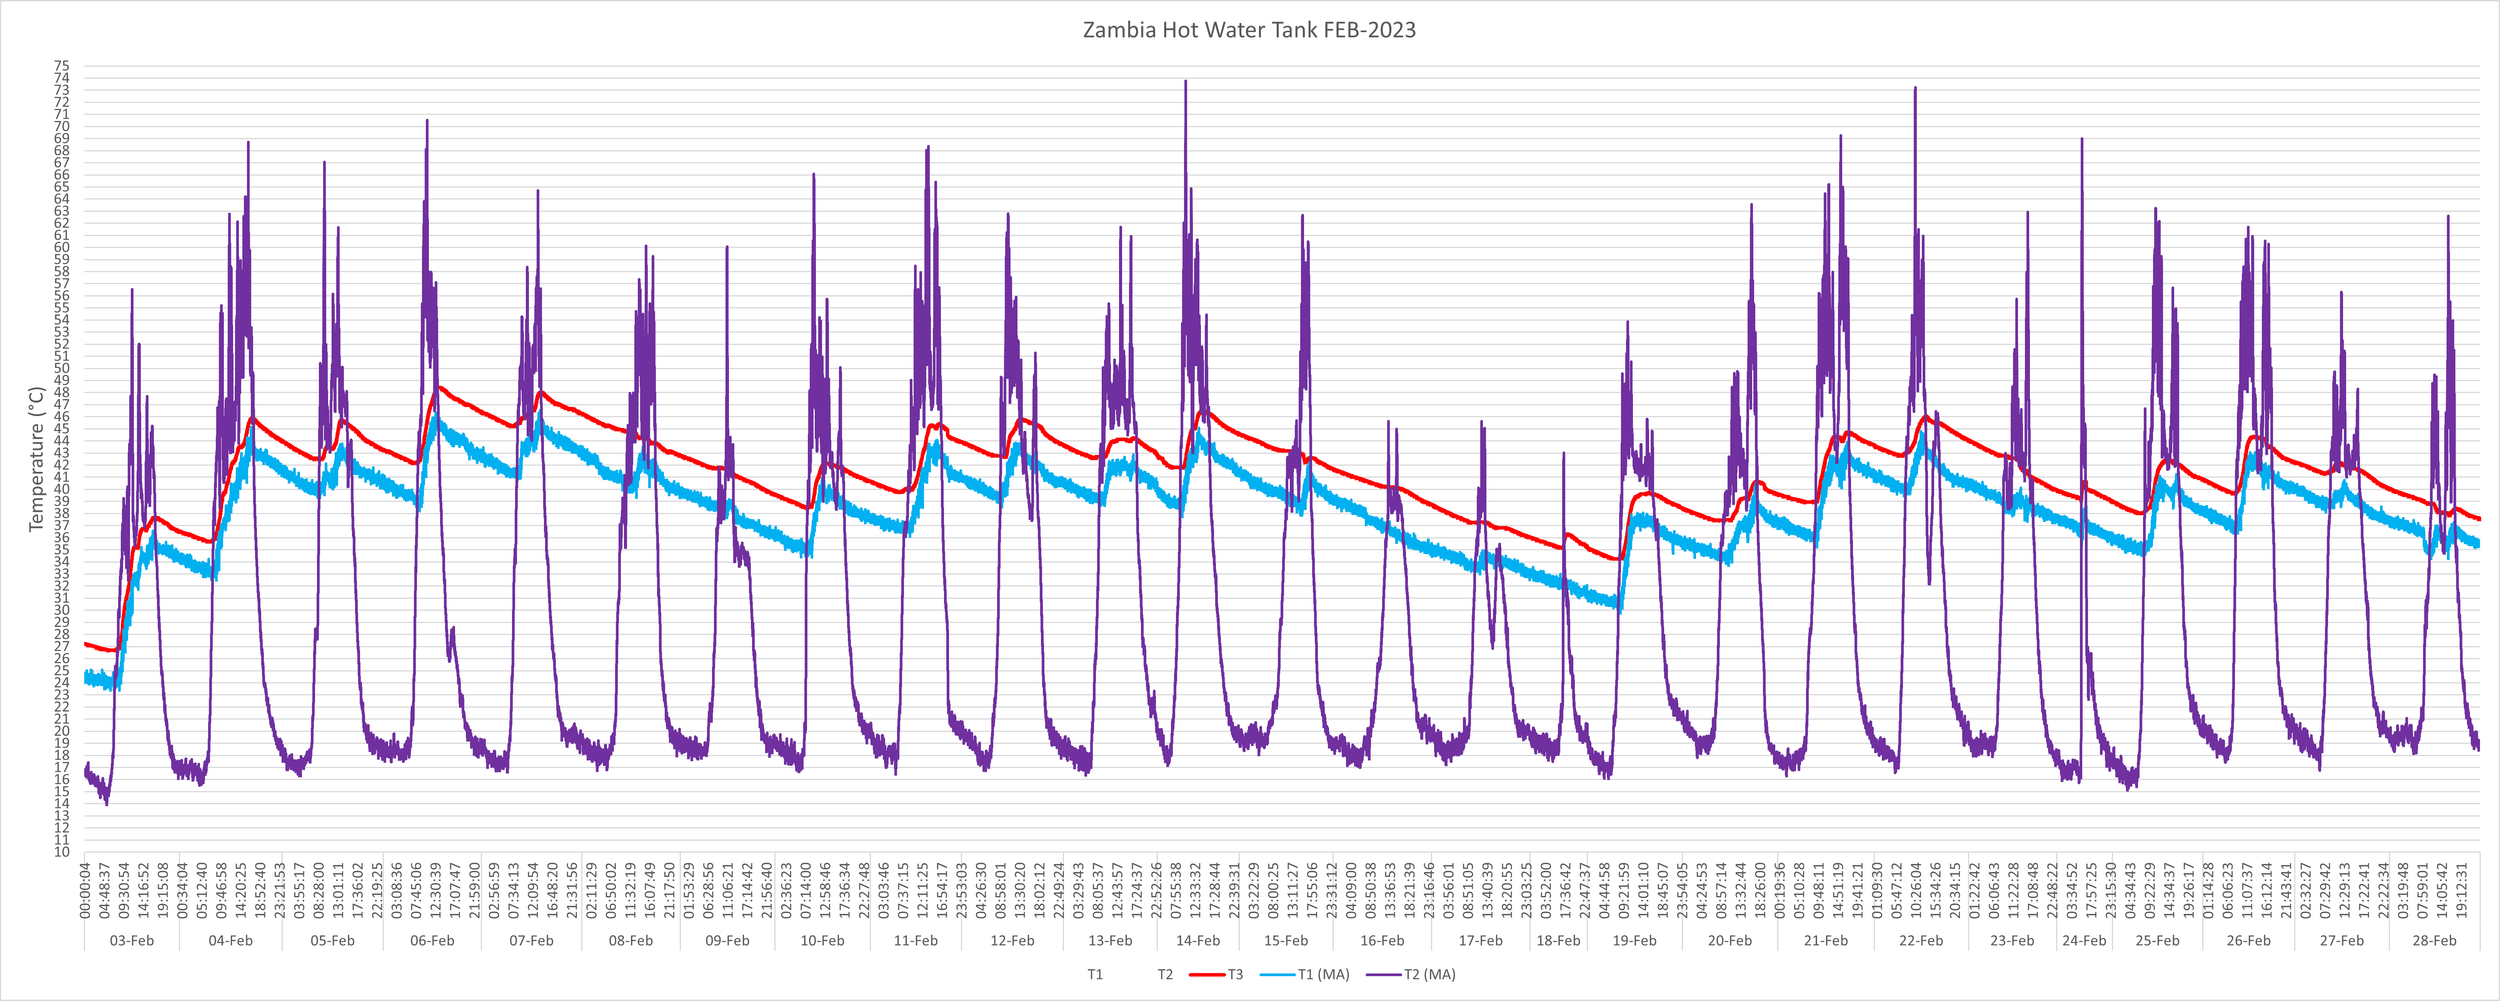
Third graph showing:
T1 - Middle to Bottom tank temperature. As it is located between Solar flow and return fluctuation is expected. (Light-Blue)
T2 - Collector Pipe Temperature, Cooling to nearly 15°C each night (Purple)
T3 - Top tank temperature, as the heat in the water has stratified a steady temperature is experienced at the top of the tank. (Red)
Daytime tank temperatures range between 40 & 50°C with overnight heat loss averaged at 4°C per night, which was then recovered the following morning. Between the 15th & 19th February there was a slight decrease in ambient temperatures as there were rain showers throughout this period, therefore the tank temperature slowly decreased as seen. The ambient temperatures and collector temperatures are linearly proportional.